Sewing Tip | Stabilizing Knit Shoulder Seams
Using a lightweight knit and having a hard time keeping the shoulder seams from growing? This installment of our sewing tips series will help as we cover two ways to stabilize the shoulder seams on projects that use lightweight knits. Let’s get started!

Patterns Pictured | Tess, Pony, Max, and Waterfall
OPTION ONE: INTERFACING
This method leaves a bit of stretch to the seam but adds stability.
WHAT YOU’LL NEED
- Cut bodice pieces in a knit sewing pattern like the Tess, Waterfall, Pixie, Max, or Pony.
- Tricot Interfacing
- Pins
- A sewing machine
- Iron
Cut pattern pieces then, cut 4 pieces of tricot interfacing that are ½” high and the width of the shoulders of the garment (or ⅛” taller than the seam allowance of the pattern). Fuse interfacing to the wrong side of each shoulder of your cut pattern.

Pin front and back bodices right sides together at the shoulder.

Sew seams according to pattern instructions.

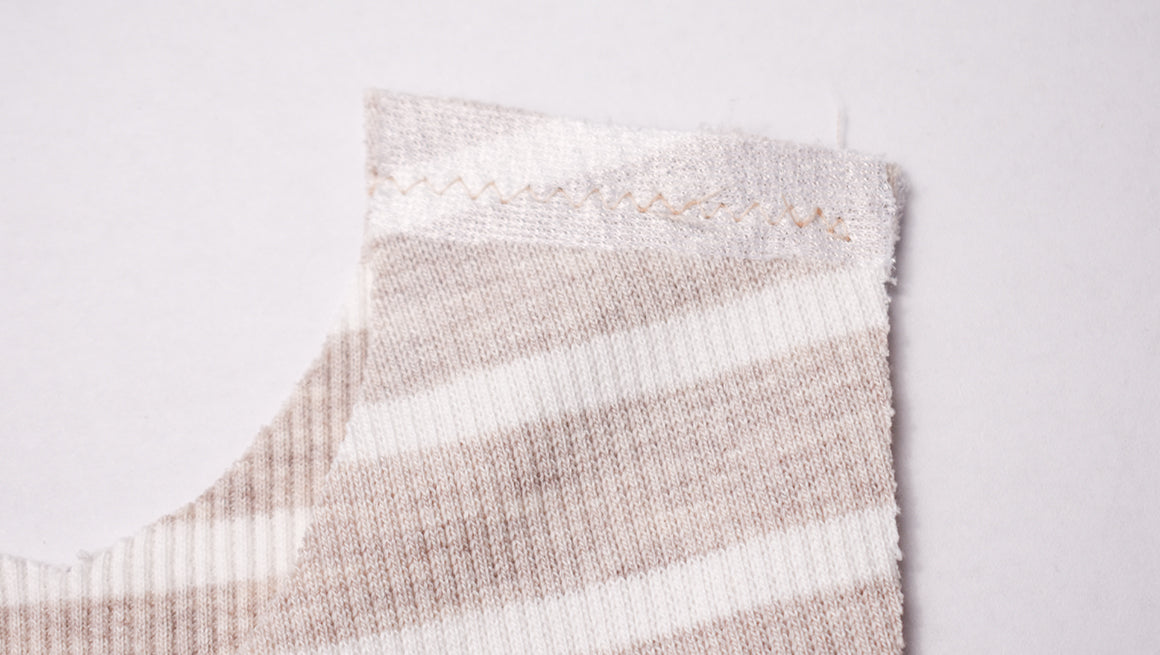
That’s it! The tricot interfacing will provide stability while maintaining a little bit of give and stretch.
OPTION TWO: SELVAGE SCRAPS
Use this method to fully stabilize the seam with zero stretch.
WHAT YOU’LL NEED
- Cut bodice pieces in a knit sewing pattern like the Tess, Waterfall, Pixie, Max, or Pony.
- Scraps of selvage from a lightweight woven fabric
- Pins
- A sewing machine
- Iron
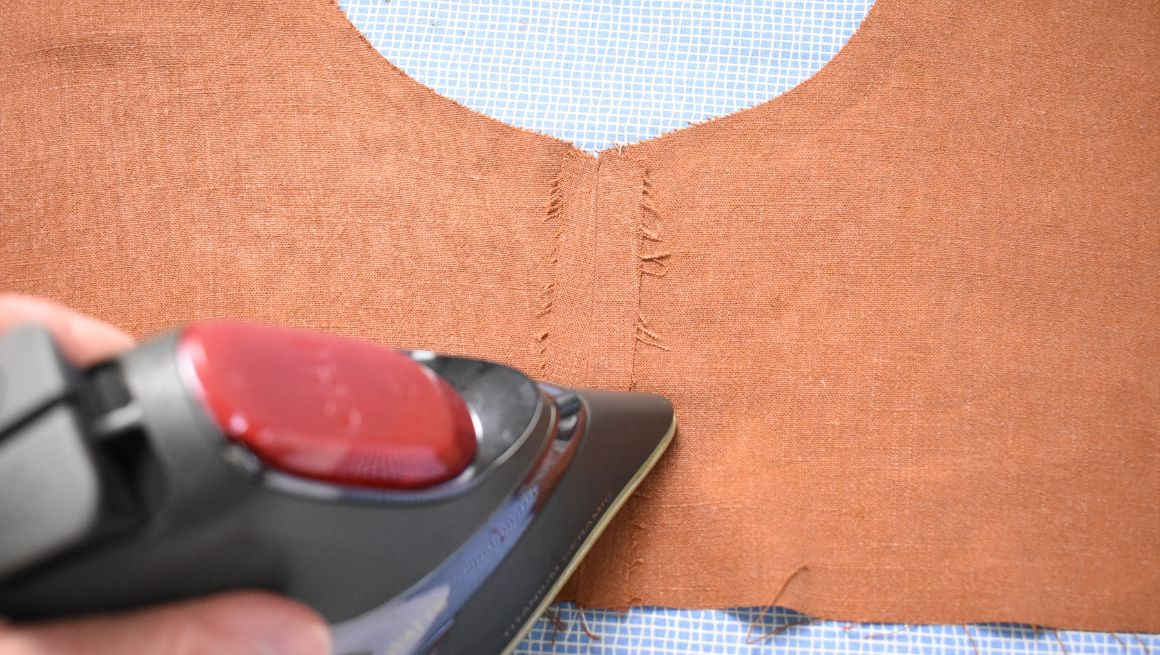
Cut your pattern pieces. On the back bodice, pin a piece of lightweight woven fabric selvage to the shoulder area.

Baste the selvage to the bodice, trimming any excess as needed.

Pin front and back bodices right sides together at the shoulder.

Sew shoulder seams according to pattern instructions.

Your finished! Now the shoulder seam is stabilized and won’t stretch at all.
Find more sewing tips and tutorials under our Sewing Tips section here, Check out our Sew Alongs here, and shop our full sewing pattern library here.
