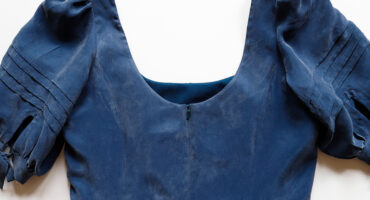
SEW TIER 1 TO THE BODICE With the right sides together, sew the tier 1 skirt to the right side of the bodice main. Finish the seam and press towards the bodice. TURN RIGHT SIDE OUT Turn the bodice right side out and remove any visible basting stitches. Prepare to attach the second and third