Pixie Tee Sew Along | Sew Long Sleeves & Side Seams Views B & C

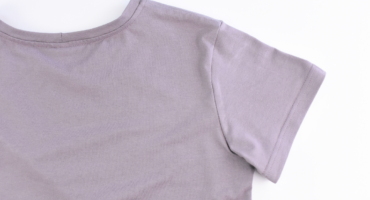
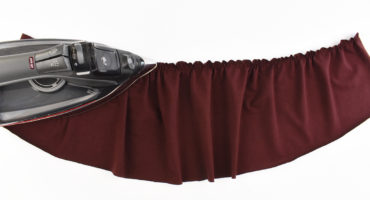
We are continuing with attaching the sleeves to our front and back bodices. In this post, we’ll demonstrate how to sew the long sleeves and side seams for Views B & C. SEW SLEEVES TO ARMHOLE With the right sides together, pin the sleeve to the armhole flat, matching the notches, and sew the sleeves.

Read more

Pixie Tee Sew Along | Sew Short Sleeves & Side Seams View A

We are ready to attach the sleeves to our front and back bodices. In this post, we’ll demonstrate how to sew and hem the short sleeves and side seams for View A. If you’re sewing long sleeves, adding hem bands, or a regular hem skip ahead to the next post. SEW SLEEVES TO ARMHOLE &

Read more

Pixie Tee Sew Along | Getting Started

Welcome to the Pixie Tee Sew Along! Over the next four posts we will be showing you how to sew this oversized tee. We will be sewing View A with the hem ties, but also demonstrating how to attach the sleeve cuffs and hem bands. The steps are the same for the top and dress

Read more

Waterfall Raglan Sew Along | Attach Neckband & Hem Ruffle

The last steps on our Waterfall Raglans are to attach the neckband and hem the ruffles. Let’s finish our new tops and dresses! SEW NECKBAND With the right sides together, sew the neckband at the short end. Press the seam open. Fold the neckband in half with the wrong sides together and press. FIND NECKLINE

Read more

Waterfall Raglan Sew Along | Sew Sleeves & Side Seams

We are ready to attach the sleeves to our front and back bodices. Once we do this we’ll sew the side seams and see our raglans take shape. SEW SLEEVES TO FRONT BODICE With the right sides together, pin the sleeves to the front bodice, matching notches, 1 notch for the front. Sew the front

Read more

Waterfall Raglan Sew Along | Gathering & Attaching Ruffle

Before you begin to sew, we recommend that you read over all of the instructions and make sure you are familiar with the seam allowances and markings. Our first step is to assemble the fronts and backs of the raglan by attaching the ruffles. This does not apply to View A, so if you are

Read more