
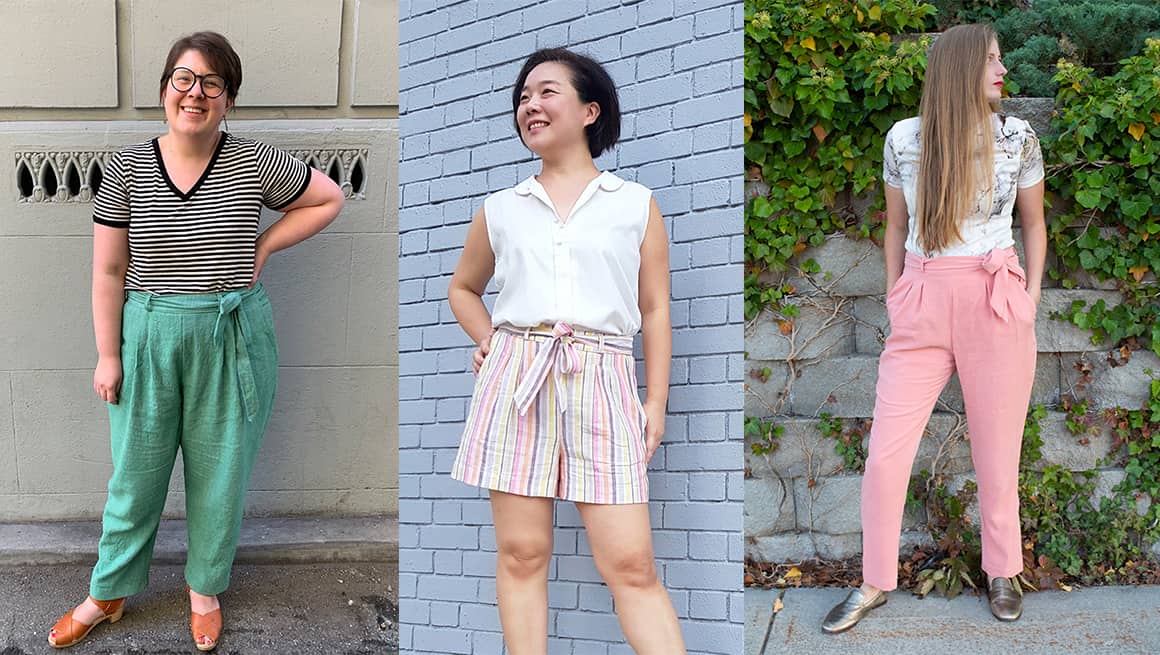
Crew Fitting & Custom Adjustments
I've started writing more extensive fitting and custom adjustment posts this year, and I hope that you find them helpful. Today I have a post all about the Crew Shorts & Trousers. I have a Pinterest board for each of my patterns, and for the Crew I added a section for pant fitting resources that I found helpful when analyzing fit issues.

Fabric || Sulb Linen Blend in Rose from Style Maker Fabrics
It's totally normal for most people to need some sort of custom adjustment, and for pants it is common to need more than one adjustment. This post walks you through some of the more common ones I've seen pop up while testing the Crew Shorts & Trousers.

Fabric || Burgundy Tencel Twill from Style Makers Fabric
I also always like to add a note that the goal should be to create a comfortable garment that you will enjoy wearing. I don't think it's important to get rid of every single dragline and pull, so be kind to yourself as you are analyzing your fit. If you have specific questions, you can always reach out to our Chalk and Notch Facebook Group or email us here.

Fabric || Rayon Chambray from La Mercerie
First things first, make sure you have a copy of the Crew Pattern!

HOW TO PICK A SIZE
First, make sure you take new measurements before starting any project because our bodies change, and starting with accurate numbers is the first step to getting a good fit. For this pattern, you want your waist (the narrowest part or where you want your trousers to finish), hips (widest part), thigh (2" down from the top of your leg), front rise (front waist to the middle of your crotch), back rise (back waist to the middle of your crotch), and inseam (crotch to knee & knee to ankle) body measurements.
Body Measurements
It is very common to fall across a few different sizes. Take into consideration your waist and hips measurement when deciding what size to make. If you fall across a few sizes, print them all and I will show you a few options on how to blend them below.

Garment Measurements
Use the garment measurement chart to review the intended amount of ease included in the pattern. This style is designed to have 0.5” (1.2 cm) of ease through the waist and 7.5” (19 cm) of ease through the hips. It is recommended to have 4” (10 cm) of ease through the shorts thigh, and 3” (7.5 cm) of ease through the trouser thigh. You may blend sizes based on your ease and fit preference.

MAKING A MUSLIN
I will always advise you to make a muslin or toile (test garment) before cutting into your final fashion fabric. You can muslin your Crew trousers by cutting the pattern mid-thigh so that you can save on fabric. If you plan on making the pants, do not use the shorts as a muslin since it has a different rise and thigh.
Fabric will affect fit, and you won't get a feel for the real fit unless you sew it in a comparable fabric.
CUSTOM ADJUSTMENTS
For reference, Chalk and Notch patterns are designed for a height of around 5'7" (174 cm). The fit models are all over 5'7" (174 cm), but all of the Chalk and Notch patterns are tested on a range of heights.
ADJUSTING THE RISE
After reviewing the garment measurements, the length of your rise may need to be adjusted. I have found that rise length does not correlate to height. Your rise length takes into account your tummy, bum, and thighs. Take your body measurements by measuring from the center of your crotch to your natural waist on both the front and back. Use these measurements and compare them to the finished garment measurements. You will want the garment to be longer than your body to accommodate a relaxed fit. The rise ease is a bit of personal preference, but I would advise that you want the garment to be around 1/2" - 3/4" longer than your body rise.
- Example 1: Reducing or adding the same amount to the rise, front and back.
Cut the front and back pattern pieces horizontally at the indicated line. If adding length, add paper and add the amount desired. If shortening, overlap at the cut line the amount desired. Use the original crotch curve when retracing the crotch and connecting the side seams. Remember to move the side seam notch up or down the same amount so the pocket notch will still match at the side seam.


- Example 2: Adding to the back and sides but leaving the center front rise length.
Cut the front and back pattern pieces horizontally at the indicated line. Add the desired length at the back and sides while pivoting at the center front. Use the original crotch curve when retracing the crotch and connecting the side seams. You can see that you remove width at the center front when retracing the front crotch curve. Add back the same amount lost to the pocket angle. Remember to move the side seam notch up or down the same amount so the pocket notch will still match at the side seam.

- Example 3: Removing length at the Front Rise only.
Cut the front pattern piece horizontally at the indicated line. Overlap at the cut line the amount desired. Use the original crotch curve when retracing the crotch and connecting the side seams. The side seam length does not move, so you can leave the pocket notch placement.

- Example 4: Sway Back
If you have bunching at the top of your center back, you may need to reduce the center back length for a sway back adjustment.

- Example 5: Reduce your front rise after the Crew is sewn.
I know a little bit about this adjustment as I've had to adjust samples after I have sewn them. This can happen when your final fabric is different from your sample garment. Remove your waistband and trim off the desired amount from the waist (this adjustment can be made to the front or back). Make sure to lower your pleats/darts if needed. Then reattach the waistband.
 LENGTHEN/SHORTEN TROUSER LENGTH
The Crew Trousers have a 27 1/2” (70 cm) inseam and are intended to finish at ankle length. There is a notch on the pattern indicating the knee placement. Measure your body against the pattern to see where you need to add or reduce length. If adjusting the length on the shorts, you can make the adjustment at the hem. To adjust the trouser length:
- Example 1: Adding inseam length
Cut the front and back pattern pieces horizontally at the indicated line/s. Add paper and add the amount desired. Re-draw the side seams and inseams.

- Example 2: Removing inseam length
Cut the front and back pattern pieces horizontally at the indicated line/s. Overlap at the cut line the amount desired. Re-draw the side seams and inseams. You can see that you will need to even out the curve on the hips the more when you shorten the length between the crotch and knee.

WHEN YOUR WAIST AND HIPS ARE DIFFERENT SIZES
You can blend sizes a few ways. You can print both sizes and blend between the two or print one of the sizes and make adjustments to that pattern. Both of these techniques are correct so it's a personal preference. See examples below for both options.
BLENDING SIZES BY PRINTING TWO SIZES
If your waist and hips are a different size, you can start with your waist and blend to your hips. Or you may want to reduce the hips for less ease as personal preference. This option is better if you are blending between more than 2 sizes.
- Example: Blending from a larger waist to a smaller hip.
Print both sizes and use a hip curve ruler to blend the hips. Make sure to adjust the pocket pieces as well.

BLENDING BY PRINTING ONE SIZE AND ADJUSTING AT THE WAIST
If your waist and hips are a different size, you can start with your hips and adjust your waist. This option works best when blending between 1 or 2 sizes.
- Example: Blending from a larger size in the waist to a smaller hip.
Print the smaller size that matches your hips. There are four back darts and four front pleats, and these can all be adjusted to reduce or increase the waist up to 2″. If your hips and thighs are 1 or 2 sizes smaller than your waist, you can adjust the darts & pleats to gain more ease in the waist.
The back darts are easy to eliminate. Each dart is 1/2″ so you can gain a full inch when removing them completely.
I suggest reducing the front pleats by no more than 1/4″ for 1″ pleats instead of 1 1/4″ pleats. If you reduce all four front pleats to 1″, you will gain a full inch in the front.
Make the necessary adjustments to the waistband and waistband facing pattern pieces.

- Example: Blending from a larger size in the hips to a smaller waist.
Print the larger size that matches your hips. Make the back darts bigger or front pleats bigger to make the waist smaller.
Make the necessary adjustments to the waistband and waistband facing pattern pieces.

BLENDING SIZES AT THE THIGH
There is a thigh measurement on the body measurement chart. You can measure your leg 2″ from the top to check against the size chart. If you need to adjust your thigh measurement, you can add or reduce the curve near the thigh. As you can see in the examples below, this adjustment also affects the rise length. Double check your rise measurements to make sure they are still the correct length for your body.
Example 1: Reducing at the thigh

Example 2: Adding at the thigh

SCOOPING THE FRONT OR BACK RISE
During testing, we found that when blending sizes, there can often be extra fabric in the front or back rise. You can scoop the curve of your rise to reduce the extra fabric in the rise.

I hope this post helps explain how and when to do custom adjustments for the Crew Pattern. It's totally worth the time to make a muslin, make any adjustments and update your printed pattern. Remember to write down some notes for yourself so that when you come back to the pattern, you know what adjustments you have made.
XO, Gabriela