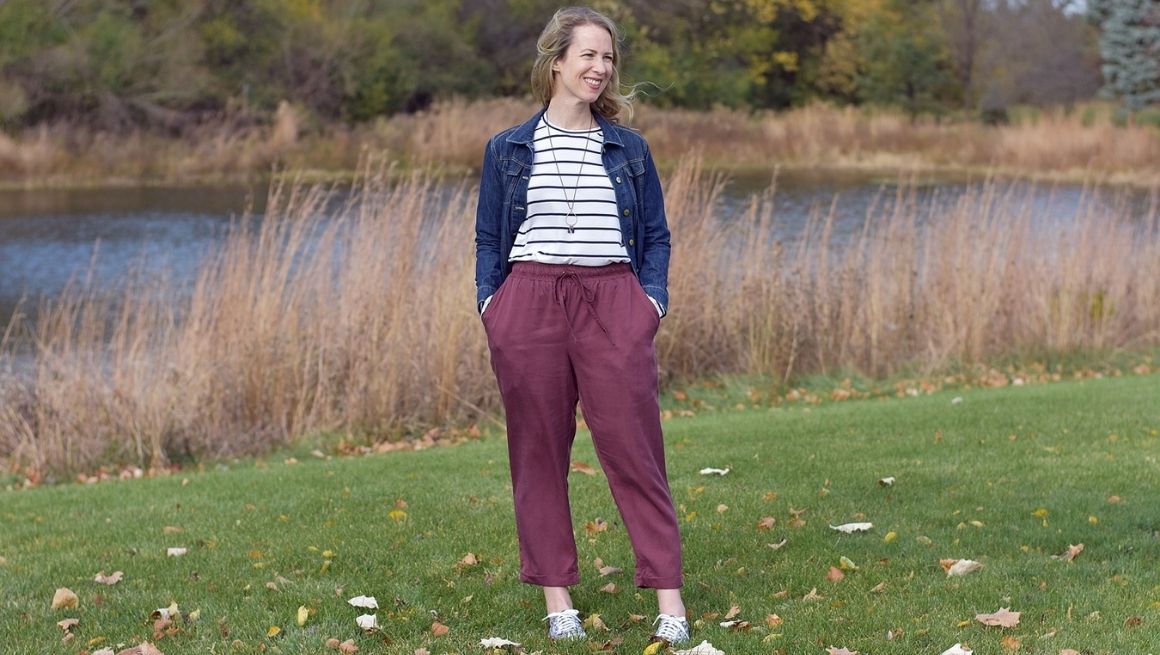
Hi, I’m Teri (@teridodds1) and I’m so happy to be part of the C & N Blogger team! I’m sharing my tutorial for how to change the Crew Trousers pattern into a pair of elastic-waist, cuffed pants. Since I’ve been spending so much time at home this year, I find myself only reaching for my most comfortable clothes. These modified Crew Trousers are the perfect match of style and comfort!

INSPIRATION
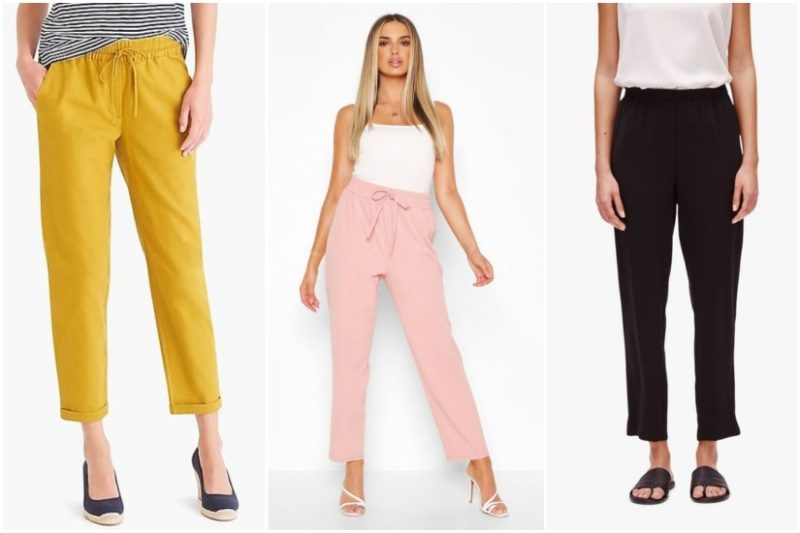
I was inspired to modify the Crew Trousers after I first saw these bright yellow, pull-on pants on Pinterest. These pants are a great wardrobe staple. They can be worn casually with a t-shirt and gym shoes or dressed up with wedges or heels and a tank. Here is some ready to wear inspiration.
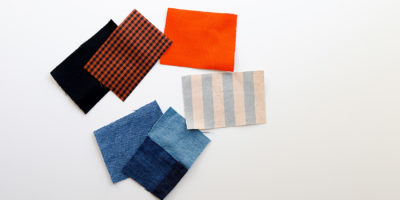
FABRIC
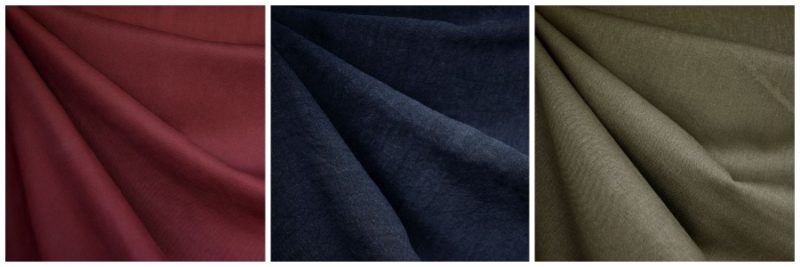
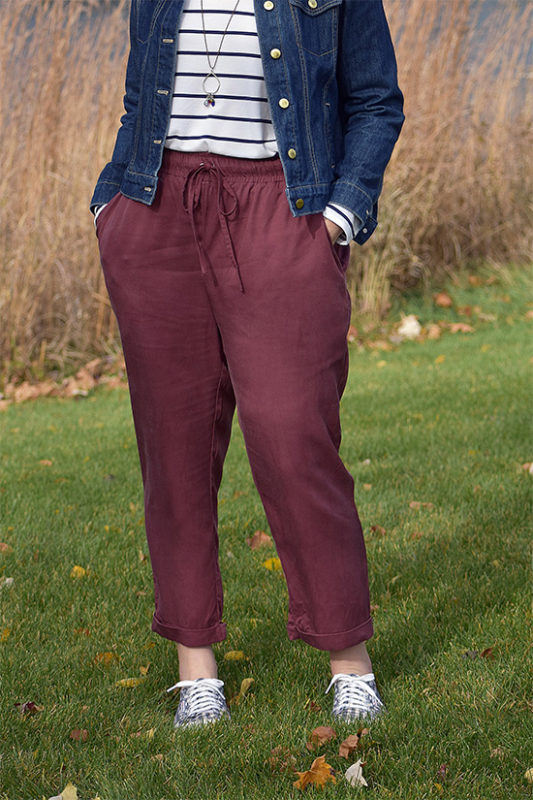
I made my elastic waist Crew Trousers with this gorgeous Tencel Twill Solid Bottom Weight fabric from Style Maker Fabrics. I chose the color burgundy, which I thought was perfect for Fall and Winter. I love the heavy drape of this fabric! I ordered 2.5 yards, which is what was recommended in the pattern. Linen or a linen/rayon blend would also be perfect for these pants.
WHAT YOU WILL NEED:
- The front and back trousers, pocket bag upper and under, pocket facing, and pocket fusible pattern pieces from the Crew Trousers.
- Ruler
- Curved ruler (helpful but not necessary)
- Pencil
- Pattern Weights
- Paper-cutting scissors
- Extra Paper
- Tape
- Chalk or another marking tool
- 2” elastic
- Drawstring and eyelets (optional)
PATTERN ADJUSTMENTS
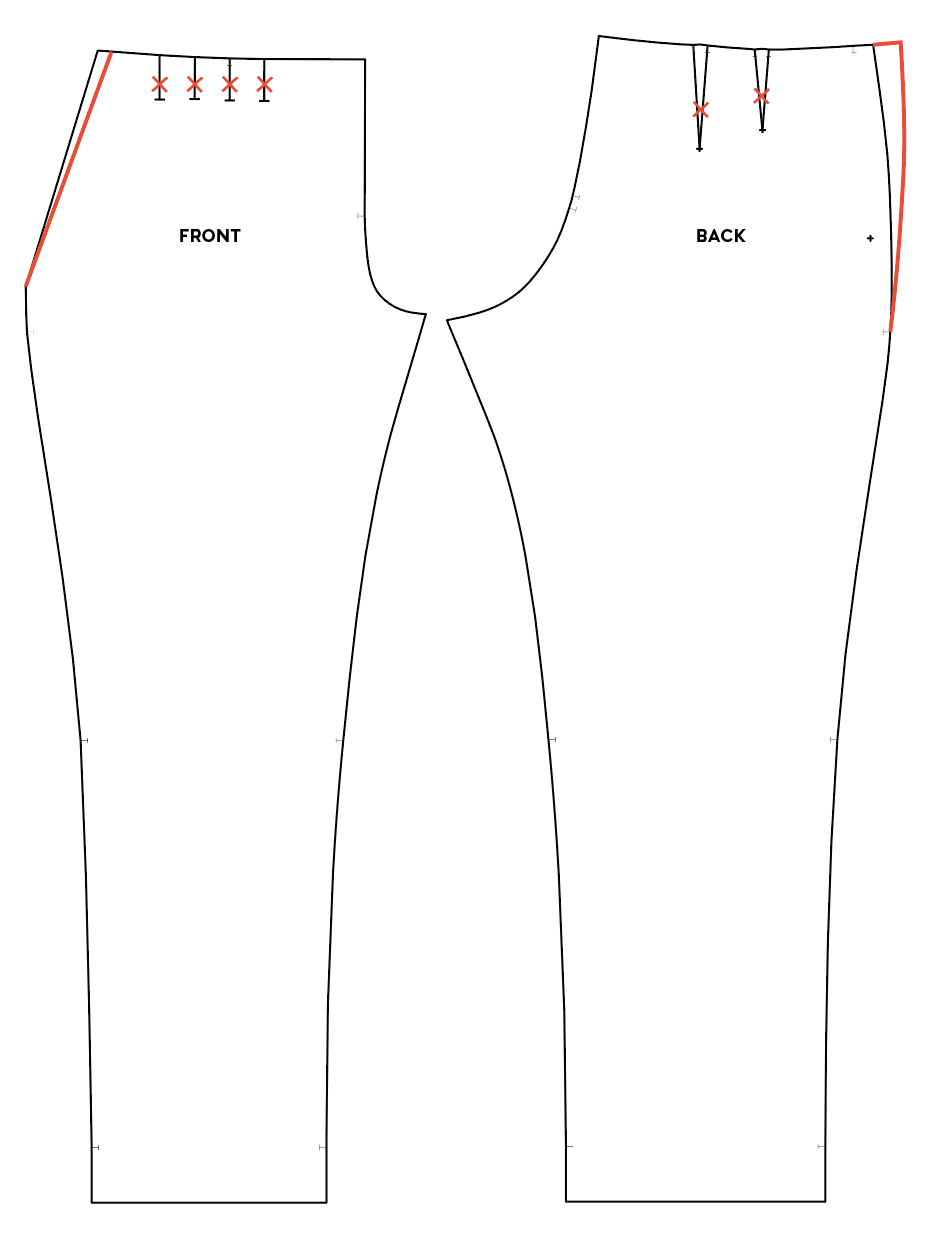
The Crew Trousers have a pleated front and darted back, with a lapped side zipper. I’ll walk you through the steps I took to change them into a pull-on pant with cuffs.
WAISTLINE AND POCKET ADJUSTMENTS
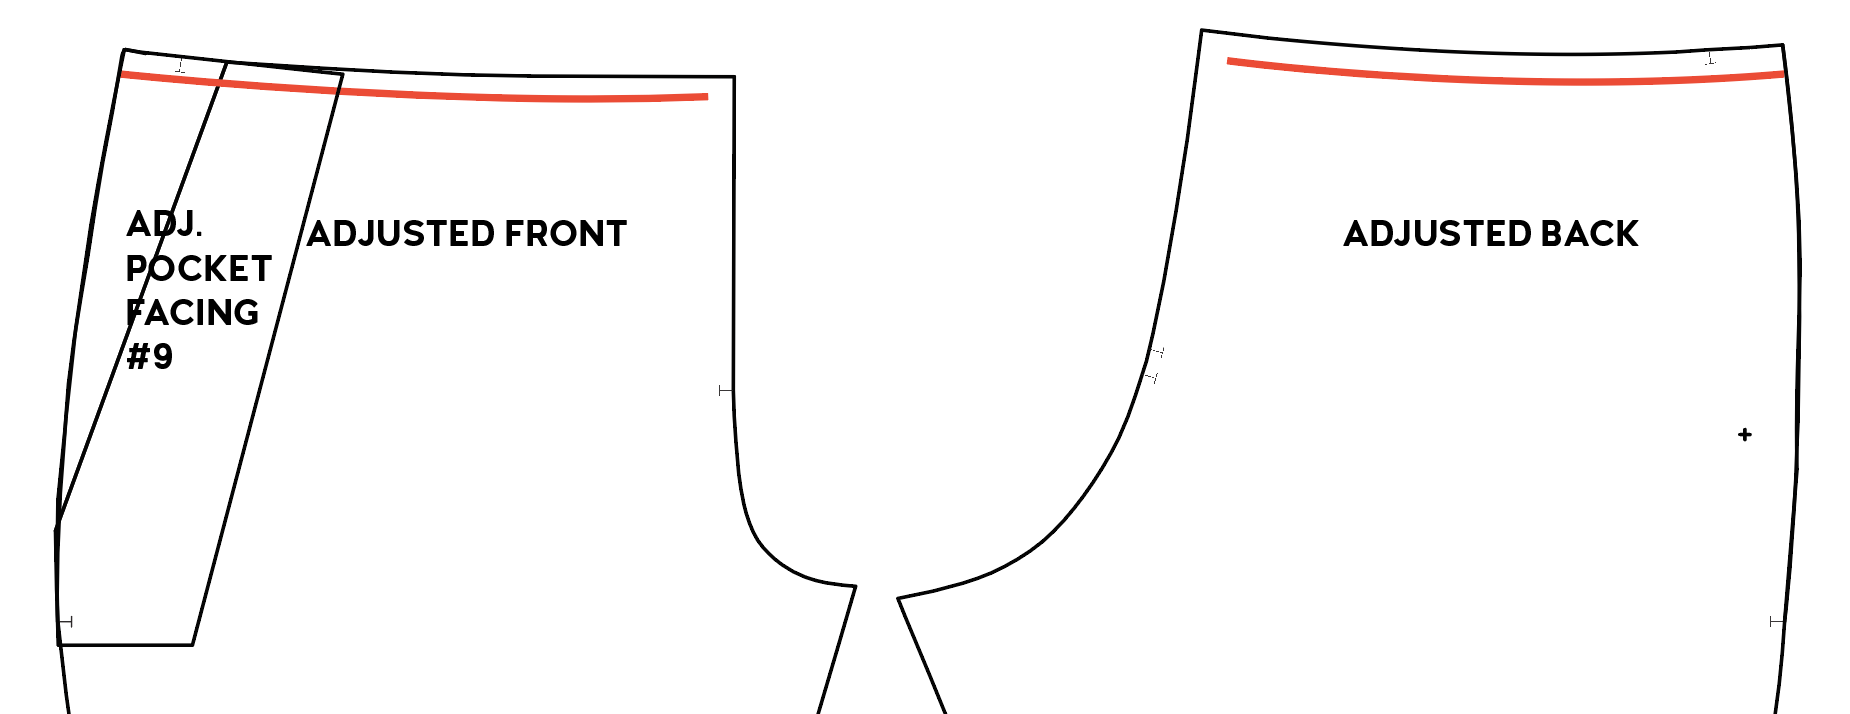
First, we are going to adjust the waistline of the trousers front and back pieces. We will not be sewing the pleats or back darts, which will give us the room we need to pull the pants up over our hips. Since there is a little bit more ease in the front pieces, due to the pleats, we’ll be removing 1/2″ (1.25 cm) of ease from the front waist and adding 1″ (2.5 cm) it to the back.
We need to adjust three pieces to make the changes to the front leg. We begin by adjusting the Pocket Facing (#9). Make a mark 1/2” (1.25 cm) starting at the waistline, curve to zero at the hip. Place the pocket facing on top of the Pocket Back Under (#13) and remove the same amount from the waistline. For the Pocket Bag Upper (#14) move the pocket opening angle in 1/2″ (1.25 cm), angle to zero at the bottom of the pocket opening. Use the Pocket Bag Upper (#14) to adjust the Front Leg pocket angle.
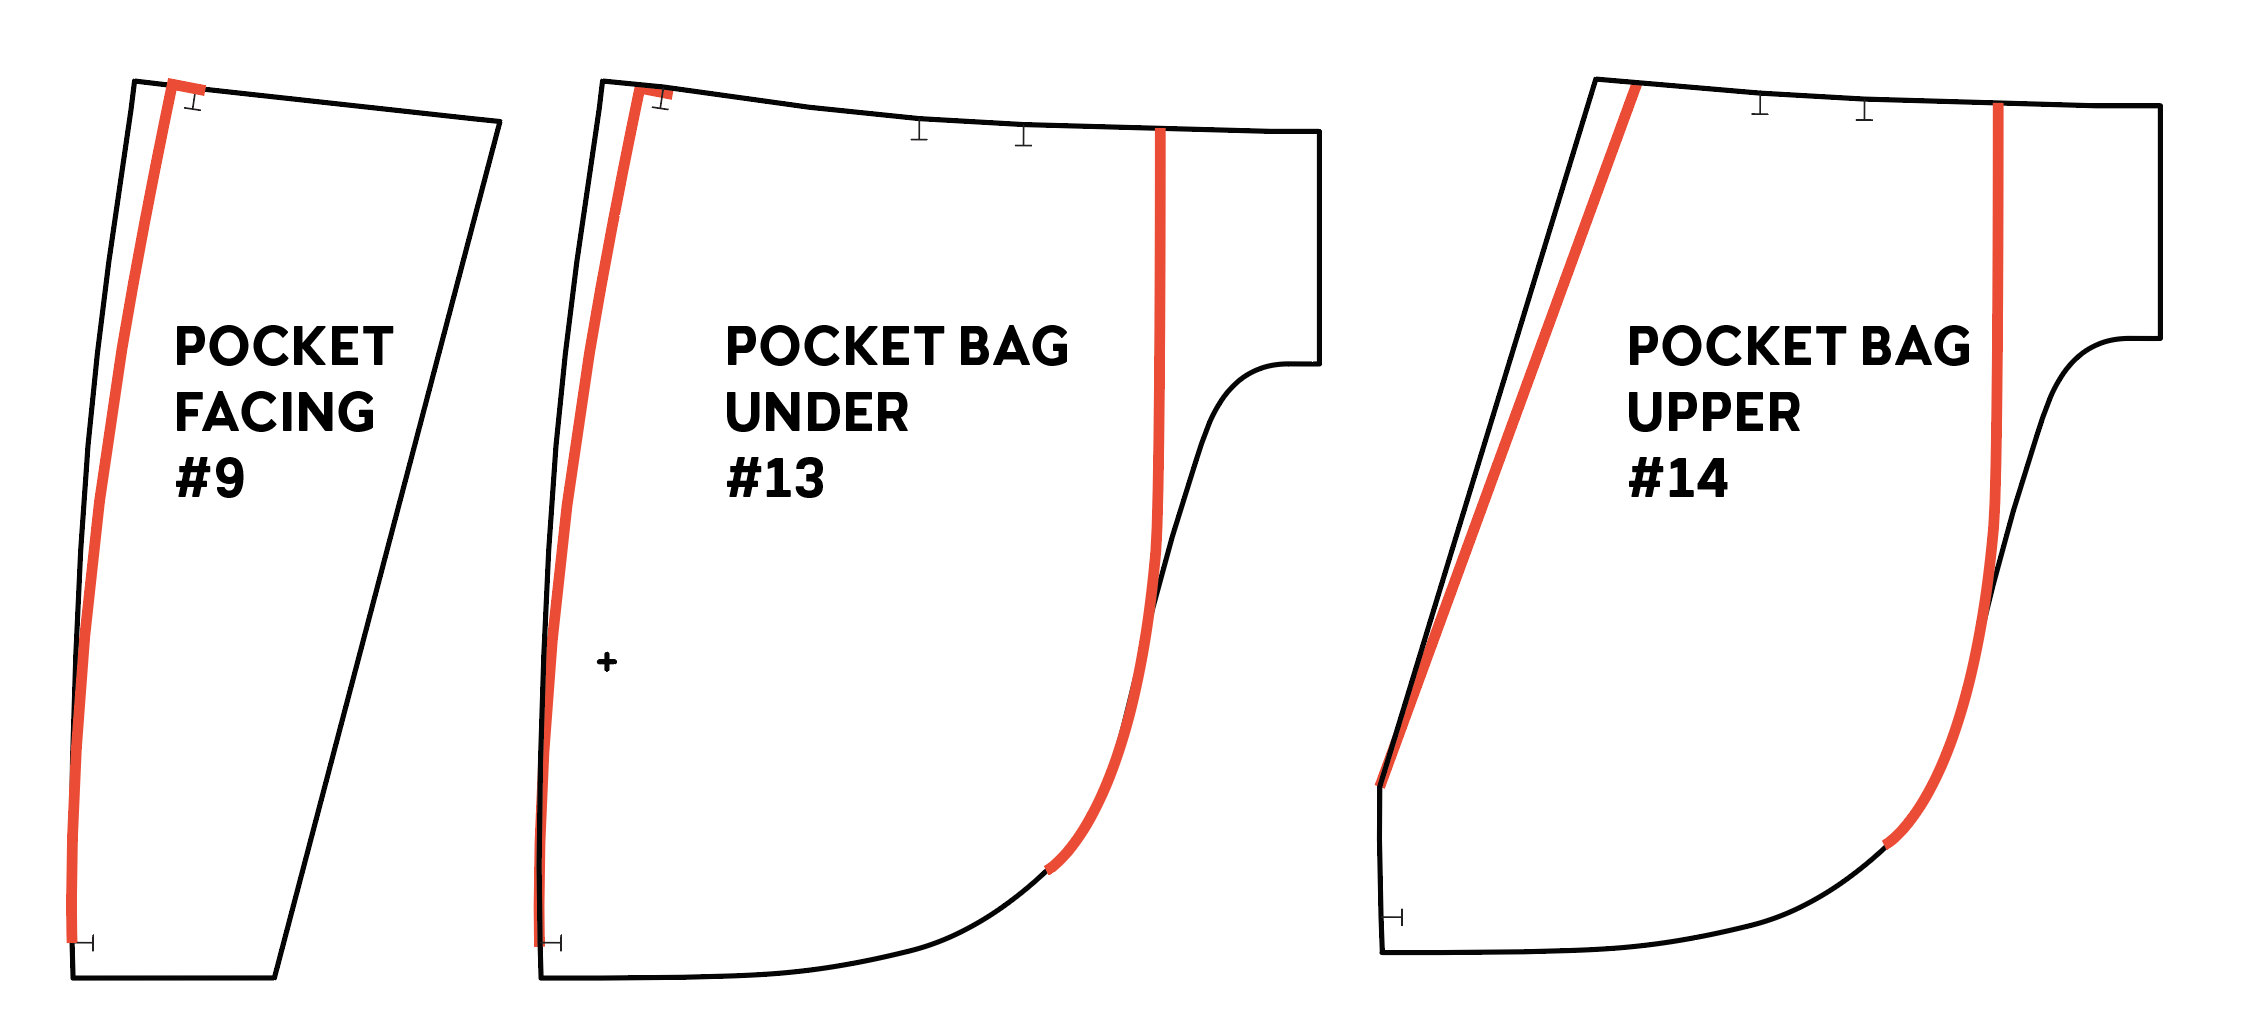
There is one more change that we will make to the pocket pieces. They are originally designed to extend to the front seam of the trousers. We will shave off those extensions and continue the bottom curve straight up to the top of the waist seam.
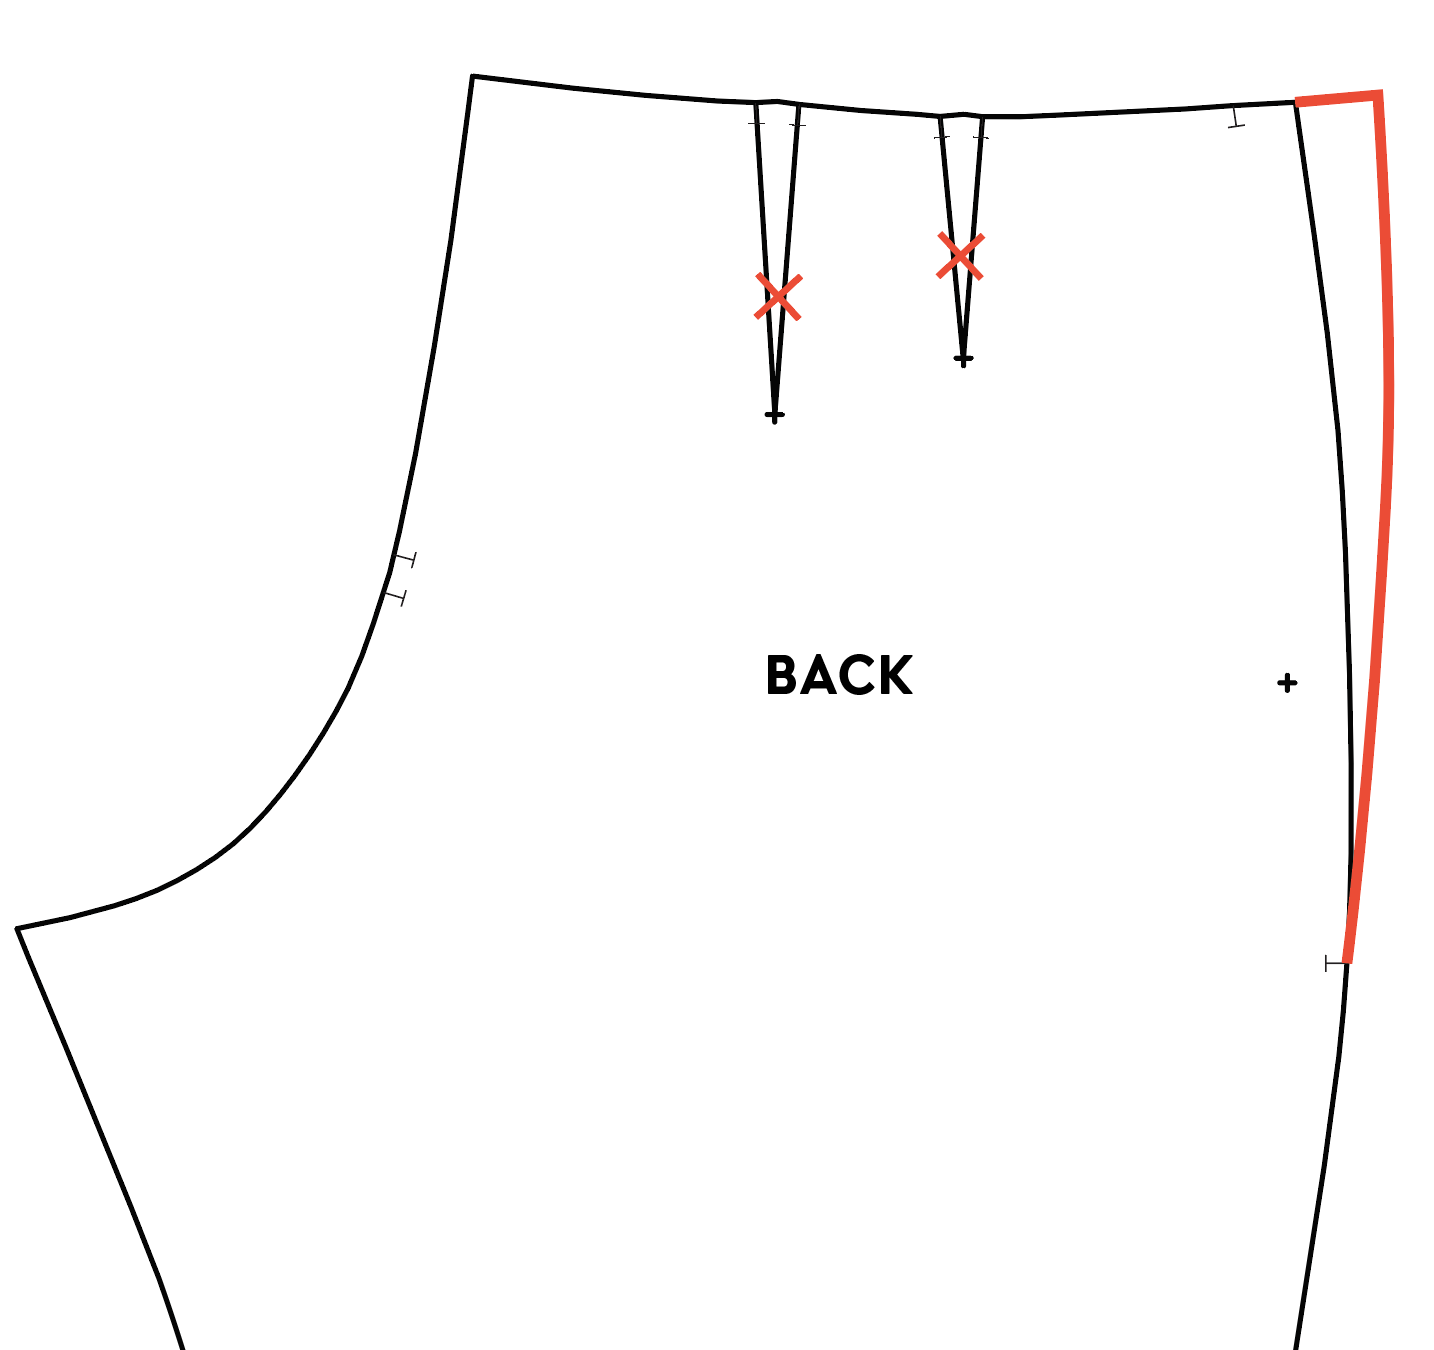
We are going to widen the back pieces at the waistline to make sure we have enough ease to pull the pants on without a closure. We’ll start by taping some paper to the side edge of the back trouser piece from the waist to the hip notch. Make a mark 1″ (2.5 cm) away from the side seam on the paper and draw a line with a slight curve that tapers to meet the pattern piece at the hip notch. You will also eliminate the back darts.
ADDING A CUFF
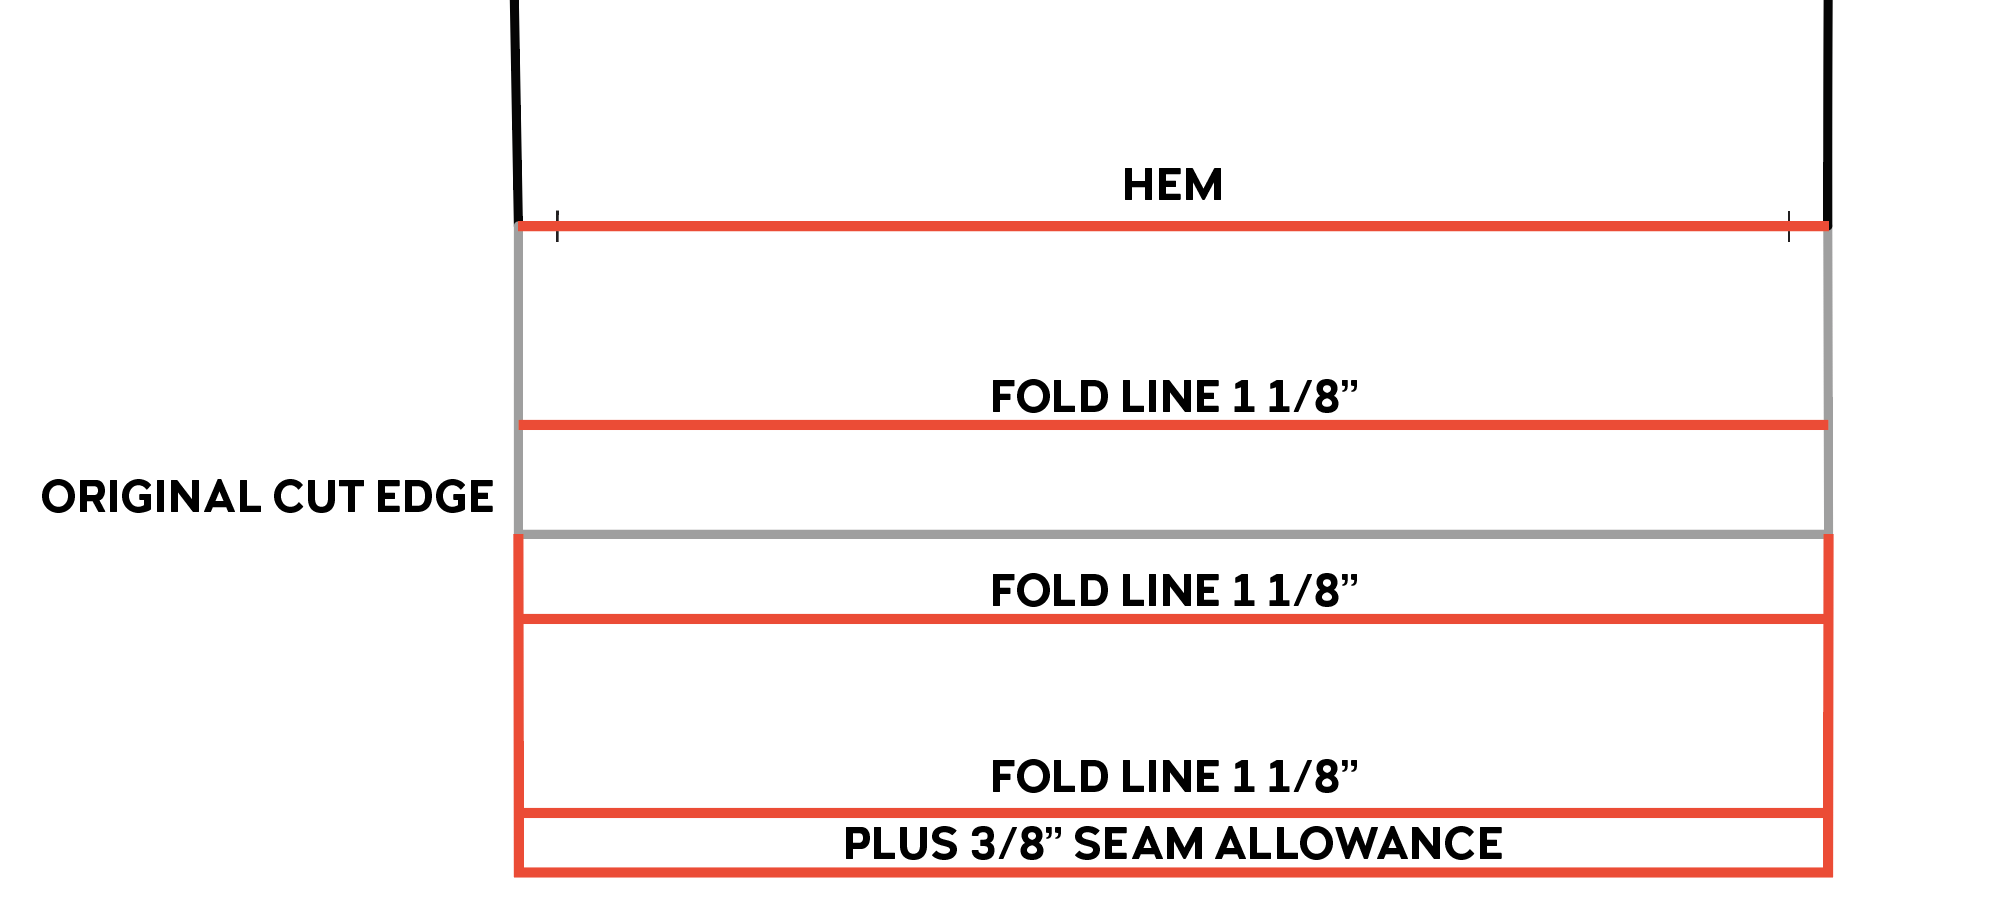
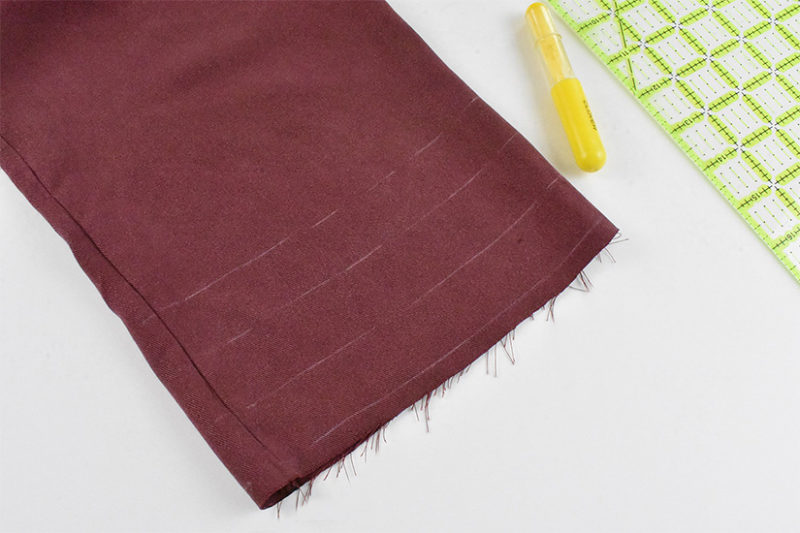
Next, we will modify the hem allowance on the front and back trousers for the cuff. We need to add some length to the bottom of the legs to accomplish this, so we’ll tape some paper to the bottom of the pant legs and draw a series of horizontal fold lines. The first line we’ll draw connects the two notches at the hem of the pants. Then we’ll draw another line 1 1/8″ (3 cm) below the first line. We need to repeat this process 2 more times so we end up with 4 lines, each spaced 1 1/8” (3 cm) apart. Finally, we draw a line 3/8″ (1 cm) down from the bottom line. Trim away any excess paper below this line. We also need to lengthen the side seams so that they reach that very bottom line and trim away any excess paper on the sides.
DRAFTING AND CUTTING WAISTBAND PIECES
Our last step is to create our waistband pieces. We need to measure the width of the front and back trousers to determine how long to make the front and back waistband pieces. Mark the seamline (or sew line), which is 3/8″ (1 cm) below the top, across the width of the front and back trousers. Be sure to place the pocket facing piece below the front trouser piece to calculate the correct length. Make a note of the width of the front and back trousers at the waist seam line, and then subtract 3/8″ (1 cm) for the center front and back seams.
Once you have your measurements draft a rectangular waistband pattern piece for the front and back. The length is your waist measurement and the height is 5 1/8” tall. For reference, I cut a size 12 at the waist and my front piece measures 11 5/8” x 5 1/8” and my back piece measures 11 1/8” x 5 1/8”. We will cut our waistband pieces on the fold so that they are twice as long as the width that we measured. Snip a small notch at the center front and back of the waistbands.
CONSTRUCTION
After cutting our front and back trouser pieces, we do not need to transfer the markings for the pleats and darts, since we will not be sewing them. We need to mark the 4 lines we drew at the hem of the pants to create the cuff.
We do not need to interface our waistband pieces, but we will be applying the interfacing to the wrong side of the upper pocket lining.
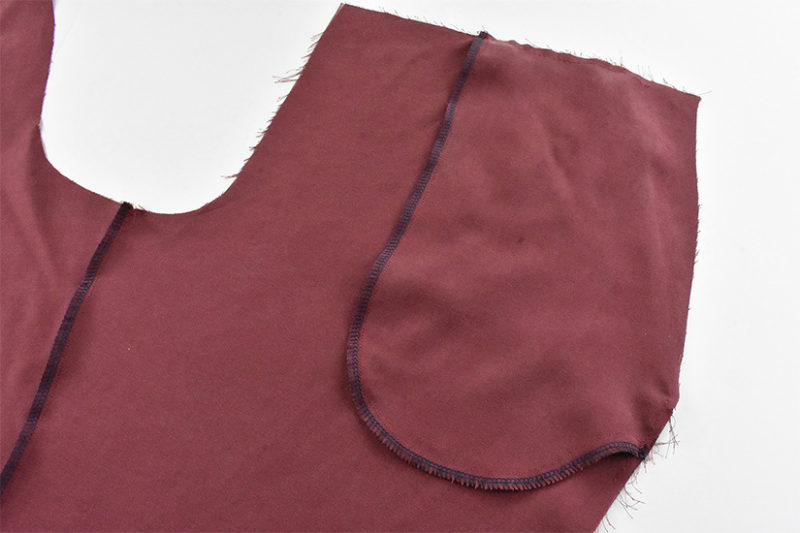
Follow steps 9-13 to assemble the pockets. The pockets will not reach to the center of the trousers since we changed their shape. They should look like the photo above.
Move to steps 25-27 to sew the side seams, inseams, and rise. In step 25, sew both the left and right side seams since we are not installing the zipper.
After assembling the trouser legs we will sew the waistband. Pin the short edges of the front and back waistbands right sides together and sew them at 3/8” (1 cm) seam allowance. Then press the waistband in half, wrong sides together, so that the top and bottom raw edges meet.
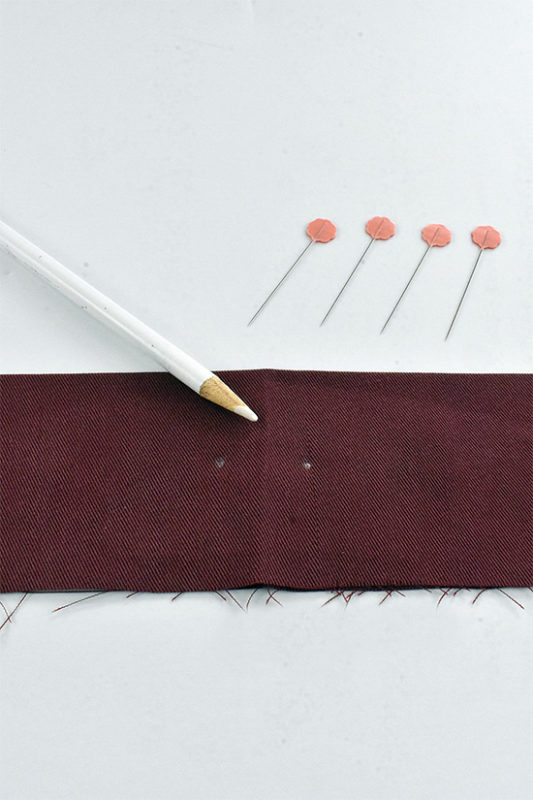
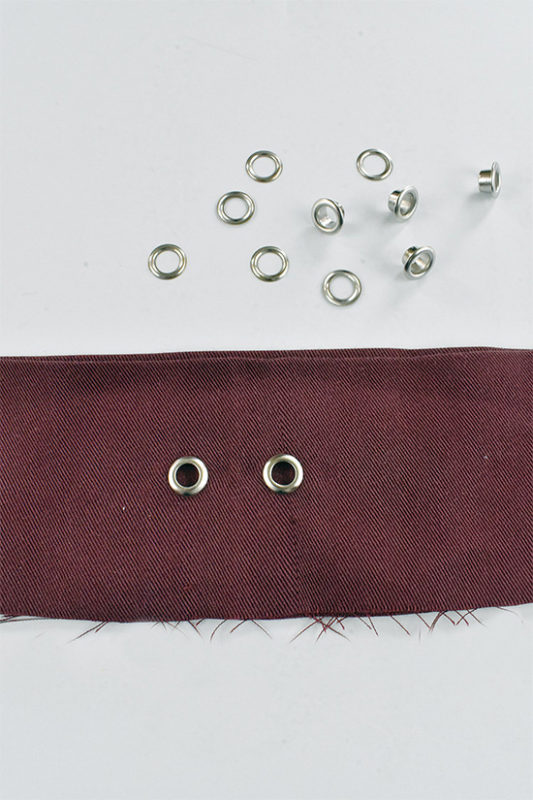
If you would like to add a drawstring to your trousers, find the notch we cut at the center of the front waistband piece. Fuse a 2” (5 cm) wide x 1” (2.5 cm) tall piece of interfacing to the inside of the center front. Make a mark 3/8″ (1 cm) to either side of the center front marking and 7/8″ (2.25 cm) below the fold line of the waistband. Be sure to open the waistband piece and install the eyelets or sew the buttonholes through one layer of the fabric.
ATTACHING THE WAISTBAND
To attach the waistband, we will match the side seams of the waistband to the side seams of the pants and pin in place, right sides together. Match the center front and back trouser seams with the notches we cut to mark the center front and back of the waistband. Pin the rest of the waistband in place. Sew around the waistband at 3/8″ (1 cm) seam allowance, being sure to leave a 3” (7.5 cm) opening to thread the elastic through.
Thread the 2” (5 cm) elastic through the waistband. I like to try on my trousers at this point and adjust the length of my elastic to fit my waist comfortably. Overlap the ends of the elastic by 1” (2.5 cm) and sew them together with a zig-zag stitch or by sewing an X shape through the layers.
Stitch the opening in the waistband closed and finish the raw edges of the waistband using your preferred method.
If you’re adding a drawstring, thread it through one eyelet or buttonhole, through the waistband casing, and out the other opening.
An optional step to finish the waistband is to add topstitching 3/8″ (1 cm) from the top and bottom of the waistband. I like to lengthen my stitch length to 3.5 or 4 when I do this topstitching. Pull the waistband to stretch the elastic as you sew. Be sure to keep the drawstring in the center part of the waistband as you sew since we don’t want it to get caught in the stitching.

SEWING THE CUFFS
If you haven’t done so already, it’s to transfer our fold lines to the right side of our trouser legs.
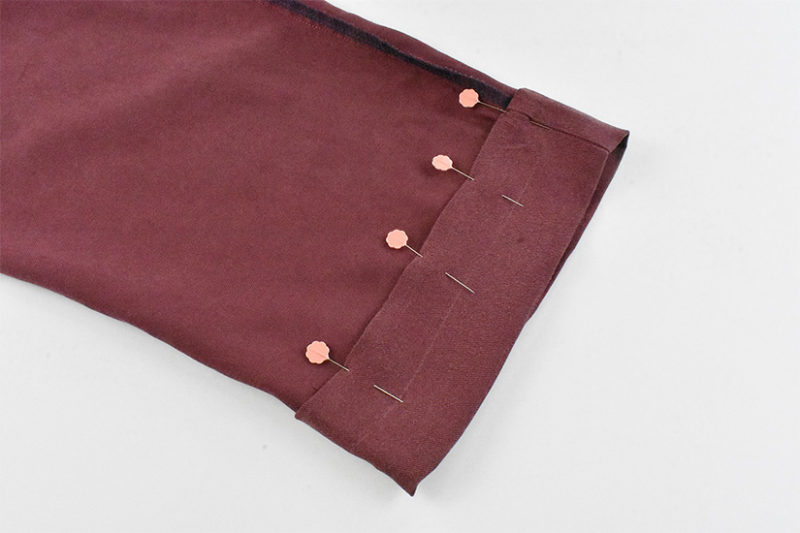
Now we’ll begin folding and pressing the hem on the lines that we marked. It will be helpful to think of the bottom line as fold line 1, the line above that as fold line 2, the next line as fold line 3, and the line at the hem notches as fold line 4. Fold the fabric wrong sides together on line 1 and press into place. This fold will conceal the raw edges in the hem.
Next, we fold and press on fold line 3. Pin the hem in place, it should be 2 1/4″ (0.6 cm) deep.
Sew the hem in place, stitching close to the folded edge.
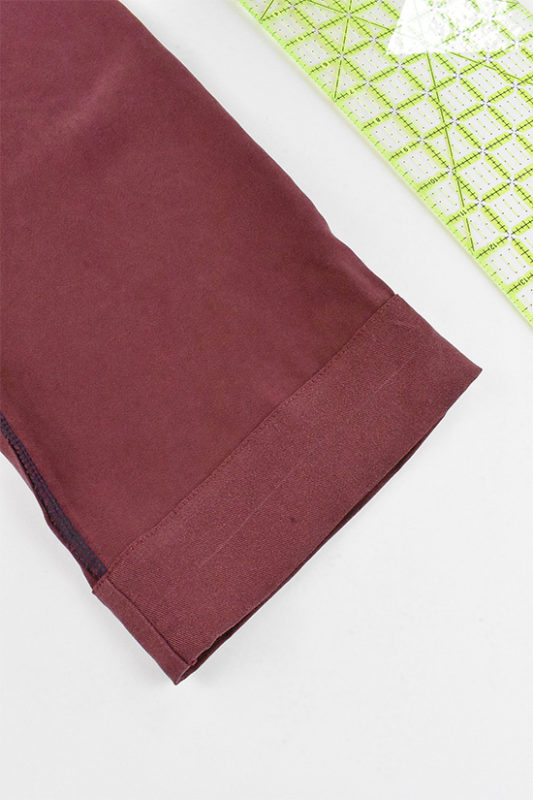
We’ll turn the trousers right side out and fold the hem up on line 4 to create the cuff. Fold line 2 will be at the bottom of the trouser leg and fold line 4 will be inside the cuff.
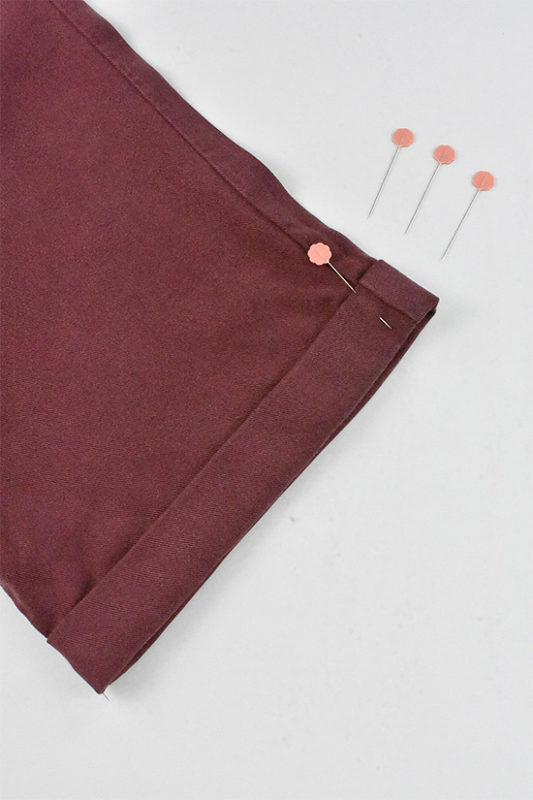
Now we just need to secure the cuff with some stitches. Press the cuff in place and pin it at the side seam and inseam. We can add some hand stitches or machine tack the cuff with a tight zig zag stitch.
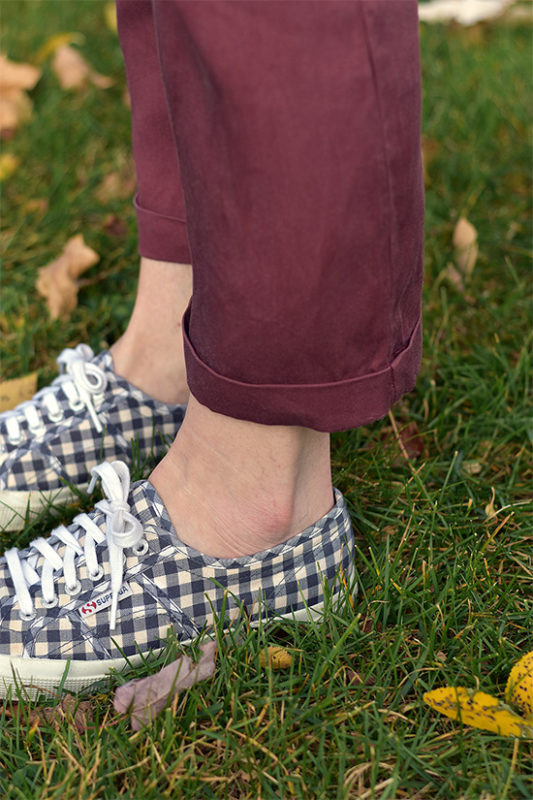
Give your trousers and cuffs a press and they are done!
THE FINAL LOOK

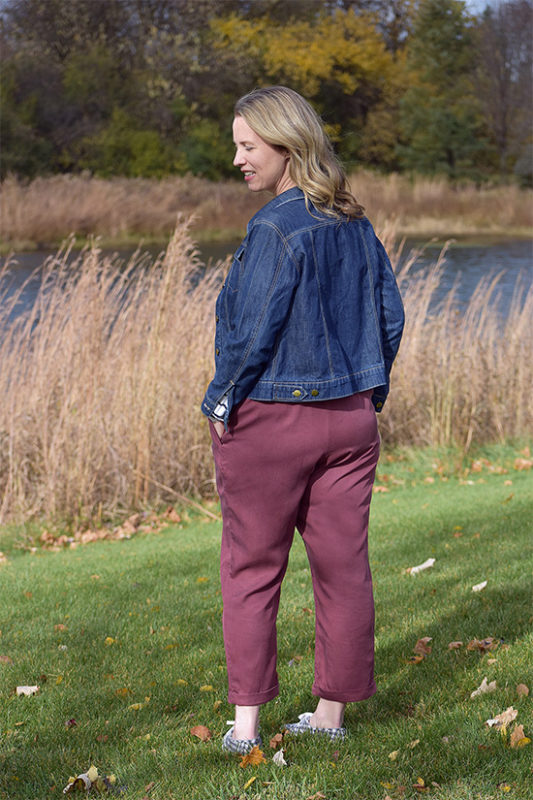
Thanks for checking out this tutorial! I’d love to hear if you try it! Please tag me @teridodds1 on Instagram if you make your own elastic waist, cuffed Crew Trousers.
