The Fringe is one of our most popular patterns, and we’re thrilled to bring you more support in your creative endeavor with the Fringe Sew Along. Throughout this sew along, we will be sewing Fringe View A. We will also be sewing the View B bodice for the Fringe & Mini Fringe since the construction is slightly different.
We hope you will find all the support you need even if the Fringe is your first garment. Of course, we also have community lead sewing support in our Facebook group or you can email directly for additional support. Let’s get started!

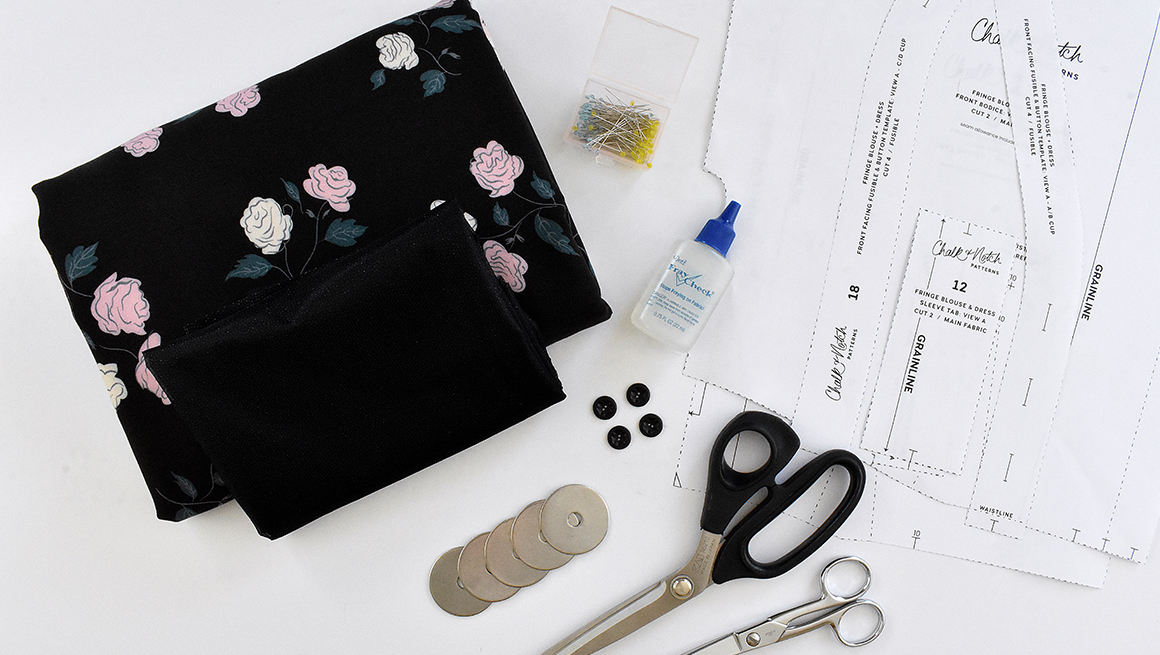
GATHERING SUPPLIES
Before beginning, here’s what you’ll need:
- The Fringe or Mini Fringe pattern printed in your size. If you prefer copy shop patterns and you are located in the US, we recommend printing at pdfplotting.
- Washed and pressed fabric: we have a fabric resource post here
- Tricot fusible interfacing: we recommend this tricot fusible interfacing from Wawak
- Five 1/2″ buttons (View A only)
- Fray Check for use on buttonholes (View A only)
- Preferred cutting tools: scissors/pins, or rotary cutter/weights
- Pins for sewing
- Thread snips
TIPS FOR CUTTING
Make sure you have all the pattern pieces you need for the view you are sewing. The cuffs/sleeves are interchangeable for the blouse and dress options.
- Your fabric should be pre-washed the same way you plan to launder your garment.
- Read the information on each pattern piece.
- Grainlines are indicated on the pattern pieces. Place pattern pieces on the grainline, parallel to the selvage or fold.
- If the pattern says “Cut 2,” the pieces are mirror images of each other.
- If the pattern says “Cut on FOLD,” place the pattern edge exactly along the fold of the fabric.
- Clip all notches at 1/4” (0.6 cm) or less.
- Transfer all pattern markings to your fabric with a washable marker or chalk.
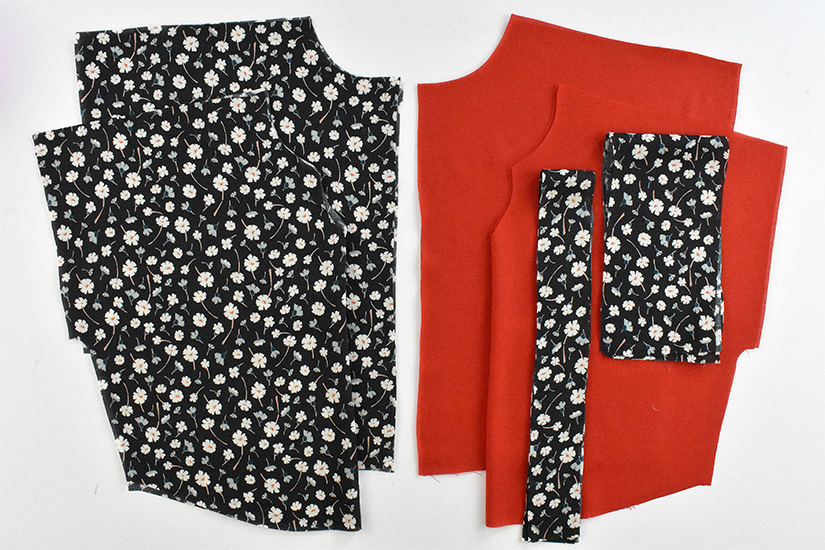
VIEW A CUT LIST
View A has a button up front, elbow sleeve and sleeve tab.
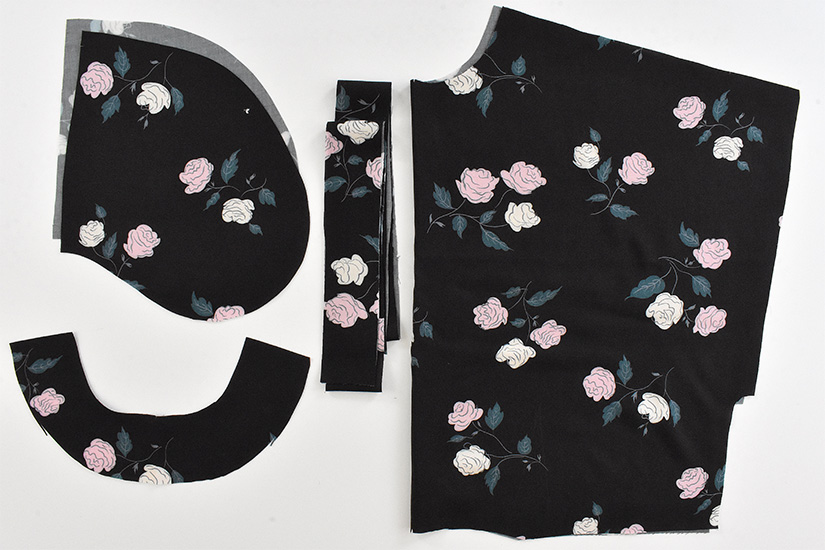
MAIN FABRIC
- #1 OR #2 – FRONT BODICE – CUT 2
- #3 OR #4 – FRONT FACING – CUT 2
- #9 – BACK BODICE – CUT 1 ON FOLD
- #10 – BACK FACING – CUT 1 ON FOLD
- #11 – SLEEVE – CUT 2
- #12 – SLEEVE TAB – CUT 2
- #14 – SKIRT FRONT & BACK – CUT 2 ON FOLD
- #15 – OPTIONAL DRESS POCKETS – CUT 4
- #16 – OPTIONAL WAIST TIE – CUT 2
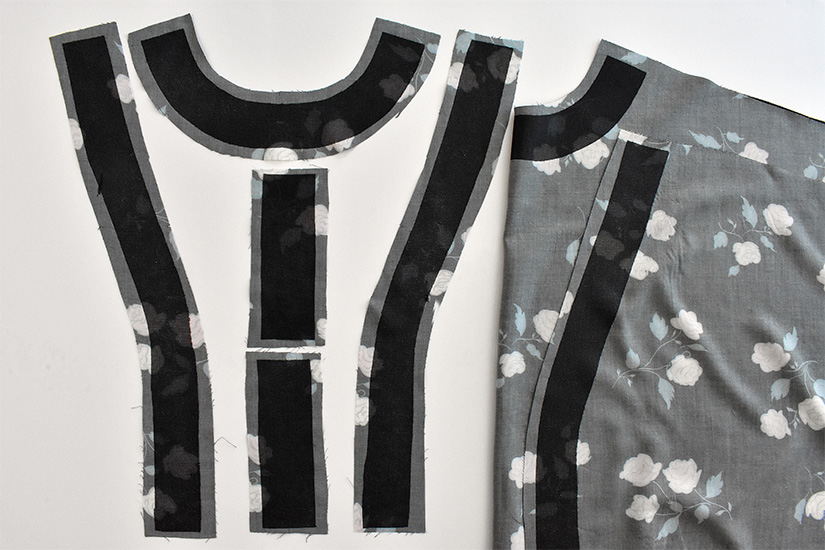
FUSIBLE INTERFACING CUT LIST
- #17 OR #18 – FRONT FACING FUSIBLE – CUT 4 (ALSO THE BUTTON TEMPLATE)
- #21 – BACK FACING FUSIBLE – CUT 2 ON FOLD
- #22 – SLEEVE TAB FUSIBLE – CUT 2
- 1/2” (1.25 cm) x 7” (17.5 cm) STRIP OF FUSIBLE FOR POCKETS
Fabric Details || Steno Roses Rayon in Black by Kimberly Kight for Ruby Star Society from Fat Quarter Shop
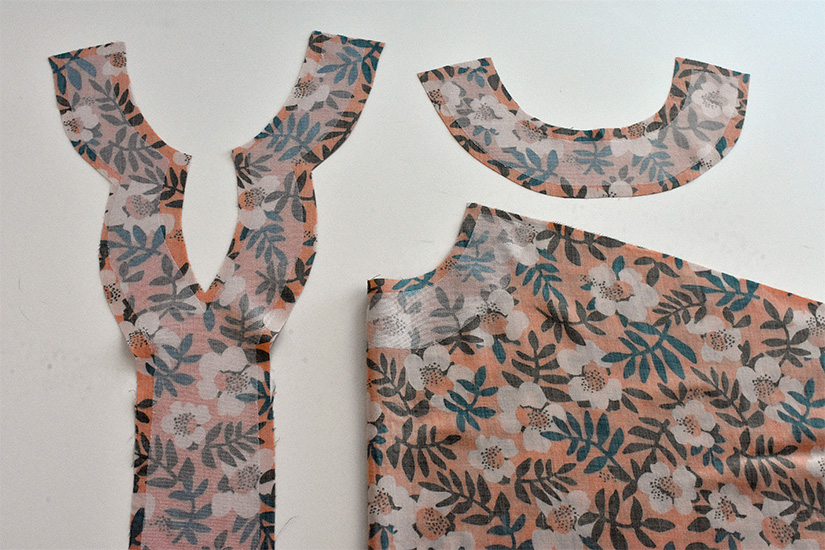
VIEW B CUT LIST
View B has a pull over, notched front with a cuff.
MAIN FABRIC
- #5 OR #6 – FRONT BODICE – CUT 2
- #7 OR #8 – FRONT FACING – CUT 1 ON FOLD
- #9 – BACK BODICE – CUT 1 ON FOLD
- #10 – BACK FACING – CUT 1 ON FOLD
- #13 – CUFF – CUT 2
- #14 – SKIRT FRONT & BACK – CUT 2 ON FOLD
- #15 – *DRESS POCKETS – CUT 4
- #16 – *WAIST TIE – CUT 2
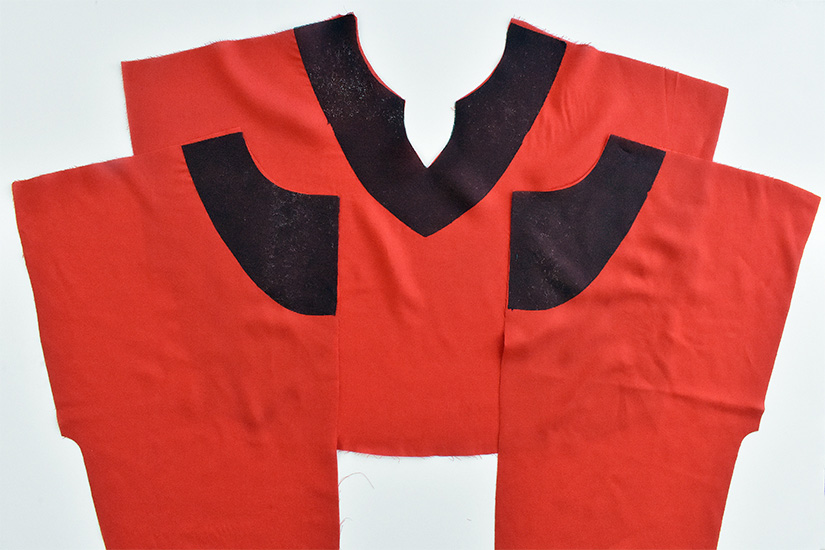
FUSIBLE INTERFACING CUT LIST
- #19 or #20 – FRONT FACING FUSIBLE – CUT 2 ON FOLD
- #21 – BACK FACING FUSIBLE – CUT 2 ON FOLD
- 1/2” (1.25 cm) x 7” (17.5 cm) STRIP OF FUSIBLE FOR POCKETS
Fabric Details || Nocturnal by Jessica Jones for Cloud 9 Fabrics
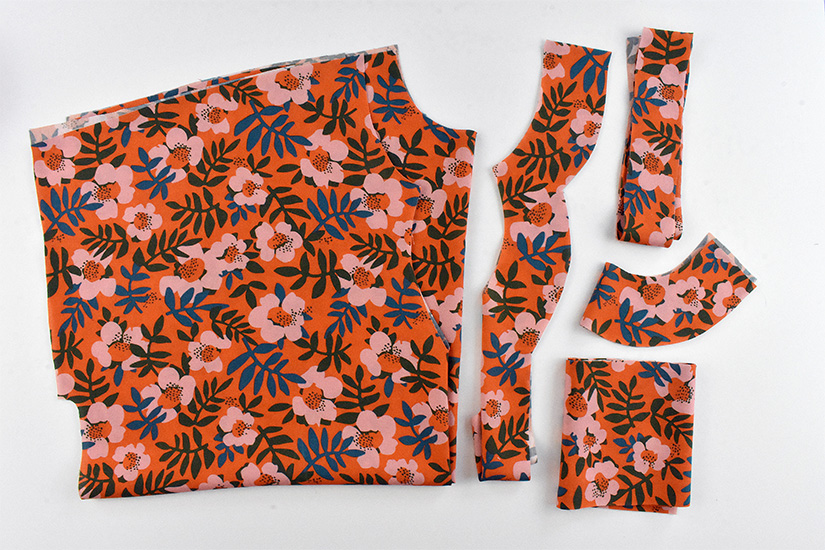
MINI FRINGE VIEW B CUT LIST
The Mini Fringe View B includes a fully lined bodice.
MAIN FABRIC
- #10 – FRONT BODICE – CUT 1 ON FOLD
- #11 – BACK BODICE – CUT 2
- #3 – SKIRT – CUT 2 ON FOLD
- #12 – CUFF – CUT 2
- #8 – OPTIONAL DRESS POCKET – CUT 4
- #9 – OPTIONAL WAIST TIE – CUT 2
LINING FABRIC (You can use main or lining fabric)
- #10 – FRONT BODICE – CUT 1 ON FOLD
- #11 – BACK BODICE – CUT 2
FUSIBLE INTERFACING CUT LIST
- #13 – FRONT FUSIBLE – CUT 1 or 2 ON FOLD
- #14 – BACK FUSIBLE – CUT 2 or 4
- 1/2” (1.25 cm) STRIP OF FUSIBLE FOR POCKETS
Fabric Details || Homelike Greetings by Maureen Cracknell for Art Gallery Fabrics from Fat Quarter Shop
ATTACHING FUSIBLE FOR VIEW A
Attach fusible interfacing to the front/back neck facings (both views) and the sleeve tabs (View A only). Optional: attach fusible interfacing to the front and back neck bodice pieces.
ATTACHING FUSIBLE FOR VIEW B
ATTACHING FUSIBLE FOR THE MINI FRINGE VIEW B
Next, we’ll prepare your facings and sew bodice darts.
Fringe Sew Along Posts: Getting Started | Prepare Facings and Sew Darts | Sew Shoulder Seams and Attach Facings | Attach the Sleeve/Cuffs and Sew the Side Seams | Sew Pockets and Skirt Side Seams | Hem and Attach Bodice to Skirt

