
Tutorial | Fringe Tiered Maxi
Hi everyone! I'm Suzie and I can be found as Threadquarters over on Instagram, YouTube and on my blog, Threadquarters.co.uk. I'm super excited to be able to guest blog for Chalk and Notch today and share a super fun tiered maxi Fringe tutorial. Let's sew all the ruffles!
Inspiration
There are just so many amazing ways to hack the Fringe dress. When Gabriela set this challenge, I knew straight away that a maxi dress with multiple tiers of ruffles would look gorgeous and a fantastic transitional piece in my summer to autumn wardrobe! When I started to peruse Pinterest for inspiration, I noticed a lot of the dresses had longer sleeves, so I also have a super simple way to change up the Fringe sleeve to mimic this without even having to change a pattern piece!

Fabric and Notions

With all of the ruffles, it's best to pick a super lightweight and drapey fabric. Otherwise, your dress will become very heavy, and it will be very difficult and awkward trying to gather the bottom ruffle. All those ruffles will use up quite a lot of fabric as well, so price may play a factor when choosing as well! You will need about 4.5 yards (4m) of fabric for this hack. I opted for a l ight viscose (rayon) from Minerva Crafts. It has a bit of that boho vibe, is super floaty and costs only £4.99/m.
These fabrics would lend themselves beautifully to this dress hack:

1 | 2 | 3 | 4
If you would like to add the fun tassel fringing that I have, then you will need to pick up about 3m of tassels. I bought mine off eBay.
For the sleeve hack, you will also need 1 yard (1m) of 1/4" (0.5-1cm) wide elastic.
Pattern Adjustments

1. Deciding where you want your first ruffle to start will depend on your height and personal preference. For reference, I am 5'6". To pick where I wanted my first ruffle to be, I held the skirt pattern piece up to my body and pretty much marked a point on the pattern with a pen! So my point falls at 16 inches (41cm) down from the center front.
2. Cut a line perpendicular to center front, 3/8" (1cm) lower than your ruffle point (that's your seam allowance added).

3. Draft your first ruffle pattern piece. Cut two rectangles: 16.5" (42 cm) x the width of your fabric.
4. Draft your bottom ruffle piece. Cut four rectangles: 10.5" (27cm) x the width of your fabric.
5. To make the 'lengthened' sleeves, I used the sleeve pattern piece from View A and added elastic.
6. Finally, if you would like to add neck ties, use the waist tie pattern piece and cut 2 additional pieces (you can shorten them to your preferred length when fitting).

Bodice Construction
1. Construct the bodice (View B) as instructed.
2. I would suggest inserting your waist ties in the front darts to give you a more cinched-in silhouette. This dress has a lot of volume, and I think the proportions work better with the waist bought in.
3. For optional neck ties: Make your neck ties in exactly the same way as you made the waist ties. You can shorten your ties to your preference. Pin open ends of ties between bodice and facing and sew in place. You can backstitch over them to make them more secure.
4. Attach your sleeves to your bodice, but leave them long (don't fold up).
5. Sew side seams.
6. Press your sleeve hems up by 1/4" (0.6cm) and then again by 1/2" (1.5cm). Edgestitch hem in place to create a casing. Leave an opening of about 2" (5cm). Feed your elastic in (a safety pin works well here) through the casing. I recommend trying your bodice on at this point to determine how tight you would like your sleeve hems to be. Pin in place. Make sure your elastic is overlapped by about 1-2cm and sew together. Insert elastic and edgestitch the casing closed.


Maxi Ruffle Skirt Construction
1. Sew top skirt as per instructions.
2. First ruffle: Sew the two rectangles together. Gather the top edge so that it's the same width as the bottom of your top skirt piece and sew right sides together.
3. Attach tassel trim: Baste tassels to the right side of the bottom of the first ruffle layer, tassels pointing away from the edge. I found it easiest to use wonder clips to hold the tassels in place and baste with a large zig zag stitch.

4. Bottom ruffle: Sew all four rectangles together. This is a VERY large circle and quite a handful to gather. I found it easier to work in sections (from seam to seam). Gather top of the second ruffle and pin right sides together to the bottom of the first ruffle, sandwiching the tassels in-between. Sew seam. Double check that you haven't caught any of the tassels in your sewing before finishing the seam.
5. Hem and you are done!


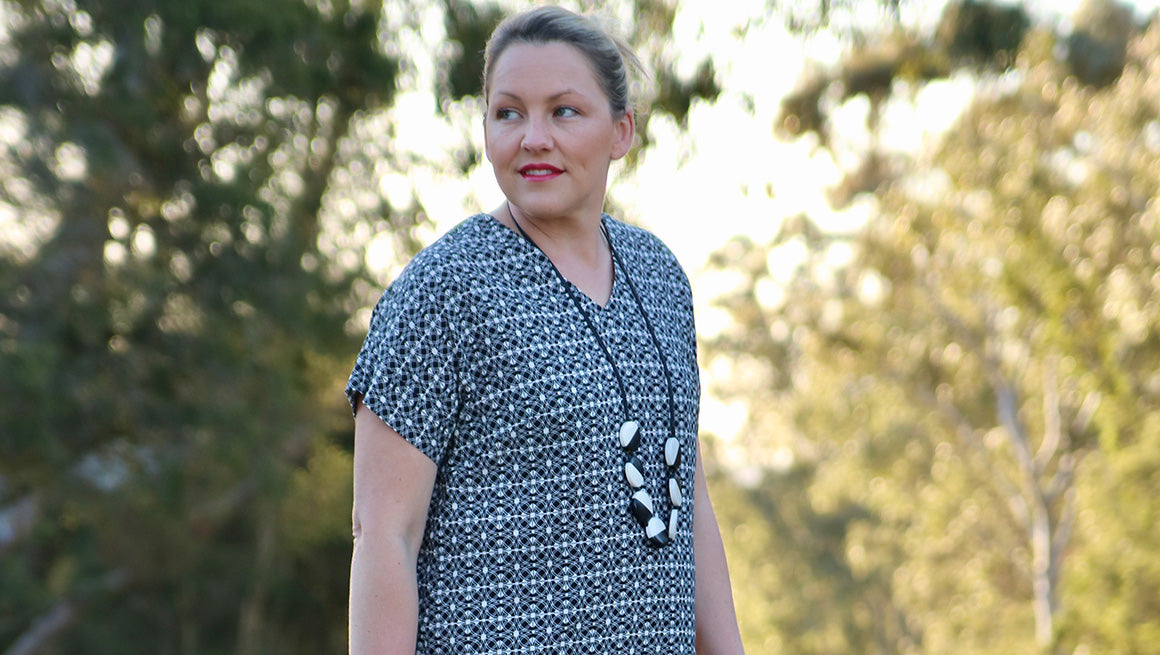
I hope you enjoyed this tutorial and might be inspired to give it a go. I absolutely love how my dress turned out, it is so much fun to wear!
Many thanks to Gabriela for inviting me to be a guest blogger. I have really enjoyed being able to share my Fringe hack along with all the other super talented seamstresses this month!
