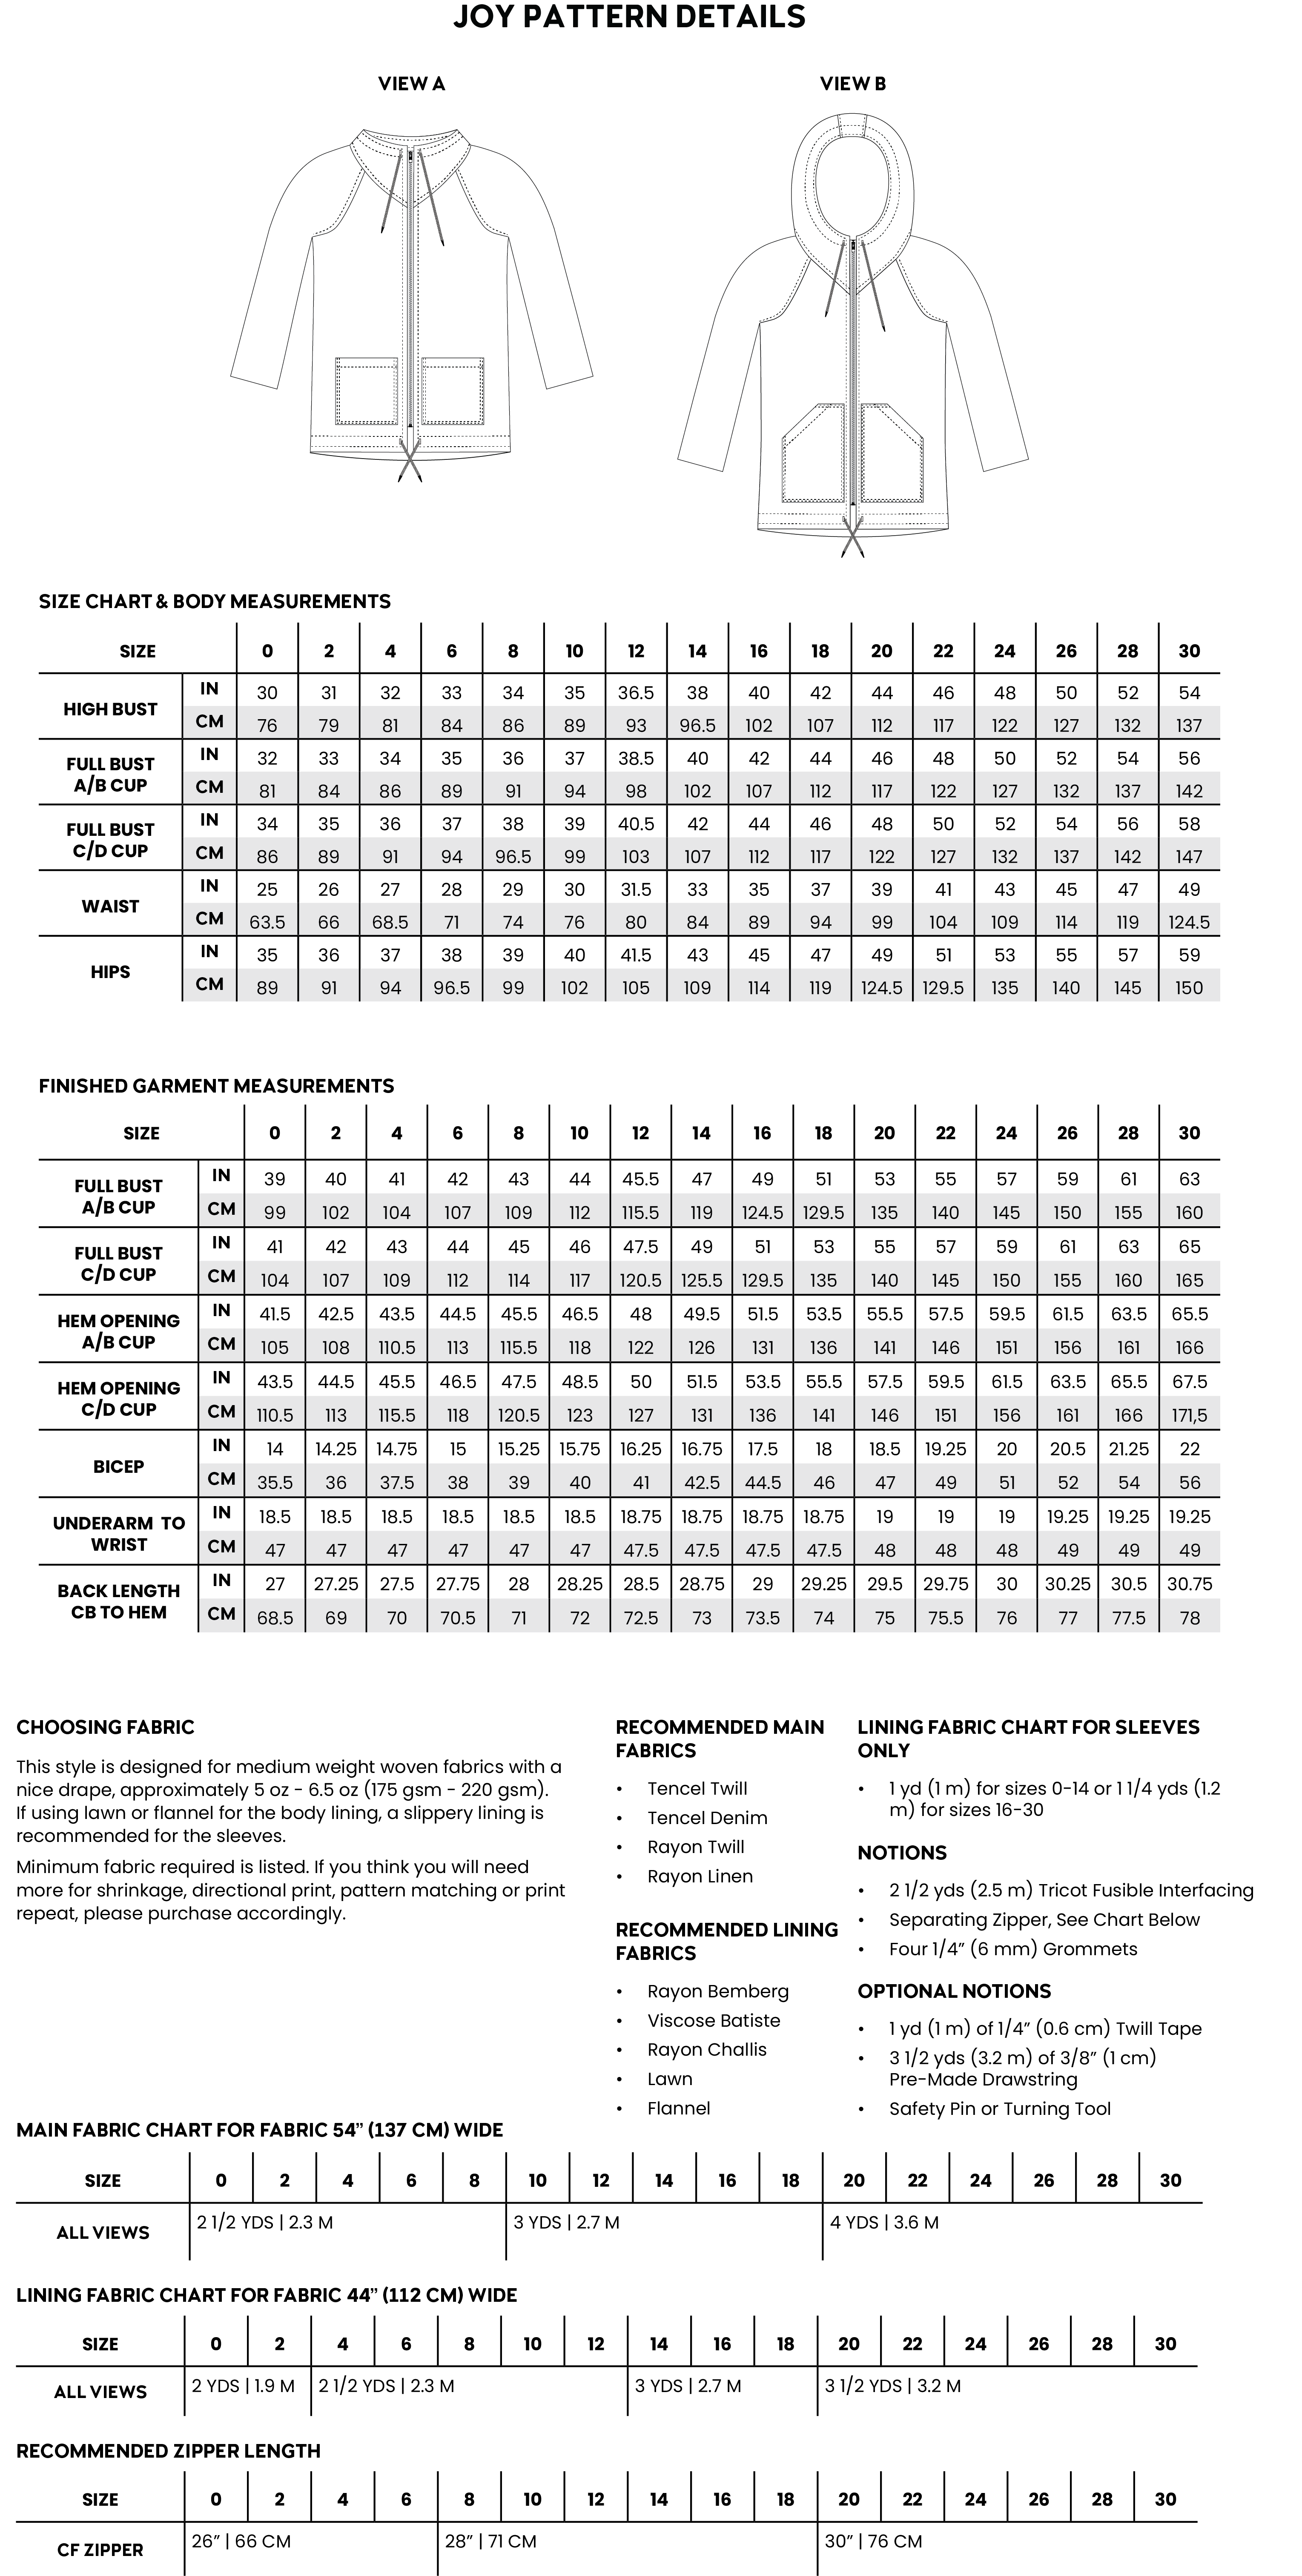
Deciding what size to sew for yourself can sometimes be confusing. Take some time to review the size chart and finished measurements below. Start with your bust measurement and confirm you have enough hip ease. If not, you can blend sizes. Keep in mind that this style is designed to have a relaxed fit.
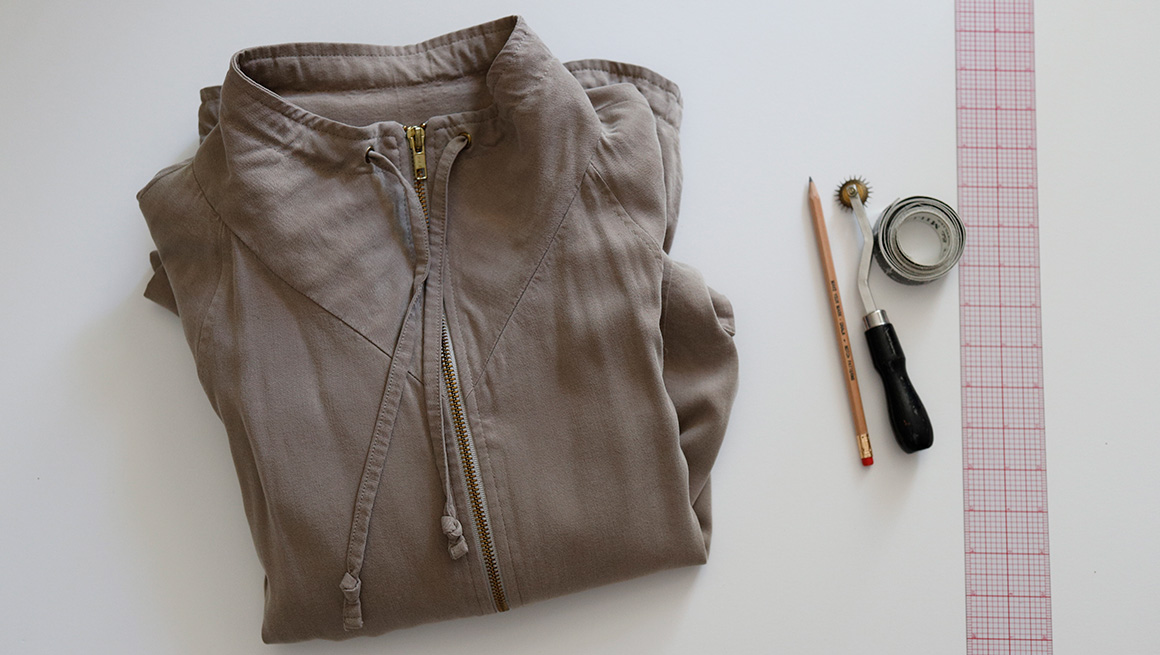
When sewing a pattern for the first time and especially if you are using precious fabric, it is highly recommended to sew a test sample or muslin. When using muslin fabric or an old sheet to test, you will not love the drape of your Joy Jacket. What the muslin allows you to do is to correct any fit issues before cutting into your fashion fabric. You can check the fit by sewing the shell body pieces to confirm the body length, sleeve length, and the shoulder fit. Below, you will see some common fit adjustments.
CUSTOM ADJUSTMENTS
Shorten or Lengthen Bodice
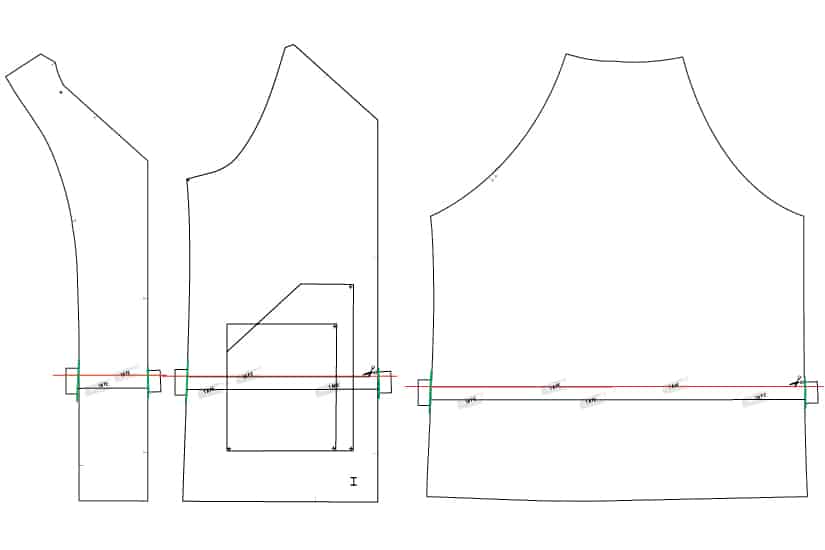
If you decide you would like to add or remove length through the torso, adjust at the lengthen/shorten line on the front and back bodice pieces, linings and facings. There is a 3/8″ (1 cm) seam allowance at the bodice hem.
– Cut the pattern horizontally at the indicated line. Shown in RED.
– Re-draw the side seam. Shown in GREEN.
– Adjust the pocket height if removing or adding more than 1.5″ (4 cm).
– Adjust the pocket placement by keeping the bottom placement and adjusting the top marks.
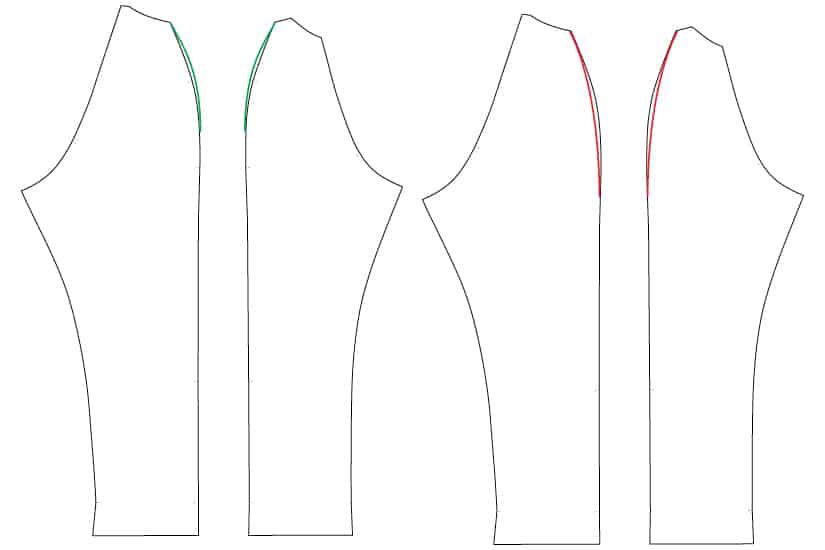
Shorten or Lengthen Sleeve

If you decide you would like to add or remove length in the sleeve, adjust at the lengthen/shorten line on the front and back sleeves and linings. This cut line is high on the bicep since the forearm is pretty slim. It is not advised to remove length from the hem. There is a 2″ (5 cm) seam allowance at the sleeve hem.
– Cut the pattern horizontally at the indicated line. Shown in RED.
– Re-draw the seams. Shown in GREEN.
Blending Sizes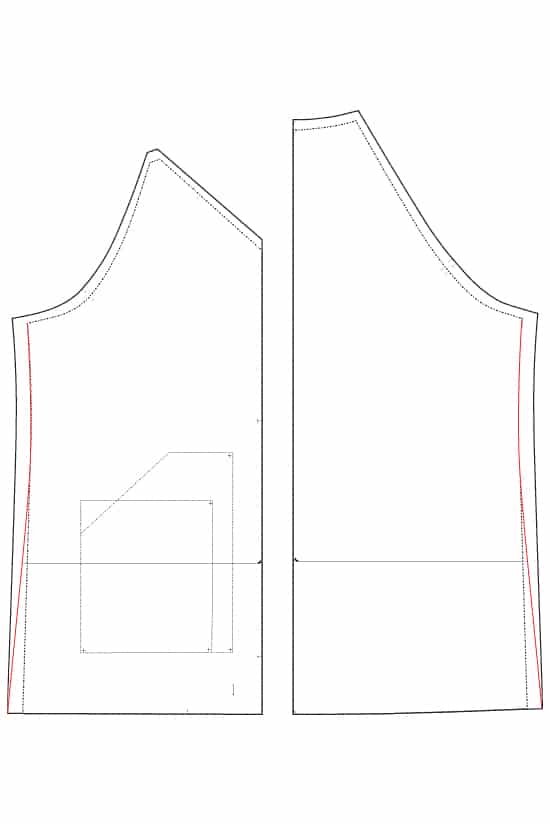 This example shows how to blend two sizes: blending from size 10 bust to size 14 hips.
– Print both sizes.
– Draw new side seams. Shown in RED.
– Make this same adjustment to the lining.
– Use the size 14 hem facings.
Adjust Shoulders
If you decide you would like more or less room in the shoulders, you can adjust the shoulder seam in the sleeves. I added a larger seam allowance so you have room to adjust the shoulders even if your jacket is already cut.
– If you have square shoulders, you can add more curve to the shoulder area. Shown in GREEN.
– If you have narrow shoulders, you can remove the curve in the shoulder area. Shown in RED.
Adjust Biceps
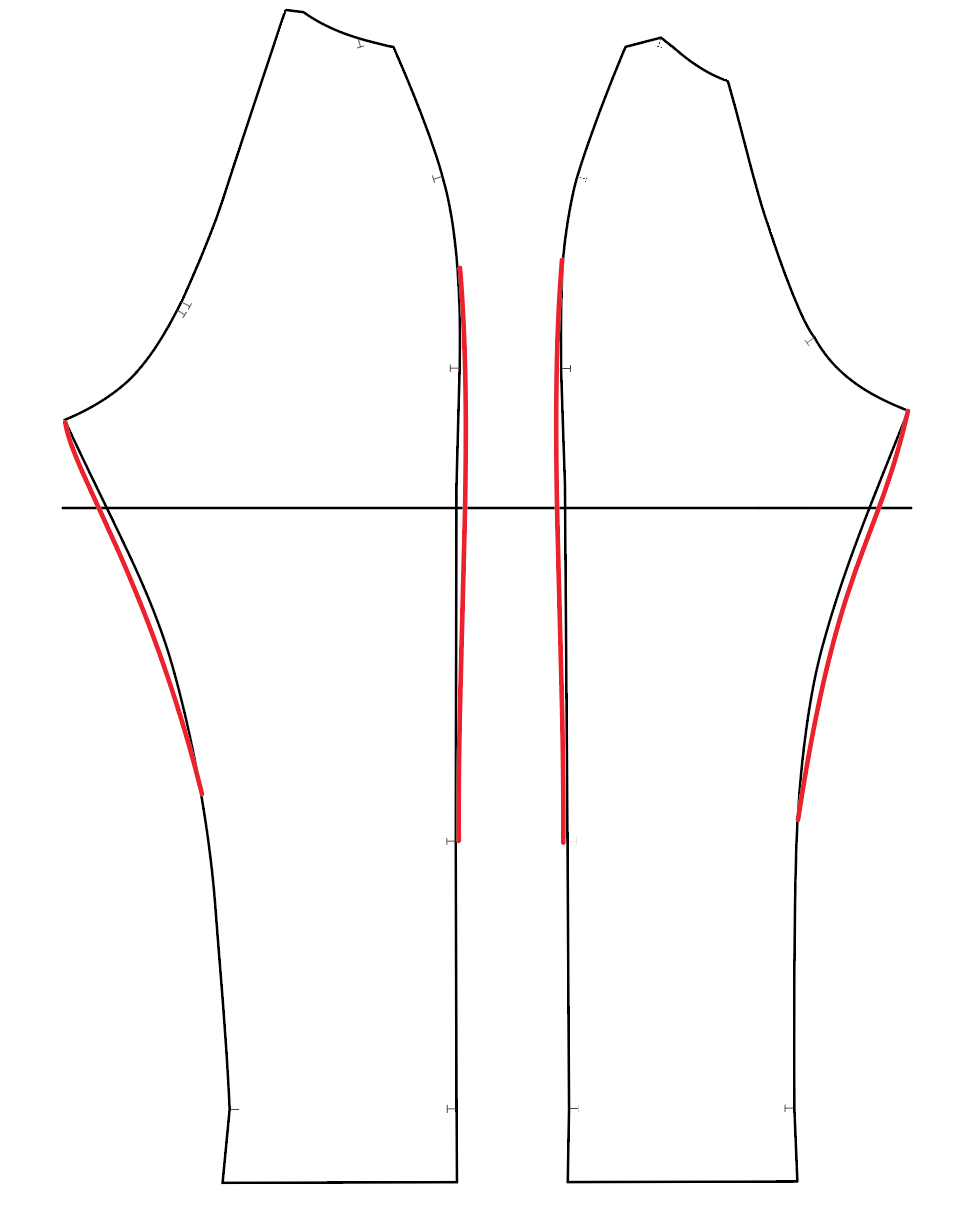
As part of our Nover 2021 update, we added a bit more ease through the sleeve. The Joy sleeve is intended to be slim, so make sure to check the bicep finished measurement.
We recommend at least 2″ (5 cm) of ease through your bicep but depending on how you plan to layer your Joy. You might want closer to 3″ (7.5 cm) of ease. To add 1″ (2.5 cm) more ease, we find that changing the sleeve curve at the bicep line is the easiest way to make this adjustment. Remember that the shoulder seam already includes 3/4″ (2 cm) seam allowances that you can reduce to 3/8″ ( 1 cm. Youu can add at least another 1/4″ (.6 cm) more ease at the underseam.
– Add more ease to the bicep area. Shown in RED.
If you need more than 1″ (2.5 cm) of ease in the bicep you may want to consider blending sizes with a larger size in the armhole and sleeve. In this case, you would also need to use the larger size for your hood or collar.
After you have tested the fit, you are ready to cut into your fashion fabric and prep all of the fusible pieces.
Joy Jacket Sew Along
1 Sewing Supplies || 2 Pattern Adjustments || 3 Cutting and Applying Fusible || 4 Prepping Drawstrings & Pockets || 5 Assemble Outer Main Fabric || 6 Assemble Lining || 7 Assemble Facing & Attach to Lining || 8 Set Zipper & Add Grommets or Buttonholes || 9 Bagging Lining & Finishing Details
Gabriela