
Hi, I am Alexis ( @myysweetsunshine ) and I am thrilled to be on the C & N Blogger Team and sharing with you my Orchid Blouse Tutorial. The tutorial will rundown how easy it is to transform the Orchid Dress pattern into a flowy blouse with a cute peplum skirt.


INSPIRATION
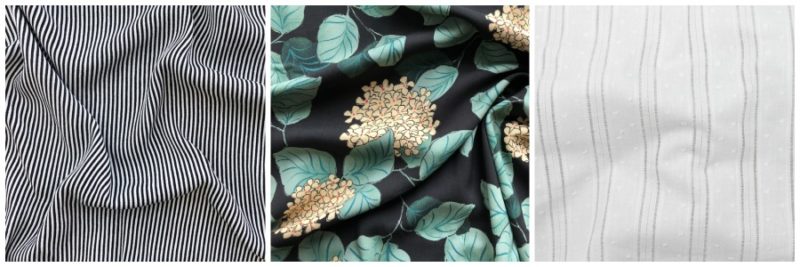
Here are a few RTW inspirations to get you thinking about what you could make! The top can be dressed up or down depending on the fabric you choose and how you style it. Cotton fabric leans towards everyday wear where is viscose fabrics will give a more dressed up feel.

FABRIC
I went bold with black and white stripe rayon from Stone Mountain & Daughter Fabrics. I used 1 1/2 yards but purchased 2 yards to be safe.
WHAT YOU WILL NEED
- Pattern – Chalk and Notch Orchid Pattern (the Fringe Pattern can also aid in drawing the darts on the back bodice)
- Tracing paper, ruler, pencil, and tape
- Paper weights
LET’S ADJUST OUR PATTERN
The Orchid pattern is drafted to be a dress with elastic at the waistline. In this tutorial we will transform it into a top length blouse with darts on the back bodice as well and three quarter length sleeves. Note: If you wish to have a blousier fit you can leave off the back darts and keep the back bodice pattern piece as is.
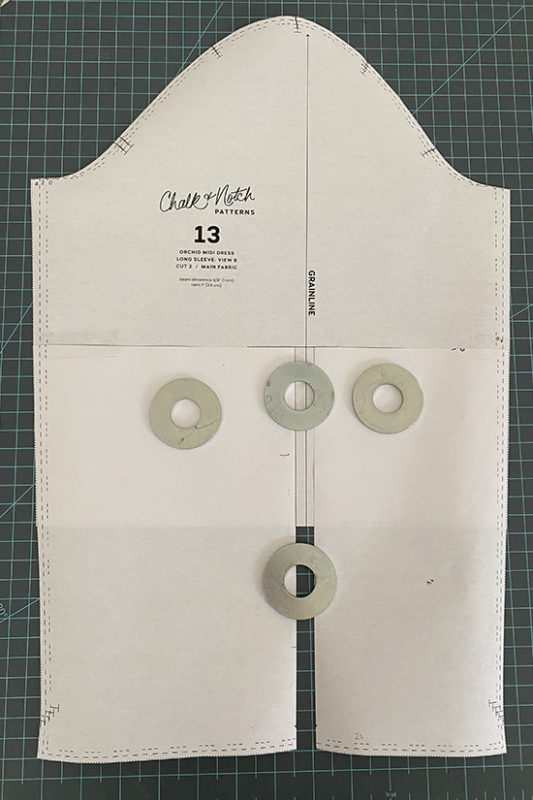
3/4 Sleeve Pattern Adjustment
First, let’s start with the sleeves. This is a very simple modification. Cut on the “shorten/lengthen here” line and shorten it by 5″. To keep the correct width, I also cut and slashed the bottom portion and realigned the top and bottom sleeves along the side seams, tape together. The sleeve hem will be slightly wider but that is ok since it’s finished with elastic.
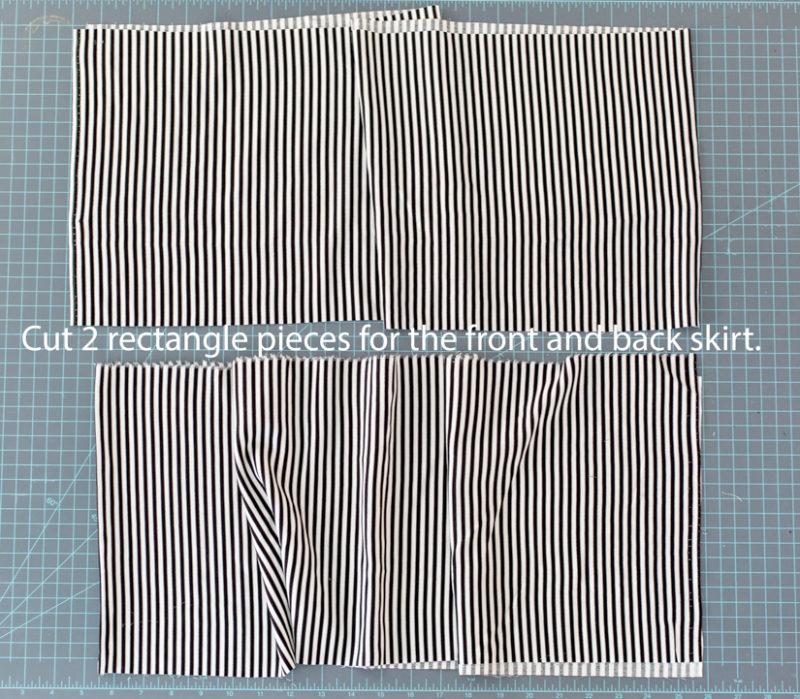
Draft and Cut Blouse Peplum
Next, to create the peplum skirt cut two rectangle pieces, 1.5 to 2 times the bodice width. The length will be cut at 9 1/2″. For example the size 4 I made was cut at 9 1/2″ x 36″.
Add Back Darts to the Bodice
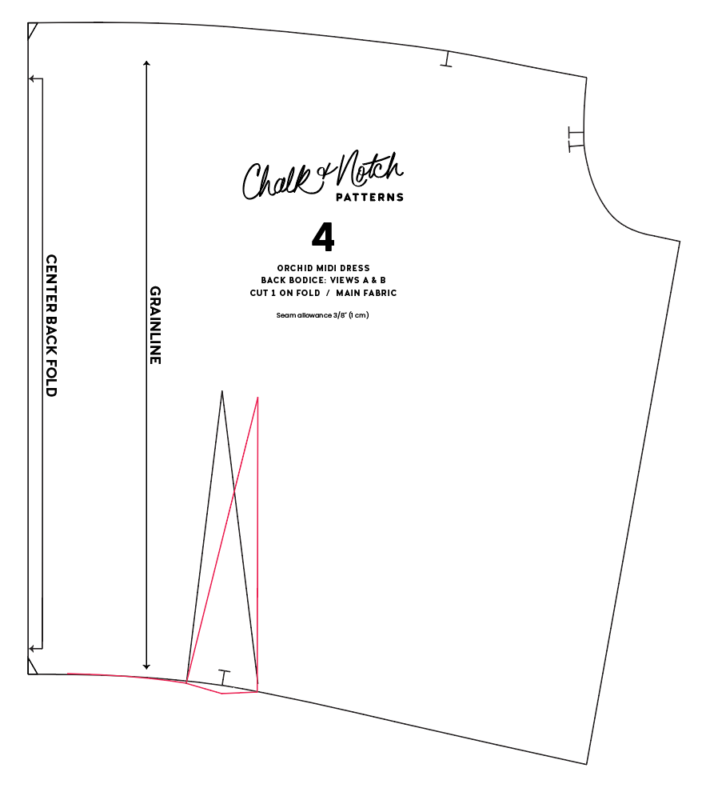
Lastly, we will create the dart on the back bodice. Adding darts to the back bodice gives the Orchid a tailored finish as well as taking in the excess fabric that is used for the drawstring waist. As mentioned above, The Fringe pattern can aid in drawing the darts on the Orchid back bodice pattern pieces. If you have the Fringe pattern lay the center back bodice pieces on top of each other and line up the center back bodice hem. You can see the Fridge outlined in RED. Transfer the Fringe back dart placement to the Orchid pattern.
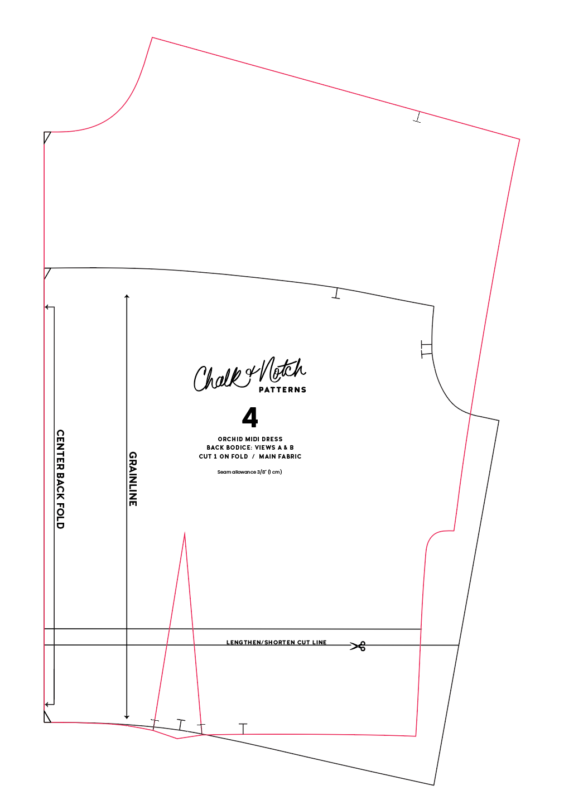
If you don’t have the Fringe pattern you can draft your own back dart on the Orchid pattern. Start by drawing a line 5″ (13 cm) long and parallel to the center back for the dart length. Draw this line at the back waist notch placement. Draw another line 1.25″ (3 cm) long for the width of the dart. Draw 5″ (13 cm) dart “legs” connecting your lines.
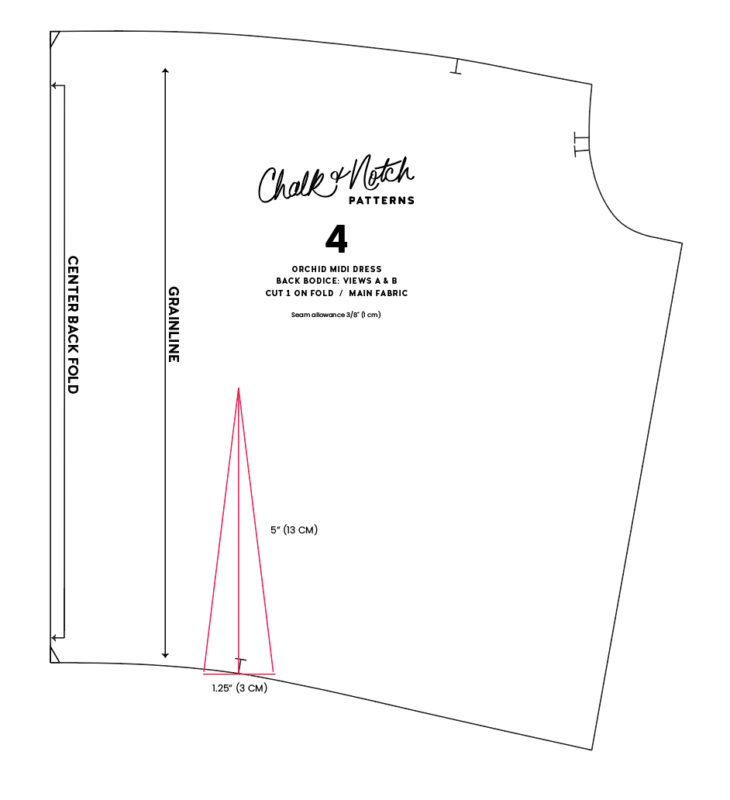
To true up the waist hem we are going to rotate the dart a bit, allowing the dart legs to maintain 5″ (13 cm) on each side and angle in slightly for a nice shape. Once you draw in your dart and true your hem (marked in RED) you are ready to cut & sew.
CONSTRUCTION
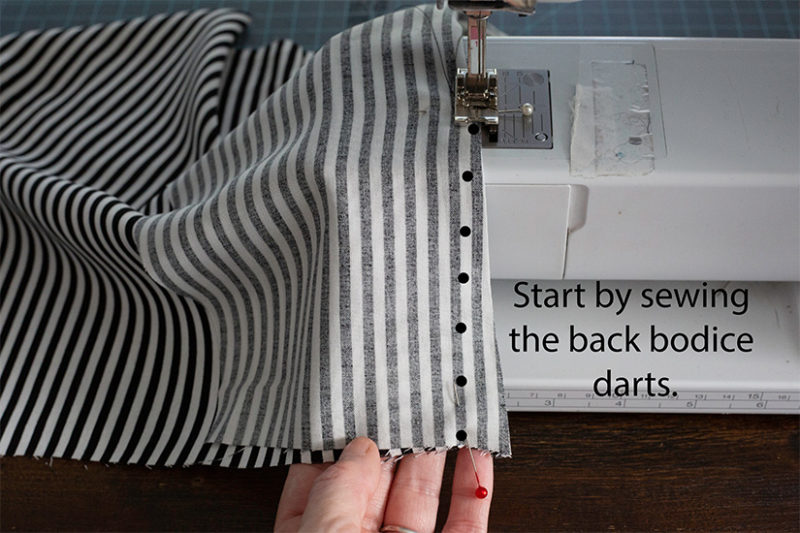
Construction is very straight forward. Prior to starting the construction for the bodice, sew both back bodice darts and iron them flat. Continue per instructions until the skirt construction.
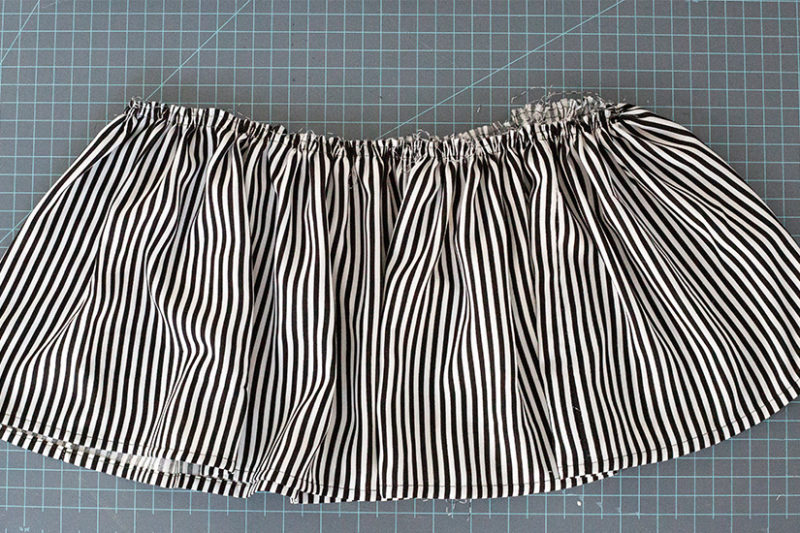
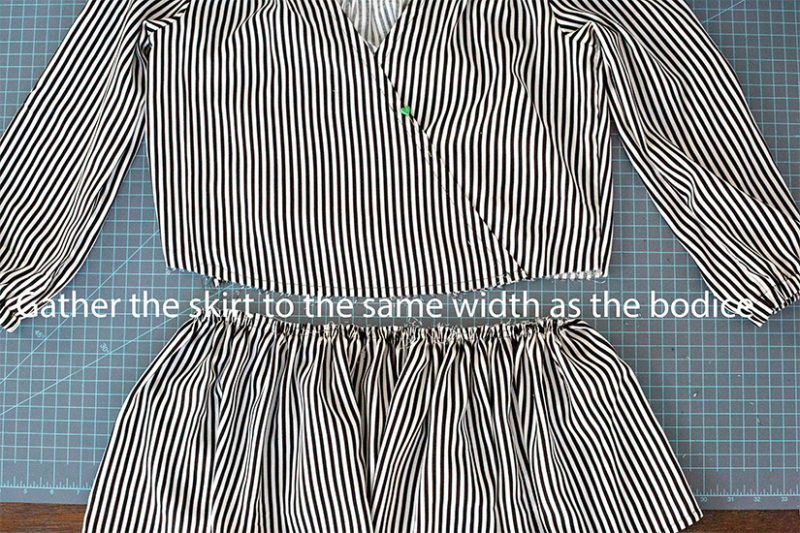
For the skirt construction: Sew both front and back skirt pieces together along the side seams. Run two rows of gathering stitches, 1/4″ and 1/2″ from the top edge.
Hem skirt: 1/4″ and then 1″.
Attach the skirt to bodice: Gather to the skirt to the same width as the bodice and pin. Sew along the pinned edge and finish the raw edges.
Sleeves: Constructed per tutorial
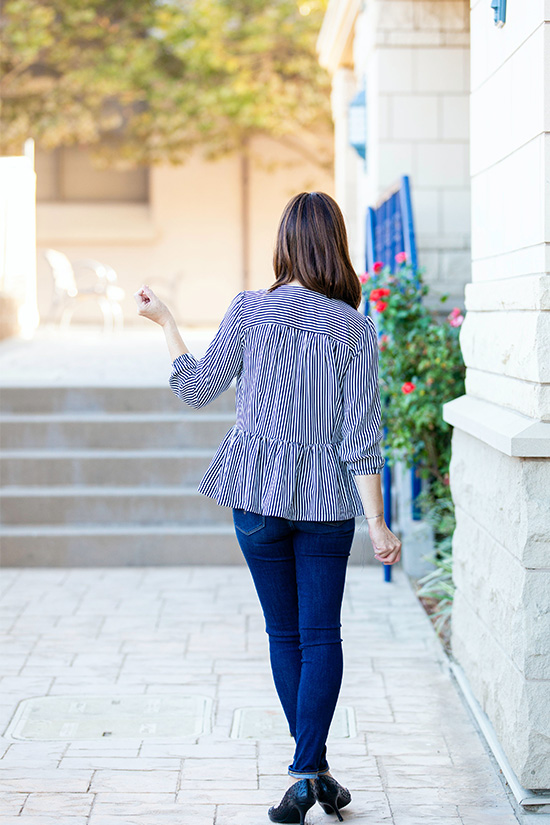
THE FINAL LOOK


Thank you to our sponsor Stonemountain & Daughter Fabrics for collaborating on this post. Use code: “chalkandnotch15” for a 15% discount (code is good through the end of the year and valid for a one time use per person).
