
Hey y’all! I’m Raven (@ravenmaureen_) and I have a blog over at ravenmaureen.com! Today I’m here sharing how I hacked my Orchid Midi to an Orchid MINI! The bodice is going to stay the same but for my second Orchid midi I decided I wanted it to be shorter and flirty!

Deets on the fabric:
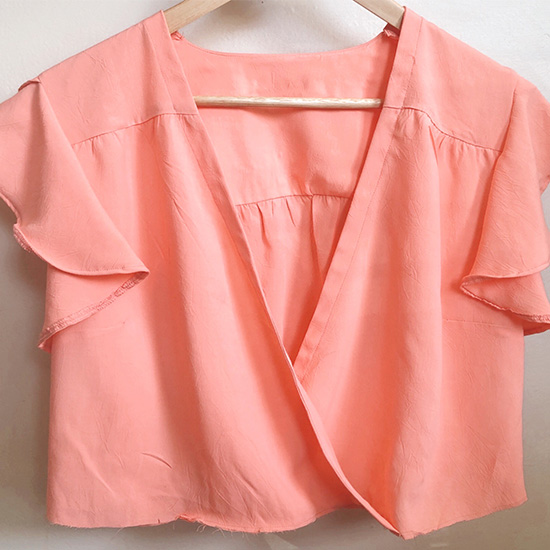
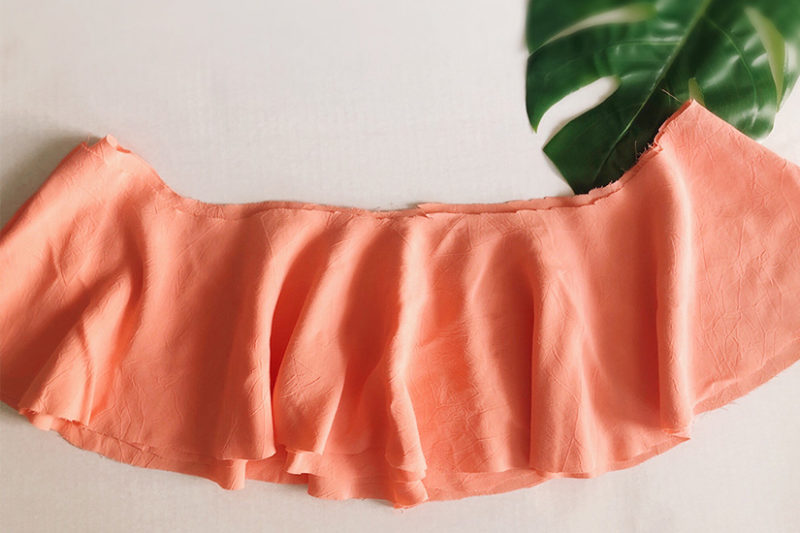
My fabric is from Harts Fabric! It’s a rayon challis. I believe I grabbed the end of bolt for this peach/salmon color, but honestly any challis (solid or print) will work for this dress. You will definitely want to choose a lightweight and flowy fabric so that the flounce will have a nice balance and volume.
Harts Fabrics has lots of gorgeous fabric options to choose from. PSST. There’s also a treat for all of you. Read to the bottom of this post for a Harts Fabric discount code.
You’ll need:
- Pattern or tracing paper
- French curve ruler and/or quilt drafting ruler
- Pencil
- Pattern weights
Let’s get started on drafting your new skirt pattern!
- I didn’t make any adjustments to my bodice and the drawstring. You’ll want to follow the pattern instructions for this part.
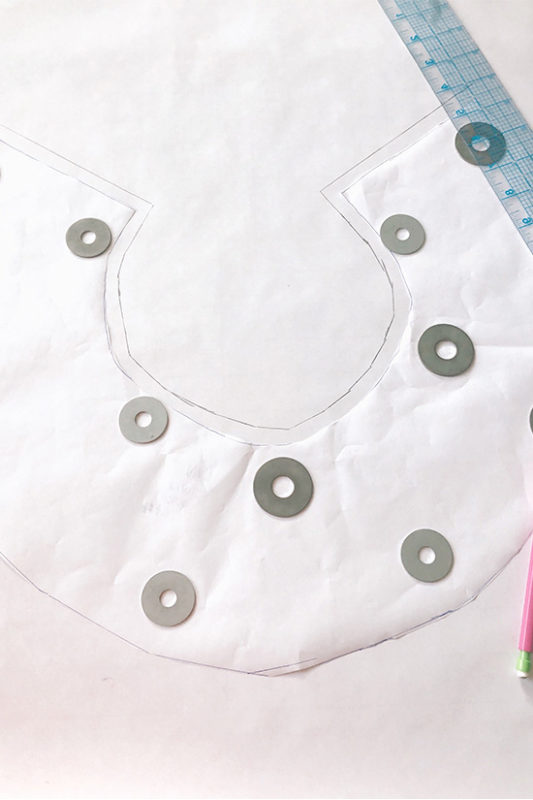
- Using your C+N Orchid Midi back skirt pattern piece you will redraw your skirt onto your pattern paper.
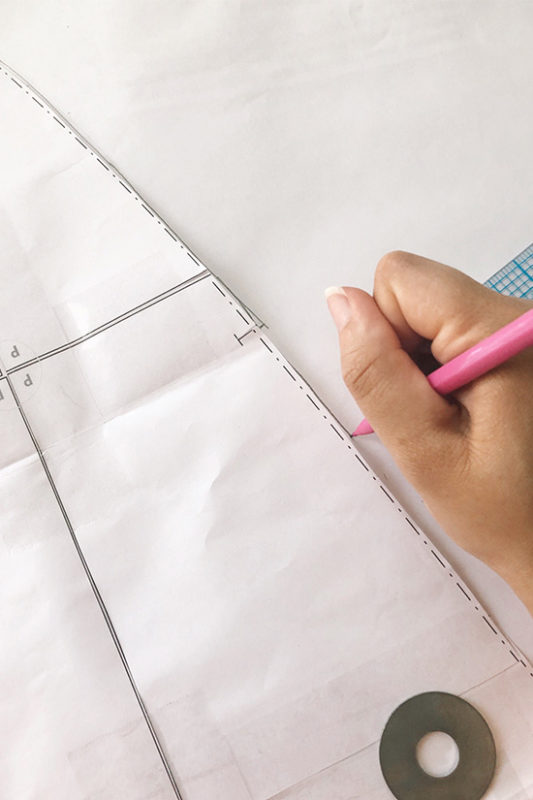
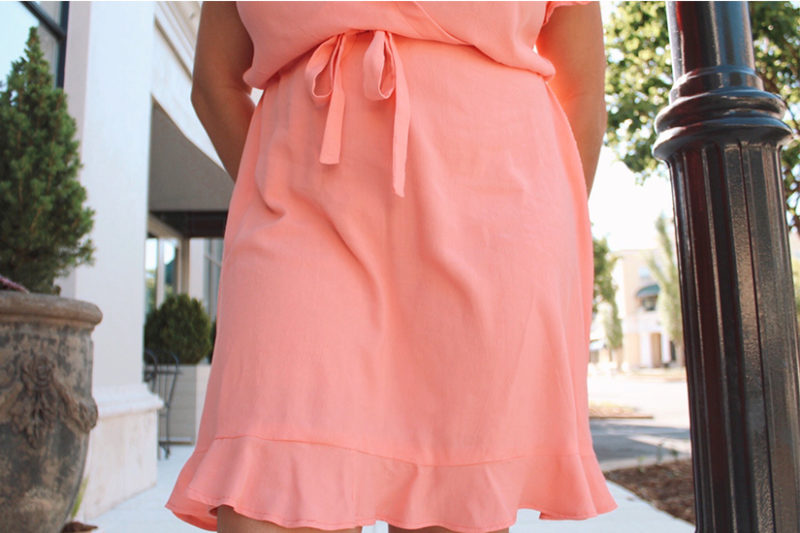
- Using a measuring tape, measure down from your belly button to your desired skirt length. I’m 5’1, mine was 17 inches. Yours might be shorter or longer according to your preferences and height.
- Draw a line at the bottom of your re-drafted skirt. Be sure to copy over all of your notches.
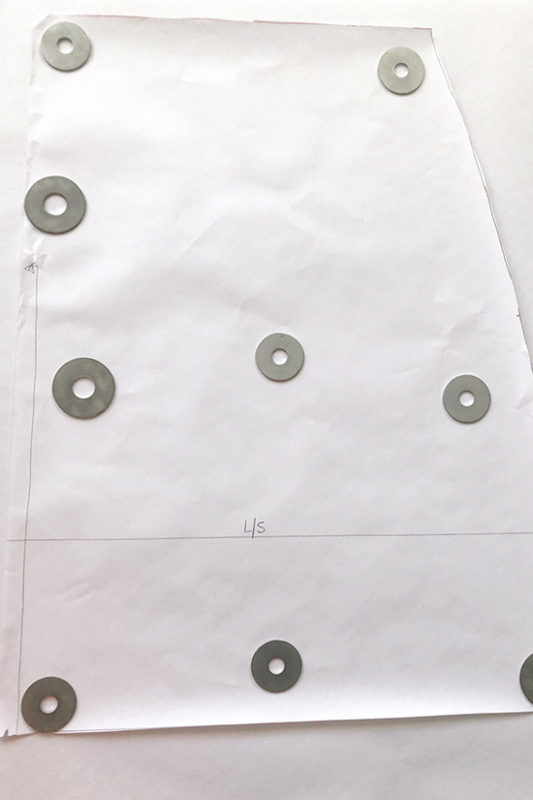
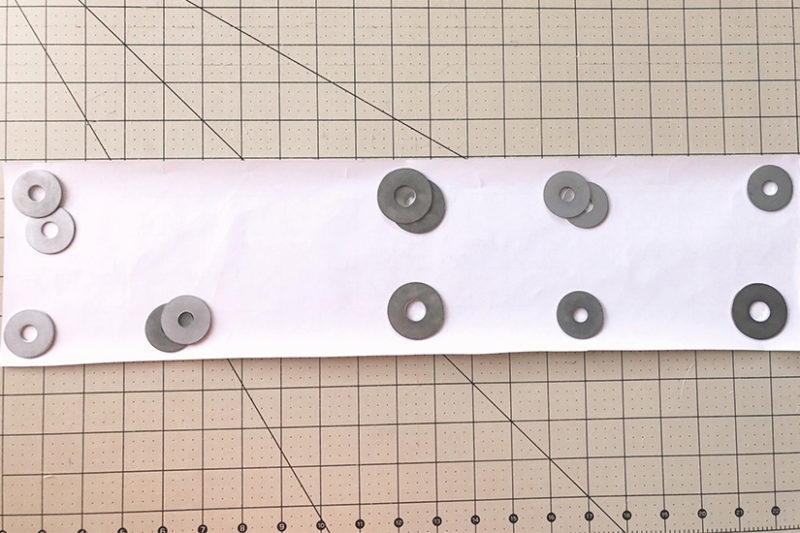
- This step is optional, but also recommended if you would like more volume in your skirt. Using the slash and spread method cut vertical slashes evenly across the skirt pattern piece. Note: When you slash and spread you want to cut each slash all the way to the top of the skirt, but avoid cutting through the waistline.
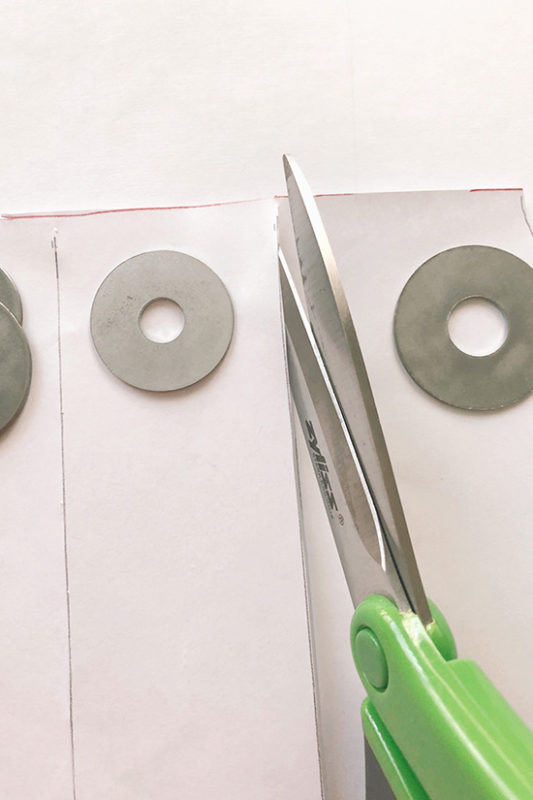
- At the bottom of your pattern piece you will want to separate the slashes evenly throughout. I made one inch sections, you can choose to make your sections larger or smaller.
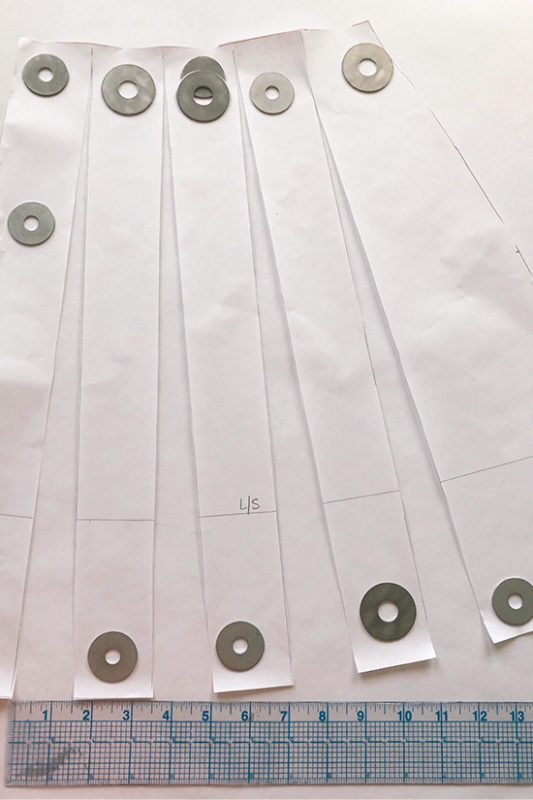
- Using your pattern weights and french curve ruler re-draft your skirt by tracing your slash and spread on a new piece of pattern paper.
- Voila! You have your final skirt pattern piece. Again, be sure to retrace your notches on your waist etc.
- Cut your skirt fabric. You should have 2 pieces cut on the fold.
How to make your flounce (optional):
- Measure the bottom hem of your skirt. Mine was 21 inches. Yours might be smaller or larger depending on how much volume you added in your slash and spread method.
- Create a rectangle using the length of your bottom hem by 5 inches.
- You will create volume again using the slash and spread method. I evenly distributed the slashes throughout my rectangle.
- As you separate the slashes evenly you will notice that your rectangle will begin to curve up into a half circle. That’s a good sign!
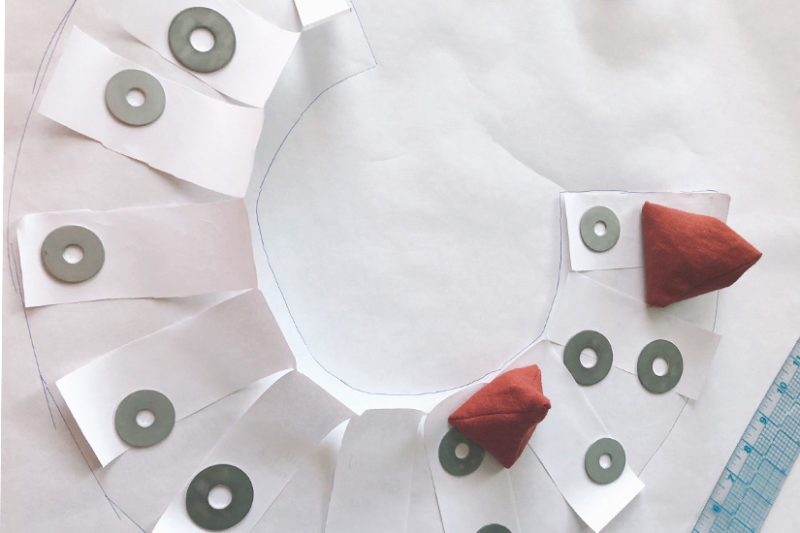
- Retrace your half circle onto a new sheet of pattern paper then add in your seam allowance. I used a 3/8 seam allowance.
- Cut 4 pieces of your skirt flounce.
Constructing your skirt:
- Sew your skirt pieces right sides together using a 3/8″ seam allowance. Finish your side seams using a zig-zag stitch or serger.
- Sew all of your flounce pieces together using a 3/8″ seam allowance. Finish your side seams using a zig-zag stitch or serger.
- Try your skirt on separately for fit and length. (Note: I cut my flounce by about 2 inches shorter since I wanted my skirt “above the knee”)
- Follow all instructions on your C+N pattern to attach your skirt and draw string to the bodice.
- Finish the seam connecting your skirt and flounce and iron the seam towards the skirt.
- Finish the seam on the flounce and use a narrow hem at the bottom.
- Give your dress a good press and you are finished!
The Final Look


Thank you to our Sponsor Harts Fabric for collaborating on this post. Use code “Orchid15” for 15% off through 5/31 (excludes sale, sunbrella, gift cards, and special order home dec).

