Sewing Tip | How to Hem Knits
We are going to talk about hemming knits in this sewing tip. We love sewing knits but know that sometimes that very last step of your project, hemming, can be a little daunting! There are many ways to get a professional-looking hem whether you are using a regular sewing machine or if you have a cover stitch machine in your lineup. We’ll show you our best pointers for sewing hems that don’t stretch out or pucker.
GATHERING SUPPLIES
You’ll need your cut fabric, pins, needles, thread, walking foot, and stabilizers. We’ll discuss options for needles and hem stabilizers next.

TYPES OF NEEDLES FOR HEMMING KNITS
When sewing with knits, choose a ballpoint or a stretch needle. Ballpoint needles have rounded tips and are designed to poke through the spaces in knit fabrics without cutting or damaging the threads. Stretch needles are most commonly used for spandex or lycra knits. If you are sewing with a ballpoint needle and seeing skipped stitches a stretch needle might be a better option for your fabric.
A great option for hemming knits is a ballpoint or stretch twin needle. A twin needle has one shank that attaches to the sewing machine, but then it divides off into two needles that sew at the same time. This needle sews two parallel lines of stitches with the upper threads and the bobbin thread zig-zags between the two threads on the bottom. The zig-zag is what gives this finish stretch so that you can pull on the garment without popping the hem.
Twin needles come in a few different widths. We’ll be demonstrating with a 4mm wide twin needle. This width looks similar to a hem on a store-bought garment and the wider space between the needles will also help reduce the chance of tunneling when you hem.

TYPES OF HEM STABILIZERS
Adding fusible hem tape to your fabric before hemming is a great way to keep the hemline from stretching, puckering, or waving. We recommend three types of stabilizers: hand-cut tricot interfacing, Heat n Bond Soft Stretch Lite, and tricot interfacing rolls.
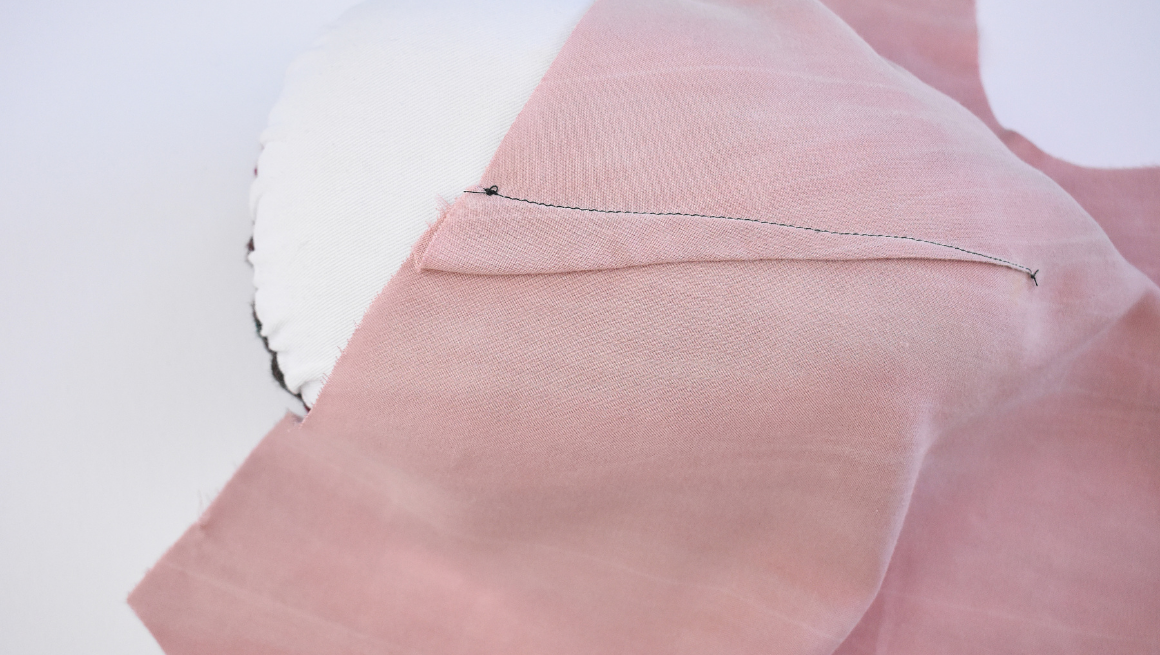
ATTACHING STABILIZER
Using a stabilizer in the hem allowance is a great way to keep the hemline from getting wavy or puckered when sewing. One option is to hand-cut tricot interfacing in strips the width of your hem allowance. Tricot interfacing rolls that are 1” wide are very convenient for knit hems, too. Fuse the interfacing to the hem allowance of your garment following the manufacturer’s directions. Fold the hem and pin in place before sewing.


Heat n Bond soft stretch lite is ⅝” wide fusible webbing that is double-sided and doesn’t require pinning. It won’t add bulk to your hems or put residue on your sewing machine needles. Iron the tape to the edge of your hem, paper side up, with no steam. At this point, you can fold the hem into place to press a memory hem.
Once the hem is cool, peel off the paper backing. Using steam, press on the memory fold and bond the hem into place.


WALKING FOOT
A walking foot is very helpful for hemming knits. Some machines come with a walking foot or have built-in features that mimic a walking foot. Other times a walking foot is a separate purchase. A walking foot has feed dogs on the bottom of the foot which work together with the feed dogs on the machine to feed the fabric through evenly. This helps so that the fabric doesn’t stretch out and hems don’t become wavy. Using the hem stabilizers discussed above will definitely help if you don’t have a walking foot for your machine.

TWIN NEEDLE HEM
When hemming with a twin needle, you’ll need to have two spools of thread. If you don’t have two spools in the color you need, you can fill a bobbin to use for your second spool of thread. Most machines have a separate thread holder that can be attached to the top or side of the machine and that is where you’ll put your second spool of thread. (If yours does not you can use two bobbins stacked on top of each other.) Thread one needle at a time so the threads don’t get tangled.

We recommend testing your twin needle on a scrap of fabric before you sew your final hem. The stitch length will determine how much the hem stretches. The longer the stitch the less stretchy the hem will be, so you may need to shorten the stitch length if the hem isn’t stretching enough.

If there is tunneling or a ridge of fabric between the two lines of stitching, you may need to lower your needle tension. Using a hem stabilizer and a wider twin needle can also help with this.


ZIG ZAG HEM
A zig-zag is a great, stretchy option for hemming knits. I prefer to use a 2.5 width and a 2.0 length for my zig-zag hems. Some machines have a more decorative 3 step zig-zag that can also be used to sew the hem. First, apply a hem stabilizer, then press the hem and pin in place. Zig-zag either from the front or from the inside of the garment. If you sew from the inside you can sew just over the raw edge to secure the hem. Just be sure that your bobbin thread matches your fabric since that is what will be visible from the outside.


LENGTHENED STRAIGHT STITCH HEM
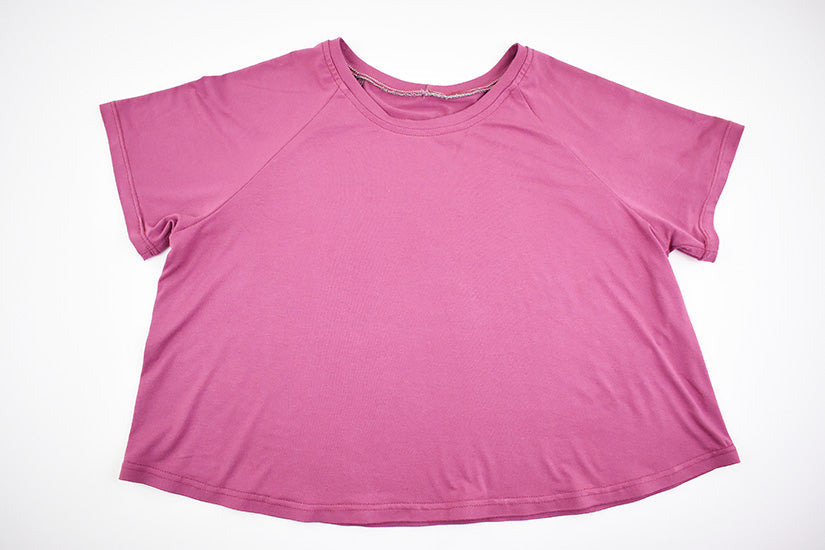
In a hem that doesn’t need to stretch, like the hem of the Waterfall Raglan or Pony Tank, a lengthened straight stitch can be used to sew the hem. First, apply a hem stabilizer. Then, if desired, overlock the raw edge before hemming. Sew the hem using a 3.5 or 4 stitch length.


COVER STITCHED HEM
If you have a cover stitch machine, this is an ideal way to sew the hems on your knit garments. A cover stitch machine can sew multiple lines of stitching on the top and a stretch stitch that resembles the stitches of a serger on the back. Begin by applying your hem stabilizer and pressing your hem in place. Pin if necessary. To stitch in the round, you’ll position your fabric under your foot and stitch around the hemline. Overlap your stitches by an inch or so at the end of the round.

To detach the garment from the machine, pull the upper threads away from the machine to create 2-3 inches of slack. Gently tug the fabric to the back of the machine.

Clip the threads and continue pulling the fabric away from the machine, which will pull the upper threads to the underside of the fabric. Tie off threads and cut.

Give your hem a final press with steam and you’re done!

