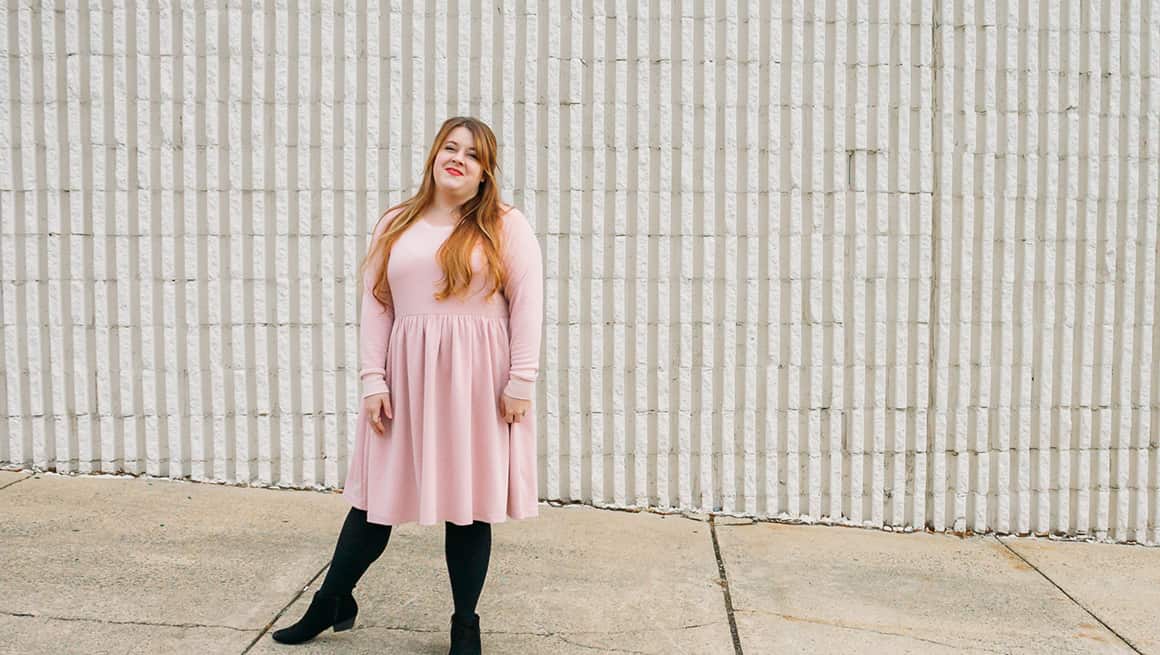
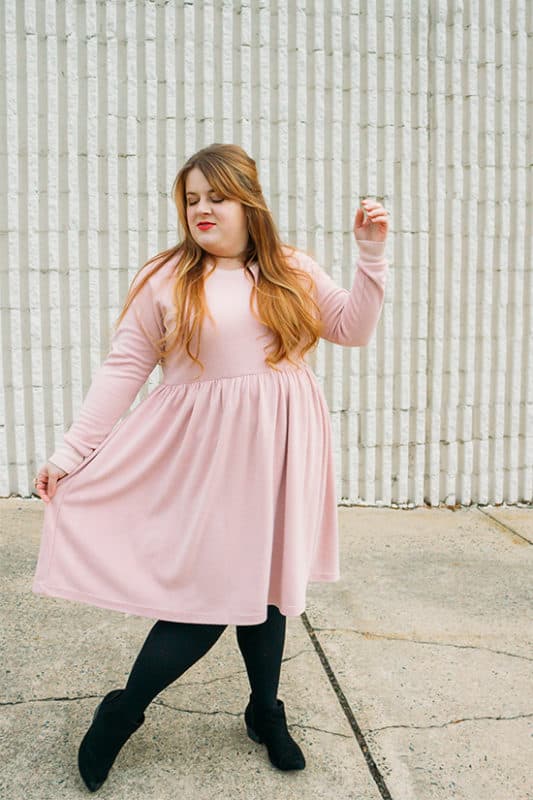
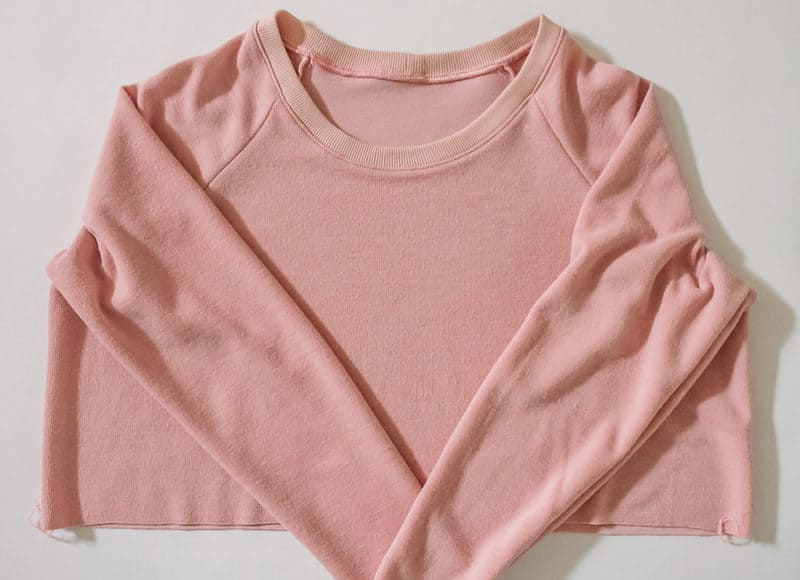
Hello! I’m Meg from MEGMADE Sewing, and I’m thrilled to be back on the Chalk & Notch blog sharing a tutorial for the Waterfall Raglan. Today I’ll be showing you how to change up the Waterfall with a gathered skirt and ribbed cuffs for a cozy sweater dress.
Inspiration
I first had the idea for this hack after looking at some sweatshirt dresses, particularly this raglan dress from Rylee + Cru’s AW2019 collection and this pink gathered sweatshirt dress (found on Pinterest):
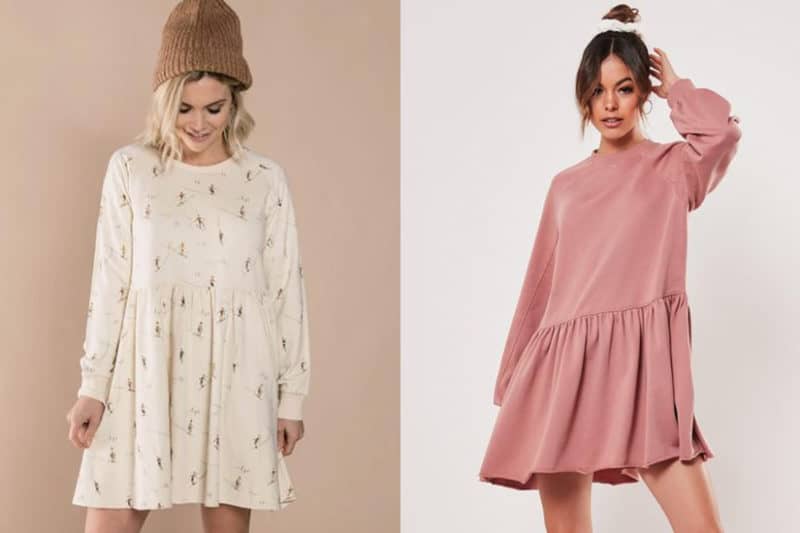
I really like the fit of the Waterfall Raglan bodice and sleeves and knew it would be a perfect base for creating my own version inspired by these ready-to-wear dresses. Instead of the more relaxed fit of a sweatshirt, I chose a slimmer fit for more of a sweater dress.

Fabric
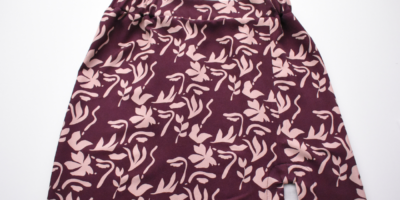
For my sweater dress I chose this beautifully soft sweater double knit in blush from Stonemountain & Daughter Fabrics. One side has a slightly ribbed sweater face, while the other side is a smooth jersey like you’d find on sweatshirting—this fabric basically splits the difference between sweatshirt and sweater! As a nod to the original sweatshirt style, I also chose a coordinating bamboo cotton rib knit for the neckband and added cuffs.

This dress would also look great in a french terry or bamboo + cotton fleece for ultimate coziness, or a more traditional sweater knit for a dressier version. I also think this style would be really neat sewn up in a print jersey, which would also be a cooler option for warm weather as well.

Now that we’ve talked fabrics, let’s get cracking with the tutorial!

For this tutorial you’ll need:
- Ruler and marking tool
- Your regular sewing supplies (scissors, thread, pins, etc)
- 1/4” elastic x your waist measurement
- Knit fabric — get the yardage for view B, plus an extra 1/2 yd
- Optional: 1/4 yd of separate ribbing for the sleeve cuffs and neckband
From the Waterfall Raglan pattern you will need these pieces:
- View A front
- View A back
- Long sleeve
- Neckband
*as a note, all seam allowances are 3/8” (1 cm), just like the original pattern
Pattern Adjustments

On the front bodice piece, mark your waist point. Mark 3/8” (1 cm) below your waist at the side seams and center back. Mark 3/4 (2 cm) below your waist at the center front to allow for more length for your bust. Depending on your bust size you may need more length at the center front. This is your new cut line.

Mark 1 1/2″ (4 cm) in from the bottom of the side seam. Taper the side from the underarm to the mark you just made to slim the bodice. Repeat for the back pattern piece. This is your new cut line.
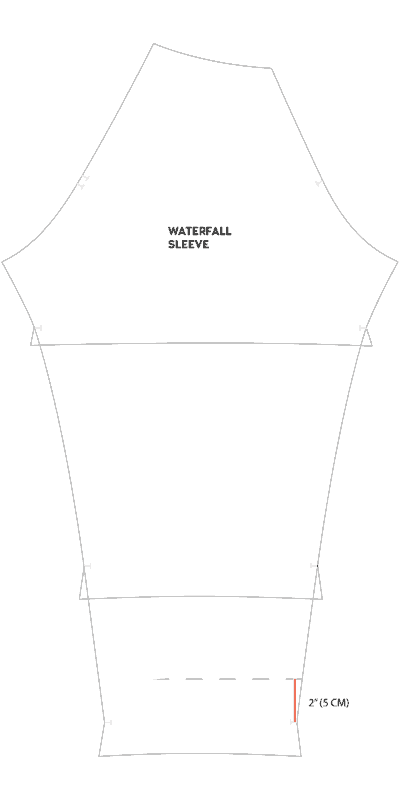
On the sleeve piece, remove 2” (5 cm) above the long sleeve finished hem mark. Remove the length from the hem rather than the shorten/lengthen line because we want the sleeve to gather a little into the cuff.

Measure your new sleeve opening and multiply this number by 0.8.
On a piece of paper, draw a cuff pattern piece that is (sleeve opening x 0.8)” by 6” (15 cm).
Measure the marked hem on your front bodice pattern piece and multiply by 2 to get the full bodice width. Multiply that number by 1.75 (or 1.5 for a less full skirt).
Measure the length from your waist to your preferred hem length, and add 1 3/8” (3.5 cm).
From your fabric, cut two rectangles that are (waist x 1.75) by (length + 1 3/8”), and cut out your adjusted bodice front and back pieces and sleeves.
Cut the neckband and cuffs out of ribbing or main fabric. *Note: I added 1/2” (1.2 cm) of width to the neckband piece for a wider finished neckband.
ASSEMBLE THE DRESS
Sew the bodice front, bodice back, sleeves, and neckband according to the pattern instructions. Topstitch the neckband, if desired.
Sew the side seams and mark the bodice in quarters.
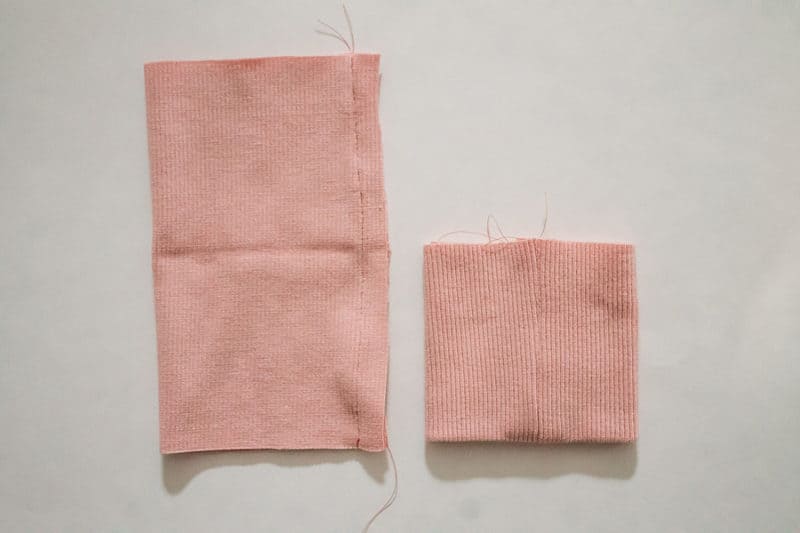
Press each cuff piece in half, wrong sides together.
Unfold, line up the edges parallel to the grainline right sides together, and sew.
Turn right side out and refold the cuff wrong sides together.
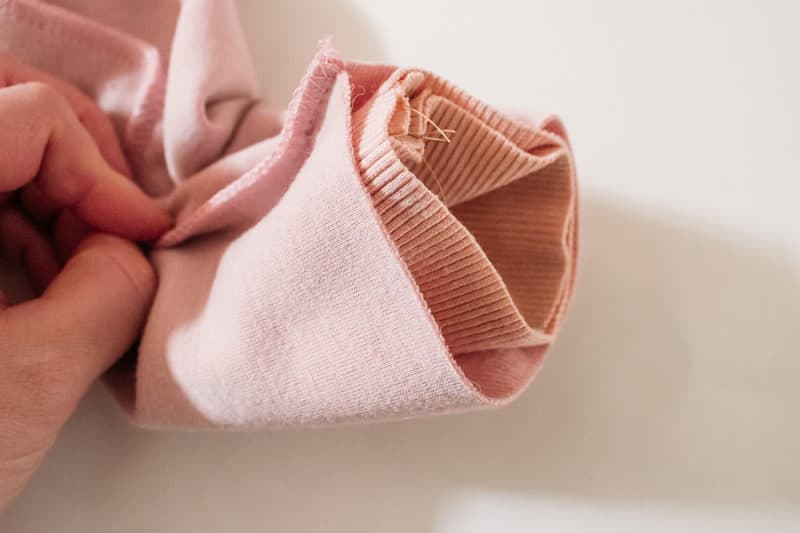
With the bodice wrong side out, insert each cuff into a sleeve and line up the seams.
Sew together, stretching the cuff slightly to fit.
Sew the skirt front and back panels right sides together along the shorter sides.
Next, sew two rows of basting stitches along the entire top edge, one line at 1/4” and the second at 5/8”. Mark the skirt in quarters.
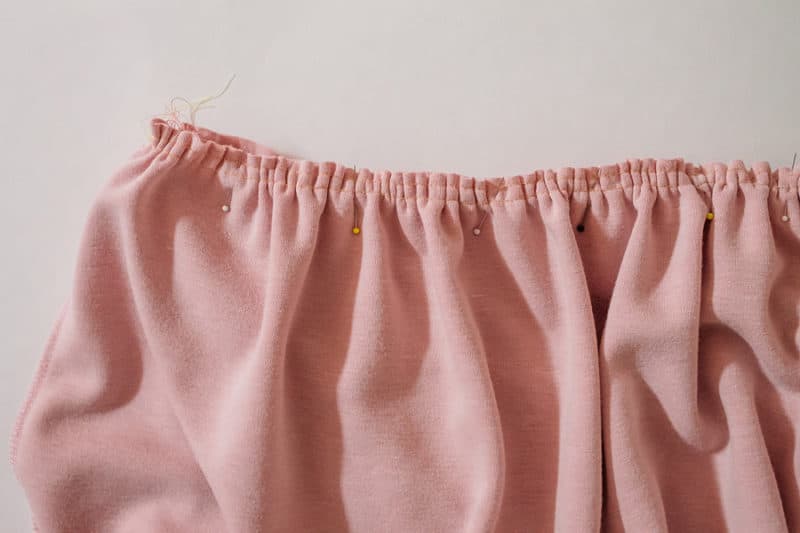
With the skirt wrong side out, place the bodice (right side out) inside the skirt and line up the quarter markings, and pin together.
Working in sections, gather the skirt to fit the bodice, making sure your gathers are evenly dispersed.
(Optional: secure the skirt to the bodice with a basting stitch to hold everything in place)
If you’re happy with the gathers, sew the skirt to the bodice and remove the basting stitches.
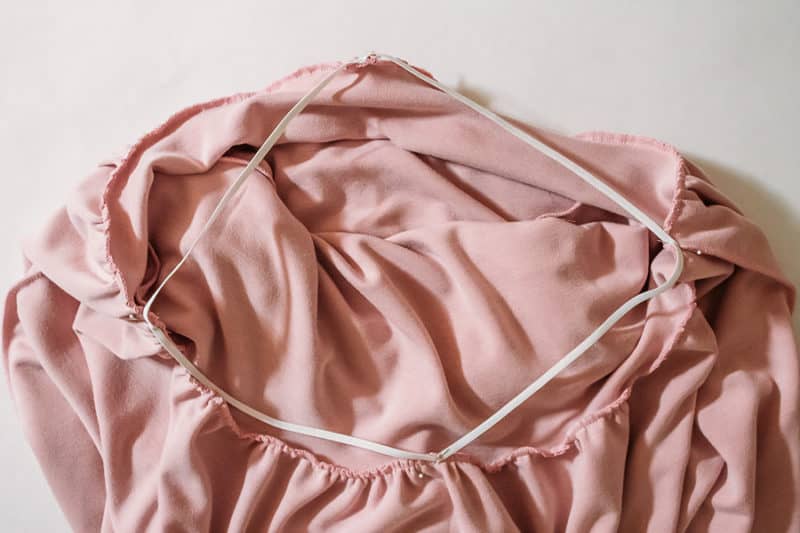
To counteract the weight of the skirt, measure and cut a piece of 1/4” elastic a few inches smaller than the waist seam of the bodice.
Sew the ends together to make a loop, and mark the loop in quarters.
Again, quarter the dress at the waist seam, and pin the elastic loop to the seam allowance only, matching the quarter marks.
Sew the elastic to the seam allowance only, using a zig zag stitch.
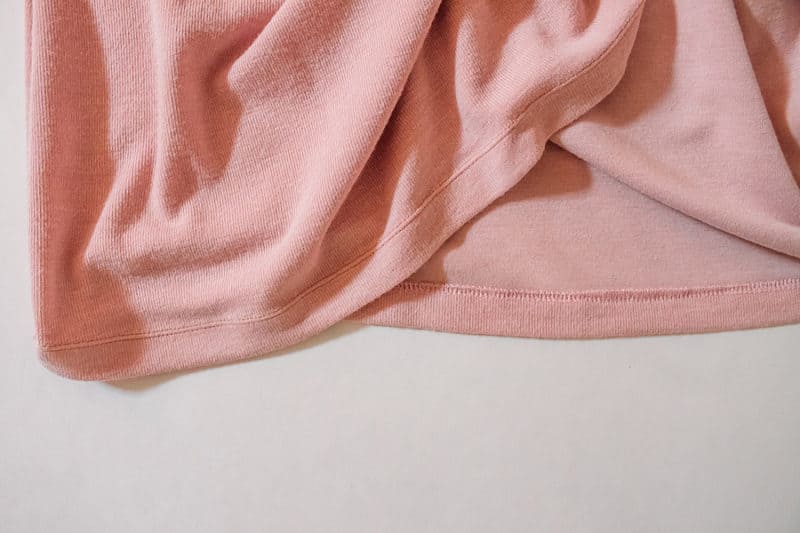
Wrong sides together, press the hem of the skirt up 1” and sew with a double needle or zig zag stitch.
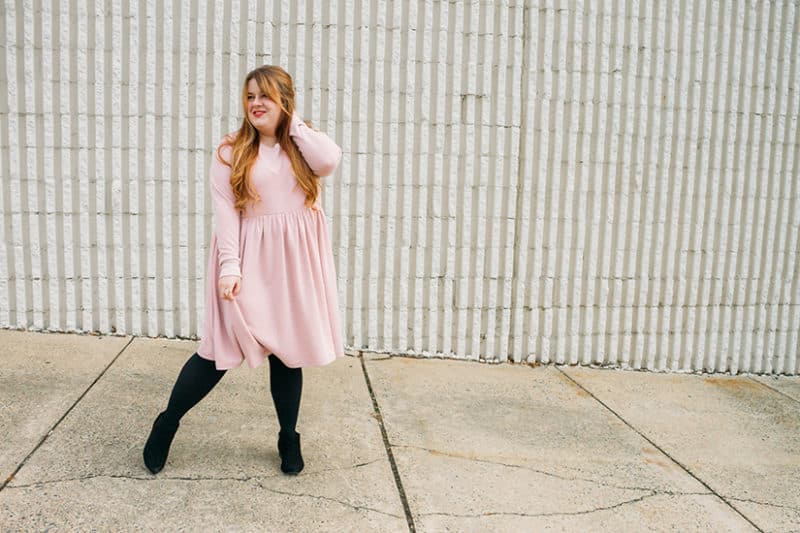
The Final Look
That’s it! Enjoy your new comfy sweater dress!

If you make a Waterfall Raglan sweater dress using this tutorial, I would just love to see it! Make sure to tag me with @megmadesewing on Instagram when you share your own dress hack. Thanks for reading along, and happy sewing!

Thank you to our sponsor Stonemountain & Daughter Fabrics for collaborating on this post. Use code: “chalkandnotch15” for a 15% discount (code is good through the end of the year and valid for a one time use per person).