
Hi sew-pals!! I’m Cassie, sewist and blogger behind Lily Shine Creates, and I am so thrilled and honored to be a part of the C&N Contributor Team. I adore Gabriela’s designs and how wearable the patterns are for this busy mom on-the-go! I got the opportunity to play with the Crew Trousers pattern and would love to share with you a quick and easy tutorial to recreate the look of these wide leg Crew Trousers.

Inspiration
Wide leg trousers are super trendy right now, especially with some great front detail and a high waist. The Crew trousers were the perfect starting point to sew up some wide leg trousers inspired by a few photos I found on Pinterest!
Check out the Pinspiration here

Fabric
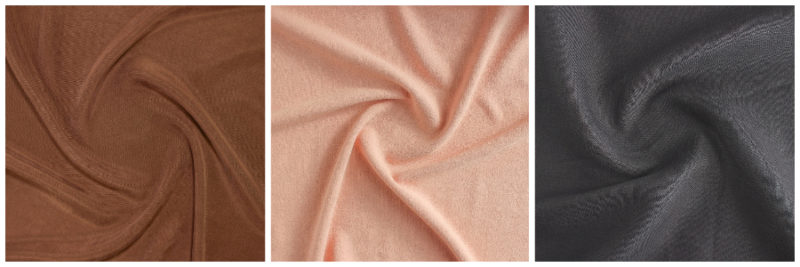
From the Pinspiration photos, I knew I wanted to use a light, flowy fabric for these trousers. Blackbird Fabrics always stocks the most gorgeous apparel fabrics, picking just one choice for the project took me quite some time! We finally settled on the Textured Rayon Cupro in Hazelnut. The fabric almost has a corduroy type of look but with such a smooth and silky drape. I love the flowy feel to the fabric and subtle sheen makes it look really chic.

Tutorial
Without further ado, let’s take a look at how I adjusted the Crew Trouser pattern to create these trendy and fabulous wide leg trousers!
What You Need:
- Crew Shorts & Trouser Pattern (print the Trousers pattern pieces. Do NOT cut out the trousers front and back yet, but assemble and tape the pages together for all pieces)
- Fabric of your choice (follow the pattern guidelines for fabric requirements. I did not need additional yardage for this adjustment)
- Straight Edge (I use a clear acrylic ruler)
- Tailor’s Chalk or other Writing Utensil

Pattern Adjustments
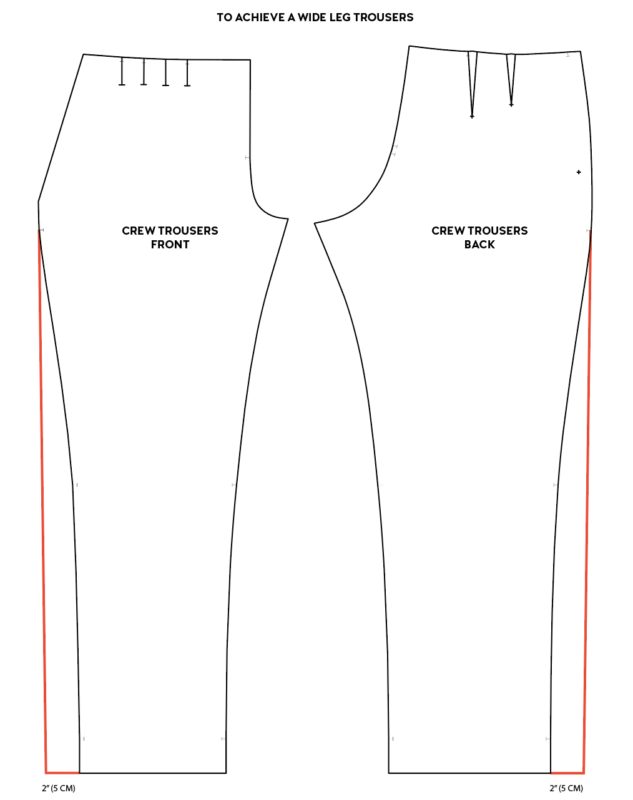
To create the wide leg trouser look, you will need to adjust your trouser front & back pieces. Starting at the widest point on the hip, draw a straight line down the outseams of the trouser front & back, adding about 2″ (5 cm) to the hem.
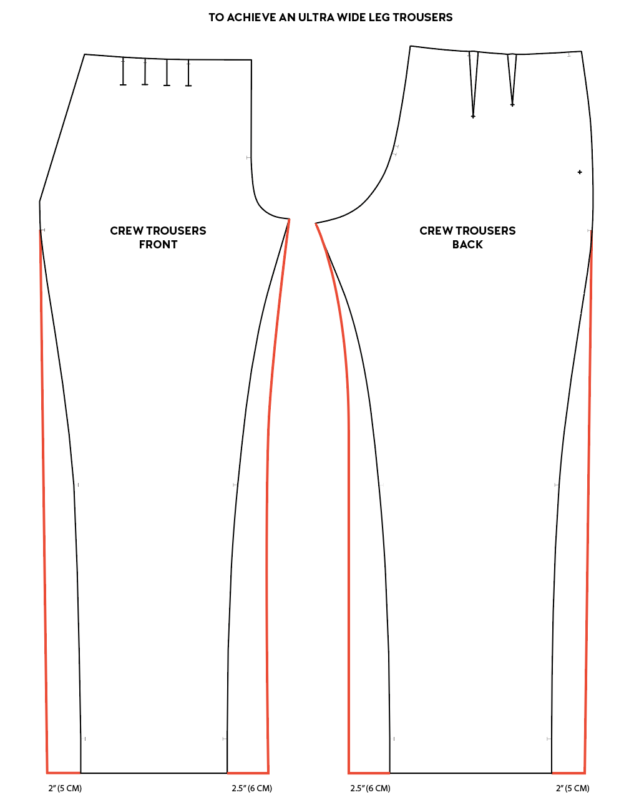
If you’d like to go ultra-wide, you can follow the same process for the inseam and add additional width to the trouser leg, adding about 2″ (5 cm) to the outseam hem and 2.5″ (6 cm) to the inseam hem. I chose to just adjust the side seam. For my version, I wanted a wide leg but not palazzo pant wide…it’s totally personal preference though!
Before you cut out your trouser front and back, measure the new outseam and ensure that both the front and back outseam measures the same. Make adjustments if not. If your outseams do not measure the same, the pants will not line up when you sew the front and back together.
I added 1” to the rise of the trouser front and back using the guide on page 10 of the tutorial and 1″ to the length of the pant leg to account for my height. Before making length adjustments, check the finished rise and inseam measurements and adjust accordingly.
Construction Adjustments
You’ll follow the tutorial exactly as it is written. Make adjustments to your pattern pieces for your height or blending of sizes as you would for any pants pattern. Easy peasy!

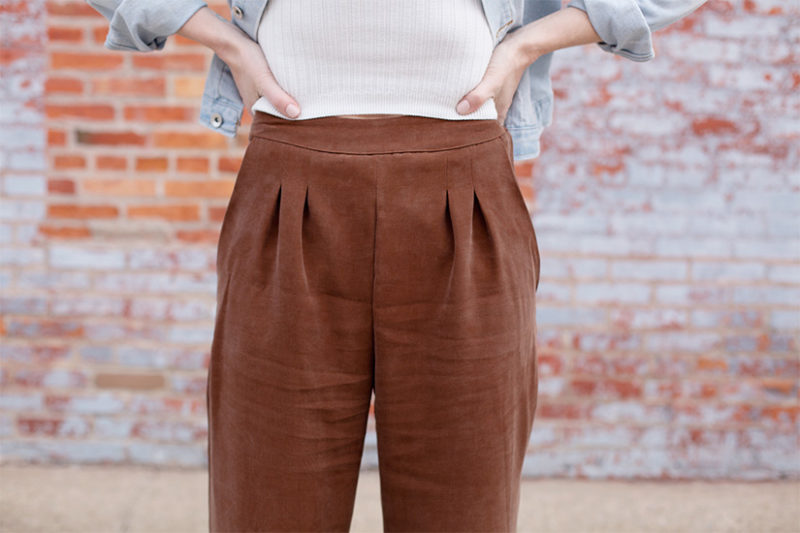
The Final Look
I hope you enjoyed reading about how you can recreate these fun wide leg trousers with the Crew Pattern. It’s amazing how a simple adjustment can make such a big statement!

I’d love to see your wide leg trousers if you sew up some Crews with this tutorial. Be sure to tag me @lilyshinecreates on Instagram so I can re-share! There is nothing better than seeing my own creativity come to life through another maker!
Thank you to our sponsor Blackbird Fabrics for collaborating on this post. Use code: “C&NCREW10” for a 10% discount valid through April 30th.
