Sewing Tip | How to Use a Seam Jumper
Is your machine having trouble sewing over thick fabrics or bulky seams? A seam jumper tool can help! This is a common issue when sewing patterns like the Den Jacket (shown in photos) the Isle Jeans or the Sun Tote, and here we'll cover three ways to use a seam jumper (also known as a 'Hump Jumper').
GATHERING SUPPLIES
To begin, you’ll need a few supplies:
- Sewing Machine
- Fresh Needles
- Pins
- Thread
- Seam Jumper Tool (You can find these in many local sewing shops, but they can also be purchased on Wawak here)

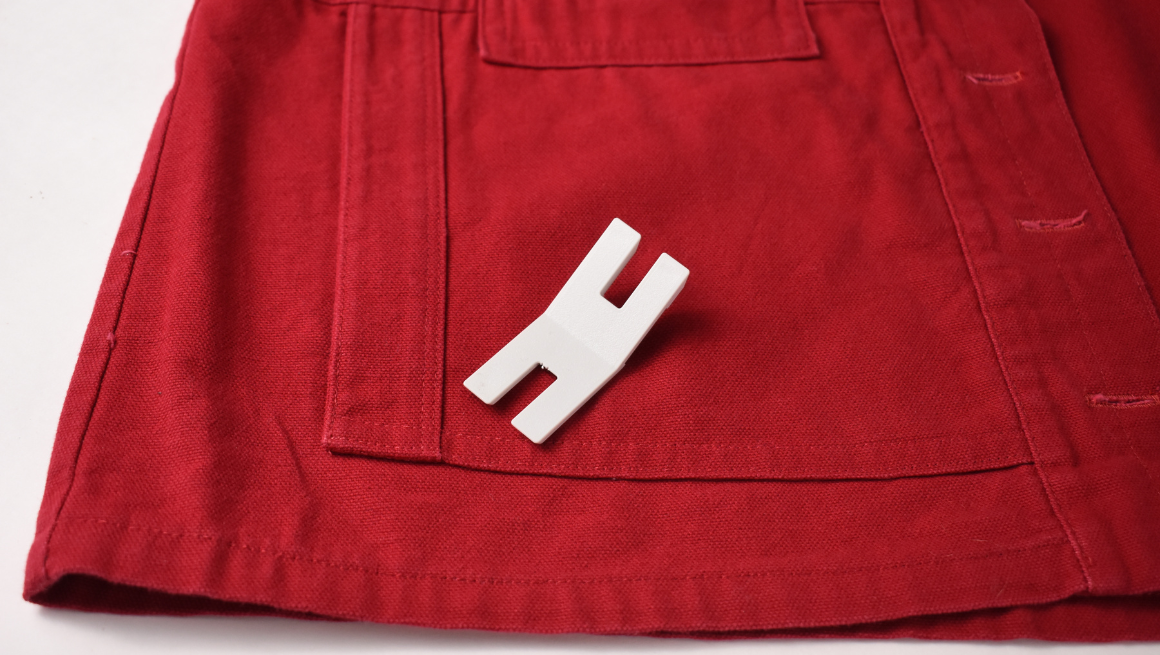
USING A SEAM JUMPER FOR TOPSTITCHING
First, we'll cover using a seam jumper to start topstitching the upper pocket on the Den jacket, but this can be applied to topstitching on a variety of projects.
- The seam jumper comes in from behind and goes under the presser foot with the needle centered in the open part of the tool.
- Begin sewing and backstitch as needed, being careful that the needle is still in the open part of the tool and won’t hit the tool.
- Sew forward a few stitches, lift the presser foot, and remove the seam jumper.
- Finish sewing the seam.

USING A SEAM JUMPER WHEN ATTACHING POCKETS
Often, a sewing machine may have difficulty stitching through the bulk when attaching pockets to a project. When using a seam jumper to help attach pockets, follow these steps.
- Put the seam jumper behind and position the needle at the top of the pocket. Be careful that the needle is centered in the open part of the tool.
- Backstitch as needed, being careful not to hit the tool with the needle.
- Sew forward a few stitches, then lift the presser foot to remove the seam jumper.
- Continue stitching to attach your pocket.

USING A SEAM JUMPER TO SEW OVER BULKY SEAMS
A seam jumper can be used in the middle of stitching to help sew over a bulky seam. Here, it’s shown going over the seam that attaches the top and bottom front bodice of the Den Jacket.-
- Stop sewing before the seam and lift the presser foot.
- Slide the seam jumper under the presser foot.
- Lower presser foot and begin sewing.
- If needed, lift presser foot and move seam jumper forward along the seam.
- When finished, lift presser foot and remove seam jumper.

That's it! For more sewing help, click here to check out all our Sewing Tips, or find our entire library of apparel sewing patterns here.
%20the%C2%A0Isle%20Jean...)