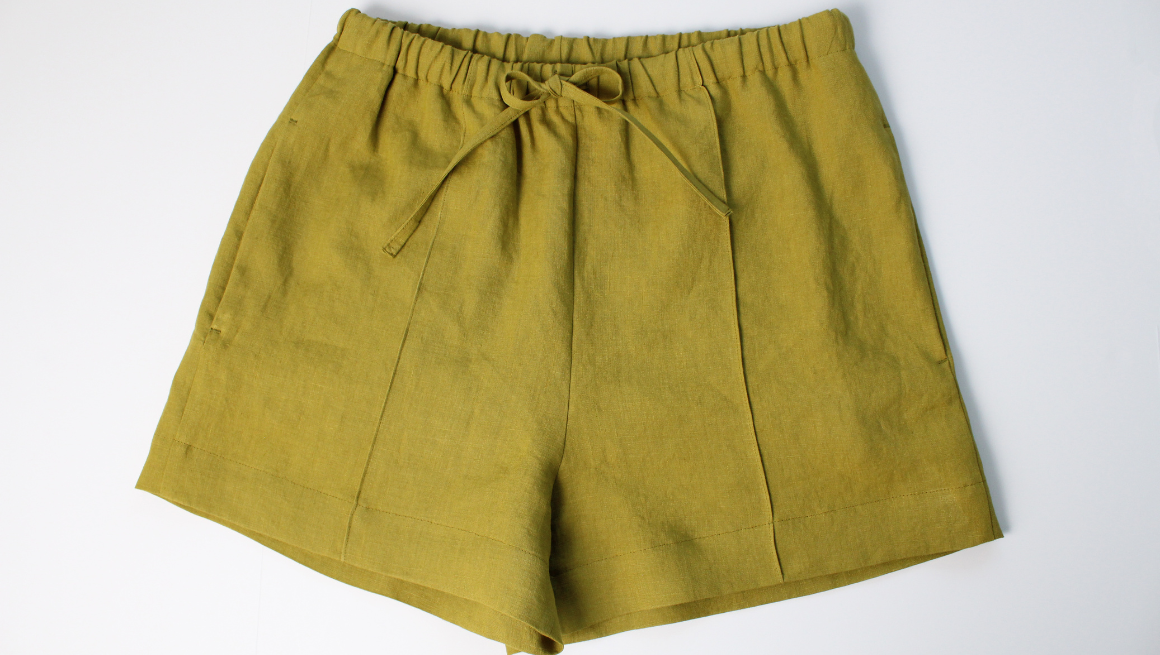
Reya Sew Along | Sew the Waistband & Hem
In this post, we will finish the Reyas by sewing the waistband and the hem! You are so close to finishing.
PREP THE WAISTBAND CASING
Prep the waist casing by stitching a fold guide just under 3/8” (1 cm).

Press the waist casing down 3/8” (1 cm), wrong sides together.

Fold the waist casing down again, this time at 1 1/4” (3 cm) to mark the casing width. If omitting the drawstring and buttonholes, skip to the step below labeled: SEW THE WAISTBAND CASING.

SEW THE BUTTONHOLES
With the waistband pressed and folded, confirm the buttonhole placement is correct. The buttonholes should be set in the middle of the 1 1/4” (3 cm) wide casing and 1/2” (1.25 cm) away from the center front seam. Adjust if your marks are no longer in the correct spot. Open your waistband folds and sew the 1/2” (1.25 cm) buttonholes. You can set grommets instead of buttonholes if you prefer.

SEW THE WAISTBAND CASING
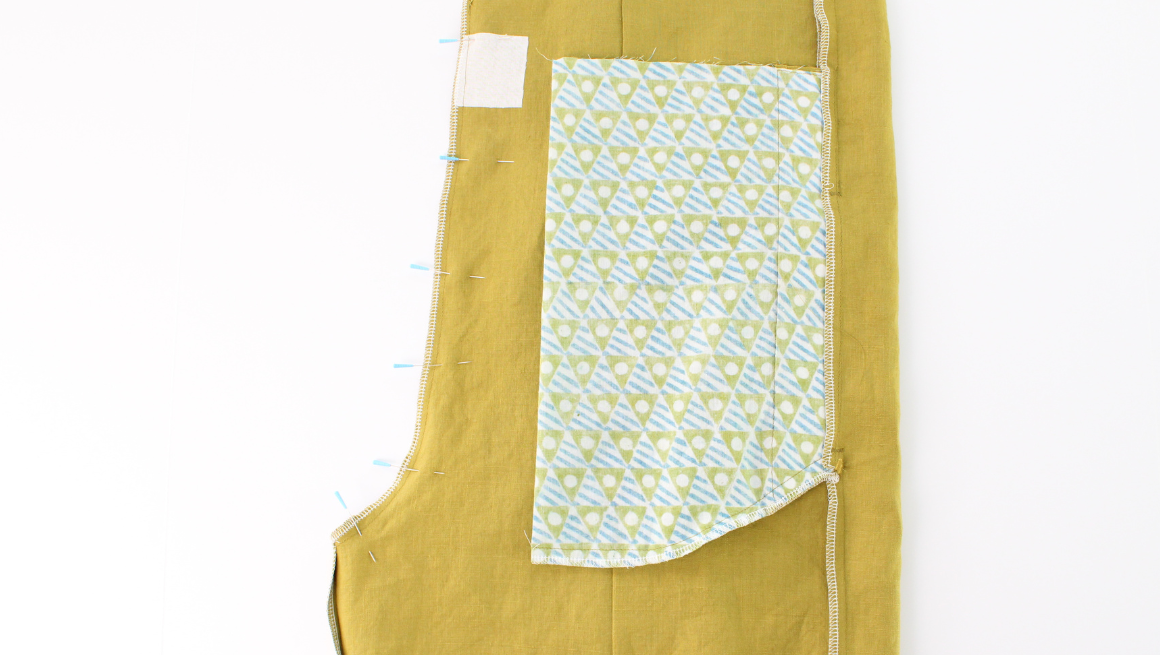
With the wrong side out, fold the waist casing at the pressed lines. First at 3/8” (cm) and then at 1 1/4” (3 cm). Make sure your side pockets are lying toward the front and are enclosed in the casing.

Pin and edgestitch the waistband casing in place. Leave a 2” (5 cm) gap at the back to insert the elastic.

INSERT 1” (2.5 CM) ELASTIC
Cut your waist elastic 1” (2.5 cm) longer than your natural waist measurement. Add safety pins to both ends. Thread the elastic through the back casing opening, being careful not to twist it.

Overlap the edge by 3/8” (1 cm) and pin in place. Try on your pants or shorts. Once the elastic length is confirmed, secure the elastic with a zig zag stitch.

Edgestitch the opening of the casing to enclose the elastic.

INSERT THE WAIST DRAWSTRING
Add a safety pin to one end of the drawstring. Thread the drawstring through the buttonholes or grommets and in the waistband casing. Pull it through so it's even.

HEM
Try on your pants or shorts to confirm the hem length. Prep the hem by stitching a fold guide just under 3/8” (1 cm). Press the hem up 3/8” (1 cm), wrong sides together. With the pants or shorts wrong side out, fold the hem edge up 1 5/8” (4 cm). Pin and edgestitch the hem in place.

FINAL PRESS
Give your Reya Pants or Shorts a final press!

Reya Sew Along Posts: Getting Started | Prep Pattern & Sew the Drawstring | Sew the Pin Tuck | Sew the Back Pockets | Sew the Side Pockets & Side Seams | Sew the Inseams & Rise | Sew the Waistband & Hem