Isle Jean Sew Along | Getting Started
We are happy to bring you a sew along for the Isle Jeans pattern. We will be sewing the wide leg view since the construction is the same for each view. The sew along features step-by-step photos for the entire sewing process to help you sew an amazing pair of jeans! In addition to the sew along, we also have community-lead sewing support in our Facebook group, or you can email us directly for additional support.
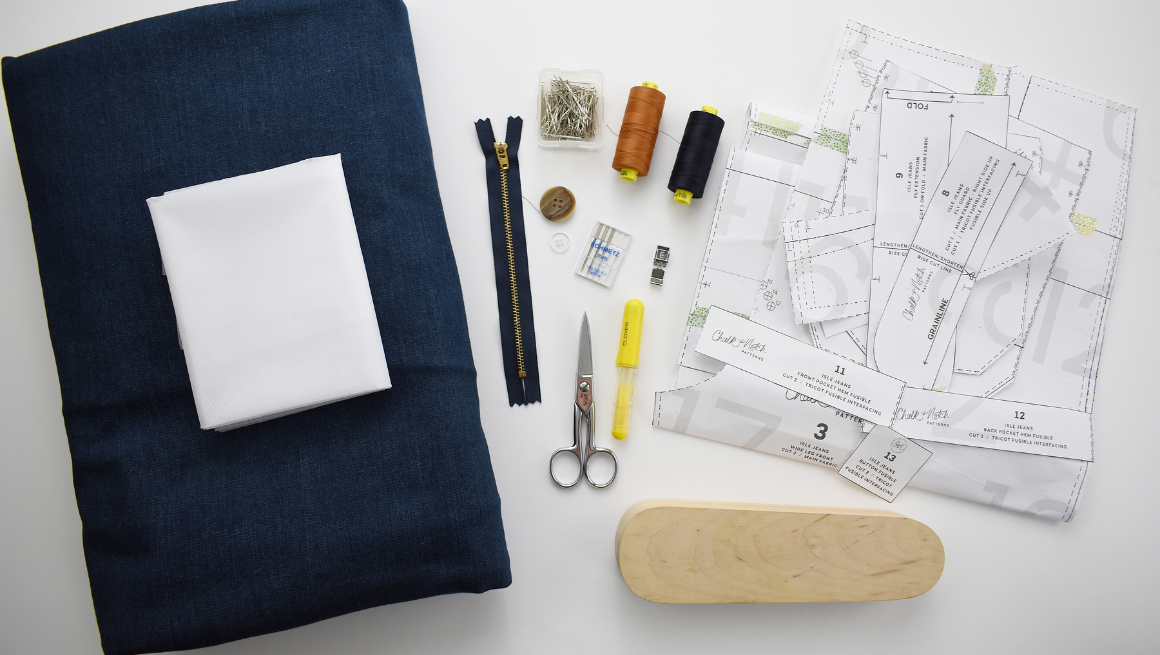
GATHERING SUPPLIES
Before we begin sewing, here's what you'll need for your Isle Jean:
- The Isle Jeans pdf pattern in your correct size.
- Washed and pressed fabric with 10%-15% stretch. If you'd like more inspiration and links to fabric and notions, check out our Isle fabric post here.
- 1/4 yd (1/4 m) Tricot Fusible Interfacing.
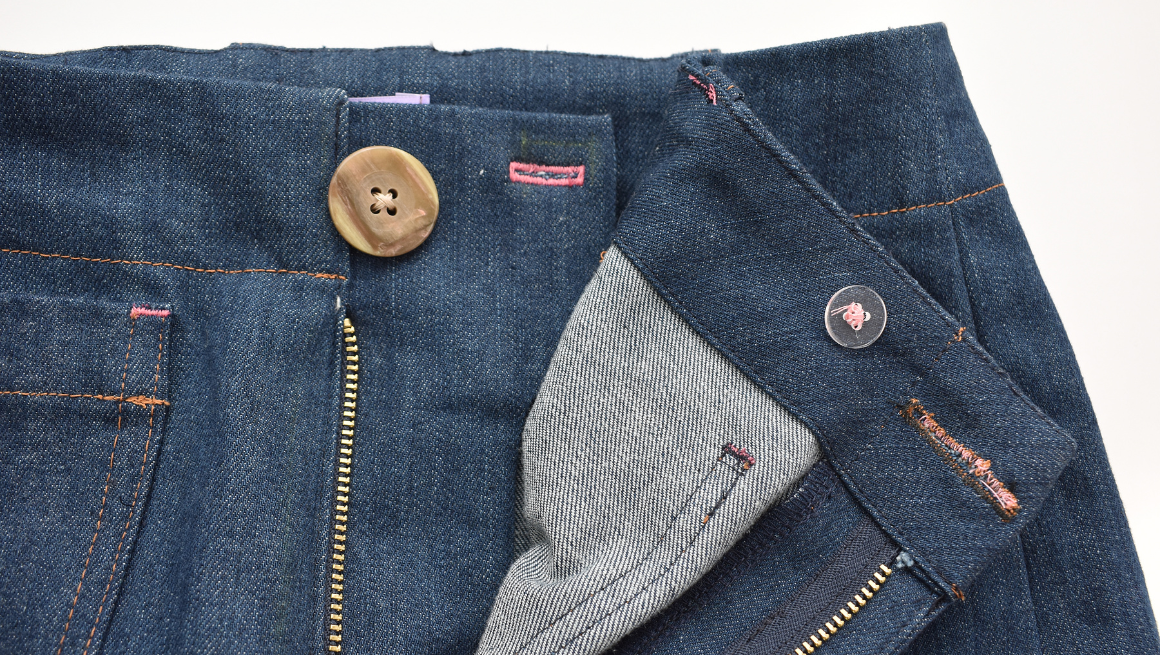
- One 1” - 1 1/8” (25 - 28 mm) Button
- One 1/2” (12.7 mm) Button
- #4.5 Jeans Zipper
- Zipper Foot
- Denim Sewing Needle
- Tailor's Chalk or washable fabric marker
- Thread
- Pins
- Thread Snips
- Topstitching Thread is optional
- Tailor's Clapper is optional

TIPS FOR CUTTING
When cutting your fabric and pattern, here are a few important notes to remember:
- Your fabric should be pre-washed the same way you plan to launder your garment.
- Read the information on each pattern piece.
- Grainlines are indicated on the pattern pieces. Place pattern pieces on the grainline, parallel to the selvage or fold.
- If the pattern says “Cut 2,” the pieces are mirror images of each other.
- If the pattern says “Cut on FOLD,” place the pattern edge exactly along the fold of the fabric.
- Clip all notches at 1/4” (0.6 cm) or less.
- Transfer all pattern markings to your fabric with a washable marker or chalk.
CUT LISTS FOR ALL VIEWS


- #1 - FLARE LEG FRONT - CUT 2 or #3 - WIDE LEG FRONT - CUT 2
- #2 - FLARE LEG BACK - CUT 2 or #4 - WIDE LEG BACK - CUT 2
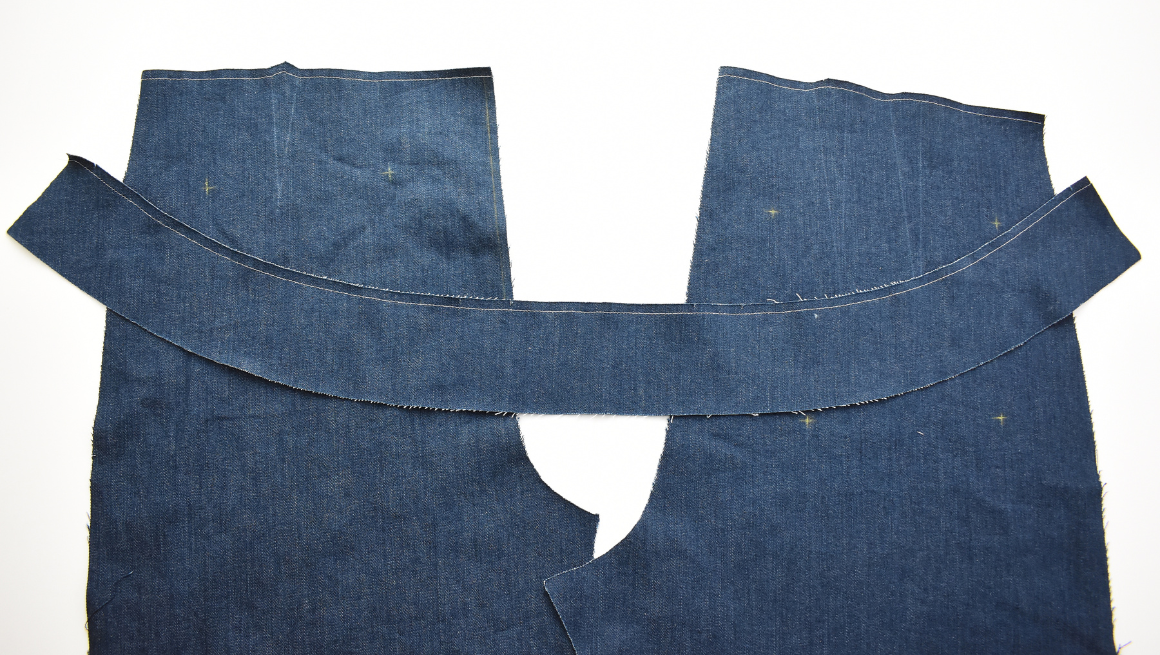
- *#5 - WAISTBAND FACING - CUT 1 ON FOLD
- #6 - FRONT POCKETS - CUT 2
- #7 - BACK POCKETS - CUT 2
- #8 - FLY GUARD - CUT 1
- #9 - FLY EXTENSION - CUT 1 ON FOLD
- #10 - BELT LOOPS - CUT 1
*A minimum fabric width of 54” (137 cm) is required for
FUSIBLE INTERFACING CUT LIST
- #8 - FLY GUARD - CUT 1
- #11 - FRONT POCKET HEM FUSIBLE - CUT 2
- #12 - BACK POCKET HEM FUSIBLE - CUT 2
- #13 - BUTTON FUSIBLE - CUT 2

Isle Jeans Sew Along Posts: Getting Started | Add Interfacing, Prep Center Fly & Sew Darts | Sew Front Rise, Attach Zipper & Sew Front Fly | Sew Back Rise, Attach Pockets, Sew Inseam & Side Seams | Sew & Attach Belt Loops, Attach Pockets & Waistband Facing | Topstitch Fly, Sew Buttonholes, Attach Buttons & Sew Hems