Ivie Sew Along | Sew Neckline & Hem Top Bodice
In this post, we are going to sew the neckline bias casing. This is the same construction for all views. Then, if you are sewing just the top, we will finish the hem. We have a video of the neckline construction here if you would like some additional help.
SEW THE BIAS TO THE NECKLINE
The neckline is finished the same for all views. With the right sides together, sew the short ends of the bias at a 45 degree angle, trim the seam allowance and press the seam open.

Starting at one end, pin the cut edge of the bias to the finished edge of the center front slit. Continue pinning along the neckline, making sure not to stretch it. The bias will be longer than the neckline. Trim any excess length as you reach the other end.

Sew at 3/8” (1 cm). Trim the seam allowance to half to reduce bulk. Press the seam up towards the bias.
UNDERSTITCH THE NECKLINE BIAS
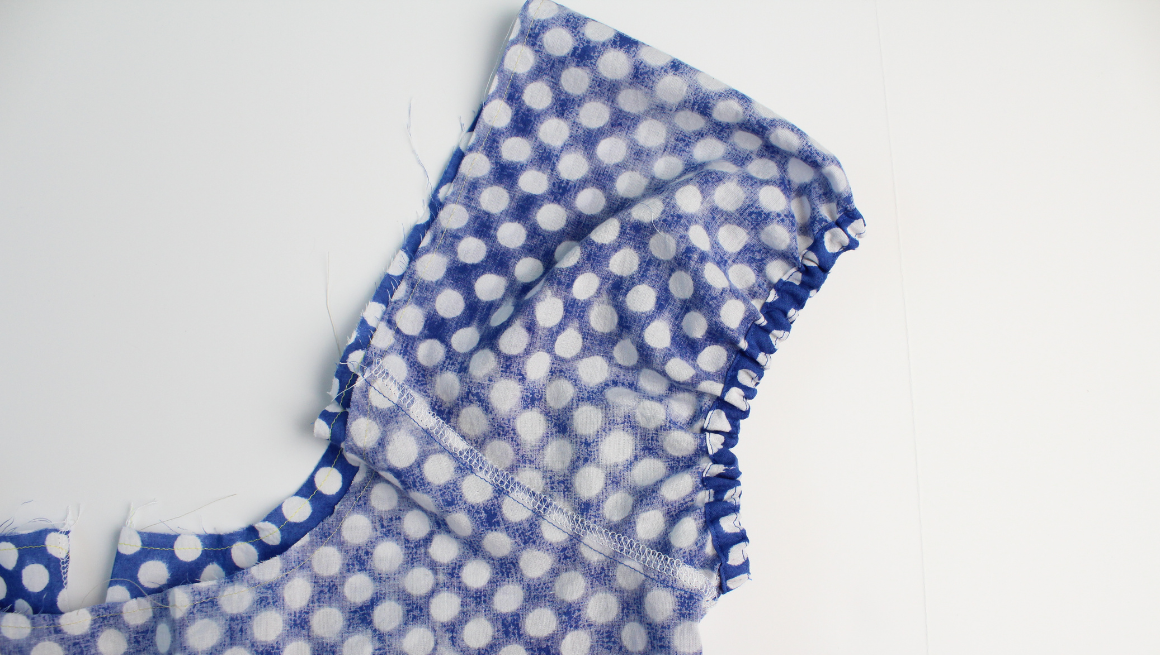
Understitch by stitching a line 1/16” (0.15 cm) away from the seam on the bias. Make sure to catch the seam allowance towards the bias when stitching.

Press the bias edge towards the center so the cut edge meets the stitch line.

TOPSTITCH THE CENTER FRONT SLIT
Before edgestitching the neckline bias, fold back the center front seam allowance and topstitch around the center front slit at 1/4” (0.6 cm).

EDGESTITCH THE NECKLINE BIAS
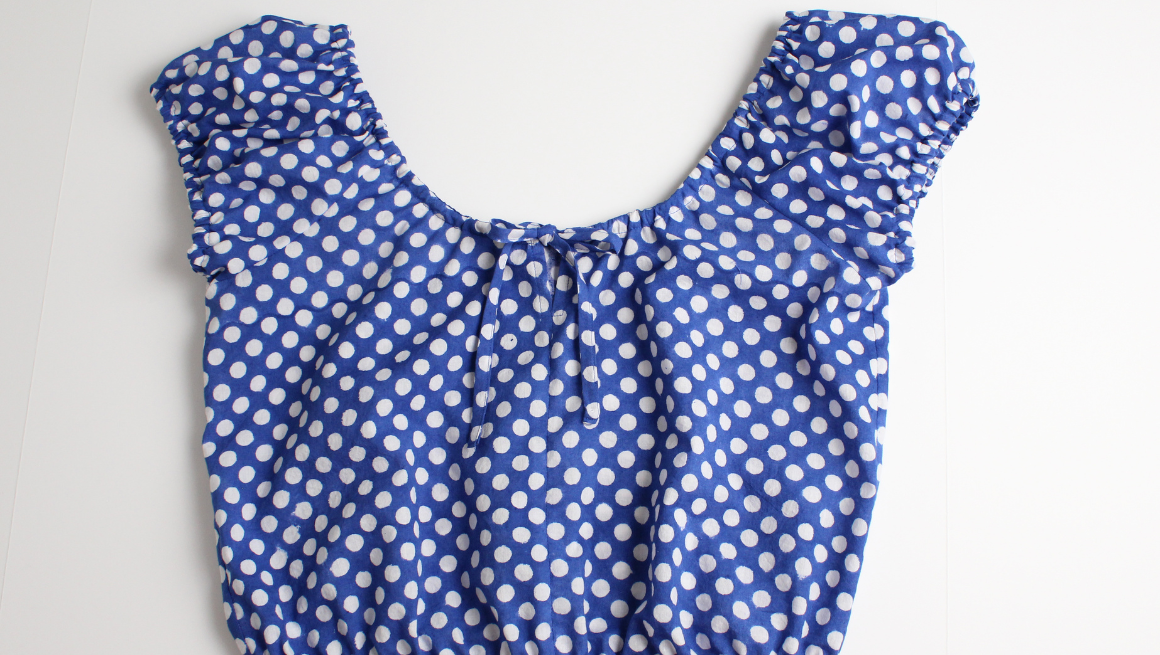
Fold the bias one more time so it is lying on the inside of the bodice. This will create the neckline casing. Pin in place.

Edgestitch the bias from the wrong side, catching the very edge. There will be an opening for the drawstring at the center front. Press.
INSERT THE NECKLINE DRAWSTRING
Add safety pins to both ends of your neckline drawstring. Thread the neckline drawstring through the neckline casing, being careful not to twist it. The tighter you tie the drawstring, the higher the neckline and armhole will be. Once the neckline drawstring is threaded through the casing, distribute the gathers and keep most of the gathers in the shoulder area. You can add a tack at the back bodice to secure your placement. If you are sewing the dress, skip to this post here, where you will start assembling the skirt. Continue below if you are making a two-piece set to hem your top.

TANK OR TOP | HEM THE BODICE
If sewing a tank or top, hem your top. Sew a fold guide on the hem at 1/4” (0.6 cm).

Press the outer edge in 1/4” (0.6 cm), wrong sides together. Fold the hem up again at 3/4” (2 cm).


Edgestitch the hem and leave a 2” (5 cm) opening near the back to insert the elastic.
TANK OR TOP | INSERT 1/2” (1.25 CM) ELASTIC
Use the cut chart on page 7 to cut your top hem elastic length. Add safety pins to both ends. Thread the elastic through the hem, being careful not to twist it.

Overlap the edge by 3/8” (1 cm) and pin in place. Once the elastic length is confirmed, secure the elastic with a zig zag stitch. Edgestitch the opening of the casing to enclose the elastic.
TANK OR TOP | FINAL PRESS
If you are sewing the Ivie Tank or Top, you are finished. Give your Ivie a final press! If you are sewing a two-piece set, you can start on the skirt in this post here.

Ivie Sew Along Posts | Getting Started | Prep Pattern, Sew Drawstrings & Bodice | Sew Tank Sleeve | Sew Cap or 3/4 Sleeves | Sew Neckline & Hem Top Bodice | Sew the Pockets & Skirt Tiers | Sew the Dress Waist Casing | Sew the Skirt Ties & Skirt Waistband