
Joy Sew Along | Assemble Lining
This post will guide you through assembling the lining and hem facing. As a reminder, if you made any adjustments to the main fabric sleeves or bodice length, you will need to make the same adjustment to the lining pieces.
SEW THE CENTER BACK LINING SEAM & PLEAT
The pleat images are from the View B sample, but the instructions are the same for both views. The photos switch back to view A after the pleat. I hope that is not too confusing.

With right sides together, sew the center back lining at 3/8" (1 cm). Press the seam open.

At the notch, sew a vertical seam at the pleat line, 1 3/8" (3.5 cm) down from the cut edge. Press the pleat open, centering the bulk of the pleat.

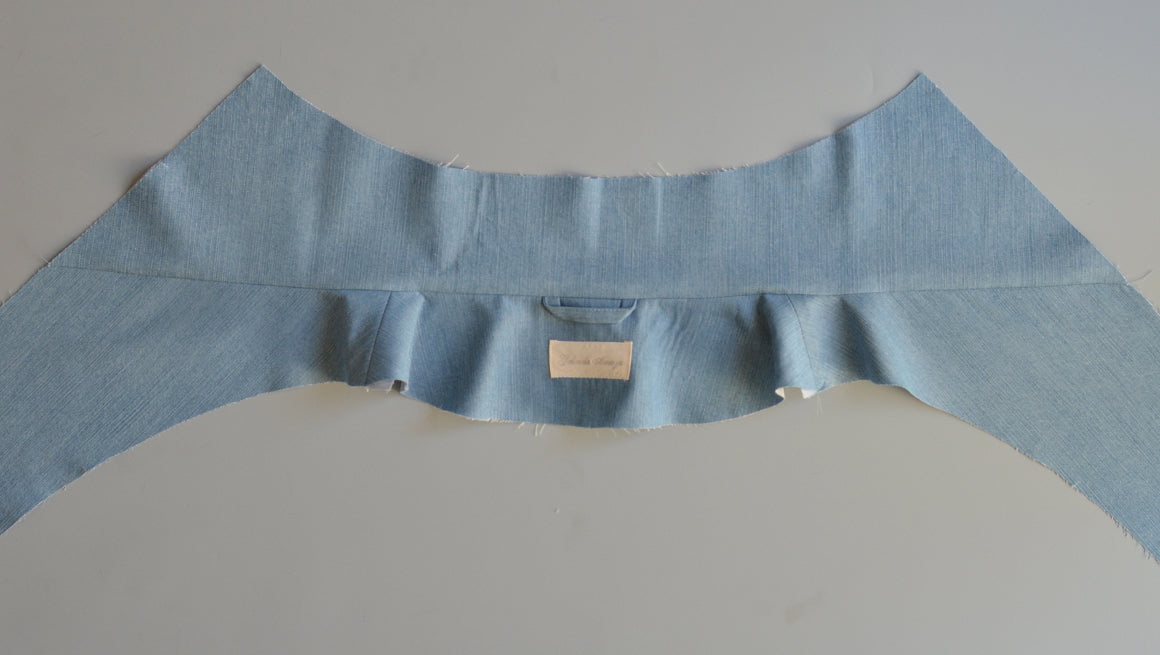
Your lining will look like this from the front.

You can see the pleat bulk centered and the center back seam pressed open.
I have a quick video to better illustrate sewing and pressing the center back pleat. You can review the video HERE.
SEW SLEEVE LINING SHOULDER SEAM

With right sides together, sew the lining sleeve seam at 3/4" (2 cm).

Press the seams open.
SEW SLEEVE LINING TO THE FRONT BODICE LINING

With right sides together, sew the front bodice lining to the front sleeve lining at 3/8" (1 cm), matching the single notches.

Press the seam allowance towards the sleeves (the tutorial says toward the bodice but this sample has them towards the sleeves).
SEW SLEEVE LINING TO BACK BODICE LINING

With right sides together, sew the back bodice lining to the back sleeve lining at 3/8" (1 cm), matching the double notches. Press the seam allowance towards the sleeves.
SEW LINING UNDERARM & SIDE SEAM

With right sides together, sew the sleeve underarm and side seam. On one sleeve leave a 6" (15 cm) opening on the underarm seam near the elbow. This will allow you to bag the lining.

Press the seams open.
SEW HEM FACING TO LINING HEM

With right sides together, sew the hem facing to the lining, matching the notches at the side seams and center back.

Press the seams towards the bodice lining.
Now your lining is ready! You will add your collar facing or hood facing in the next post.
Joy Jacket Sew Along
1 Sewing Supplies || 2 Pattern Adjustments || 3 Cutting and Applying Fusible || 4 Prepping Drawstrings & Pockets || 5 Assemble Outer Main Fabric || 6 Assemble Lining || 7 Assemble Facing & Attach to Lining || 8 Set Zipper & Add Grommets or Buttonholes || 9 Bagging Lining & Finishing Details
Gabriela
