Joy Sew Along | Assemble Facing & Attach to Lining
Now we will be assembling the facing and attaching it to the lining. When you are finished with this post, the lining and facing will be complete.
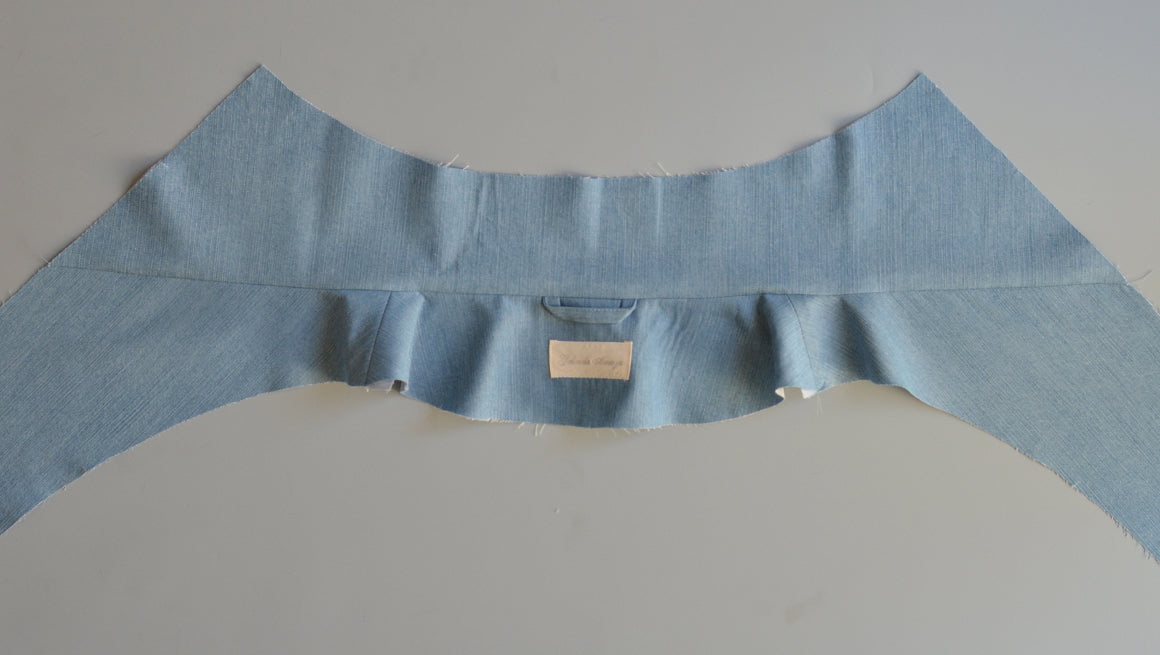
OPTIONAL: ADD GARMENT LABEL AND/OR HANGER LOOP & SEW FACINGS TOGETHER
Optional: sew a garment label and/or add a center back hanger loop on the center back facing. The hanger loop will be longer than you need.

Trim the extra hanger loop length.

Sew the center back facing to the front facing at 3/4" (2 cm), right sides together. If you made any adjustments to the sleeve upper seams, make the same adjustments to the facing seam. Press open.
VIEW A - SEW COLLAR FACING TO THE FACING NECKLINE - or - VIEW B - SEW THE HOOD FACING/LINING TO THE FACING NECKLINE

For View A only, sew the collar to the facing neckline, right sides together at 3/8" (1 cm). This will be similar to the main outer fabric where you need to do a bit of easing. As long as you match your notches and "+" marks, you should be fine.

Clip the seam to help it lay flat.

Press the seam allowance towards the collar. Optional: you can topstitch the neckline seam towards the collar at 1/4" (0.6 cm).

For View B only, pin the hood facing/lining to the facing neckline, right sides together.

Sew the hood facing/lining to the facing neckline at 3/8" (1 cm).

Clip the seam and press the seam allowance towards the hood.

Optional: you can topstitch the neckline seam towards the collar at 1/4" ( 0.6 cm). For View B only, you will need to stop topstitching at the facing seam.
SEW FACING TO LINING & ADD PLEAT IN LINING

Pin the facing to the lining, right sides together. It will look like the facing is too long at the hem, but the extra length is for a pleat.
Adding the pleat is really hard to illustrate, so here is a quick video showing how to add the pleat to the lining HERE.

Once you have added the pleat, sew the seam all the way around the facing.

Press the seam allowance towards the bodice lining.
There you have it, your lining is complete. Now it's time to add the zipper and bag the lining. You are so close!
Joy Jacket Sew Along
1 Sewing Supplies || 2 Pattern Adjustments || 3 Cutting and Applying Fusible || 4 Prepping Drawstrings & Pockets || 5 Assemble Outer Main Fabric || 6 Assemble Lining || 7 Assemble Facing & Attach to Lining || 8 Set Zipper & Add Grommets or Buttonholes || 9 Bagging Lining & Finishing Details
Gabriela
