Hayes Sew Along | Attach Sleeves and Sew Sides
The bodice is starting to take shape, here we'll continue to put it together by attaching the sleeves and sewing the side seams.
TOP & DRESS | SEW THE SLEEVE TO THE SLEEVE LINING
With the right sides together, sew the main and lining sleeves together at the hem. Trim the seam allowance to half.

TOP & DRESS | UNDERSTITCH THE SLEEVE
Open the sleeves and press the seam allowance towards the lining. Understitch by stitching a line 1/16" (0.15 cm) away from the seam on the sleeve lining. Make sure to catch the seam allowance towards the lining when stitching.

Turn the sleeve right side out and press. Trim the corners.
TOP & DRESS | ADD EASE TO THE SLEEVE CAP
To prep the sleeve cap, change your stitch length to the longest possible length. Sew two parallel baste stitch lines at the sleeve between the notches. Make sure not to backstitch at the beginning or end of your stitch lines, and leave long ends to your threads.
- The first line is 1/4" (0.6 cm) away from the fabric edge.
- The second line is 1/2" (1.25 cm) away from the fabric edge.
- Pull the bobbin threads to gather the sleeve cap a tiny bit to help ease it into the armhole cap.

TOP & DRESS | ATTACH THE SLEEVES TO THE ARMHOLE
With the right sides together, pin the sleeve cap to the main fabric of the armhole, matching the notches.

Sew the sleeve to the armhole at 1/4" (0.6 cm), making sure to avoid the bodice lining.

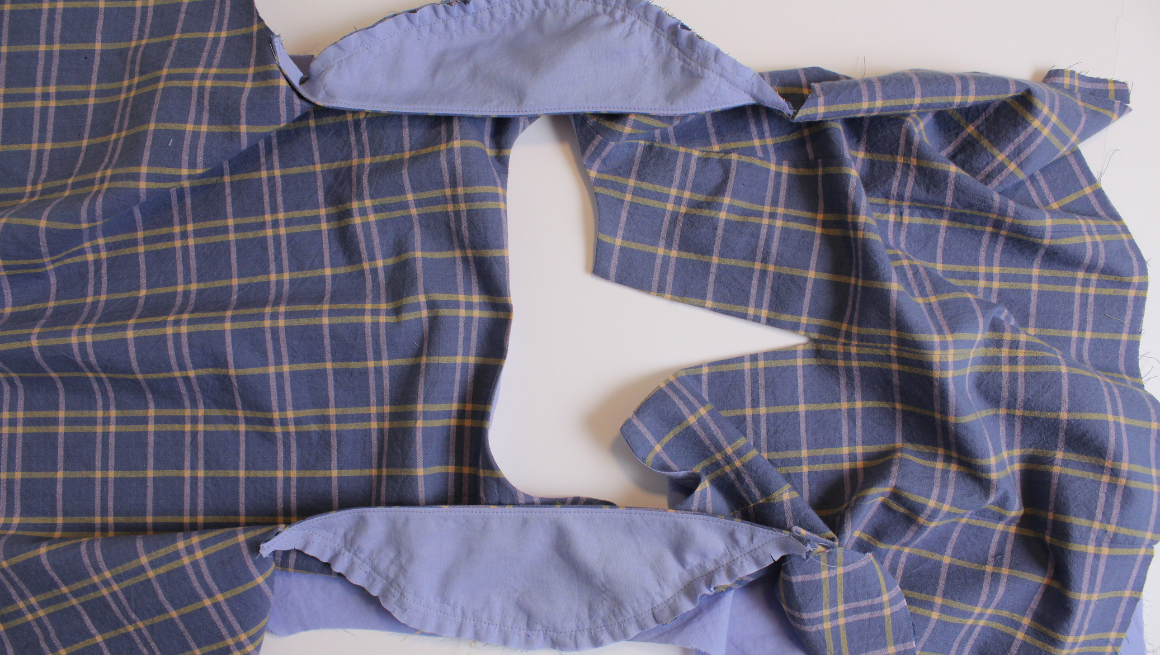
TOP & DRESS | ROLL THE BODICE TO FINISH THE ARMHOLE
To clean finish the armhole, take the bodice and roll one long end towards the other end.

Continue all the way up until all of the bodice is rolled up in the small width of the armhole strap. Once you've done that, leave the fabric rolled in the middle, but lay the main and lining flat with the right sides up.

TOP & DRESS | SEW THE ARMHOLE
Take the right side of the lining armhole and flip it around so it's touching the right side of the main armhole and the sleeve cap, with the bodice and sleeve rolled inside.Pin the right sides together with the cut edges lined up.

Sew the armhole in one continuous seam from side seam to side seam at 3/8" (1 cm). Trim the seam allowance to half.

TOP & DRESS | TURN THE BODICE RIGHT SIDE OUT
Pull the roll of fabric out from the hem so that the bodice is right side out.

You will be pulling the entire bodice through the strap, so you will need to tug a bit. Go back to 'Roll the Bodice to Finish Armhole' and repeat for the other armhole. Turn right side out and press.


DRESS | SEW THE SIDE SEAMS AND TOPSTITCH OPENING
If sewing the dress, flip the bodice so that the right sides of the main and lining side seams are facing each other. Start at the main hem and sew to the first notch, stopping and backstitching. Leave an opening for the waist drawstrings and continue sewing to the lining hem. You will not need an opening on the lining (disregard the notches).

Press the seam open. Add a topstitch around the opening on the main fabric. Repeat for the other side. If sewing the dress, skip to next post.

TOP | SEW THE SIDE SEAMS
If sewing the top, flip the bodice to that the right sides of the main and lining side seams are facing each other. On one side you will leave a 6" (15 cm) opeing on the lining side seam. Start at the main hem and sew a continuous line to the lining. Stop a few inches past the armhole seam and start a few inches before the lining hem.

Press the seam open. For the other side, you can sew a continuous seam from the main hem to the lining hem. Continue to the next post and skip to where we'll hem the top.
Hayes Sew Along Posts: Getting Started | Staystitching, Interfacing, & Ties | Assemble Bodice & Sew Neckline | Attach Sleeves and Sew Sides | Finishing the Bodice | Assemble Skirt | Finish Dress and Skirt Waistband