News
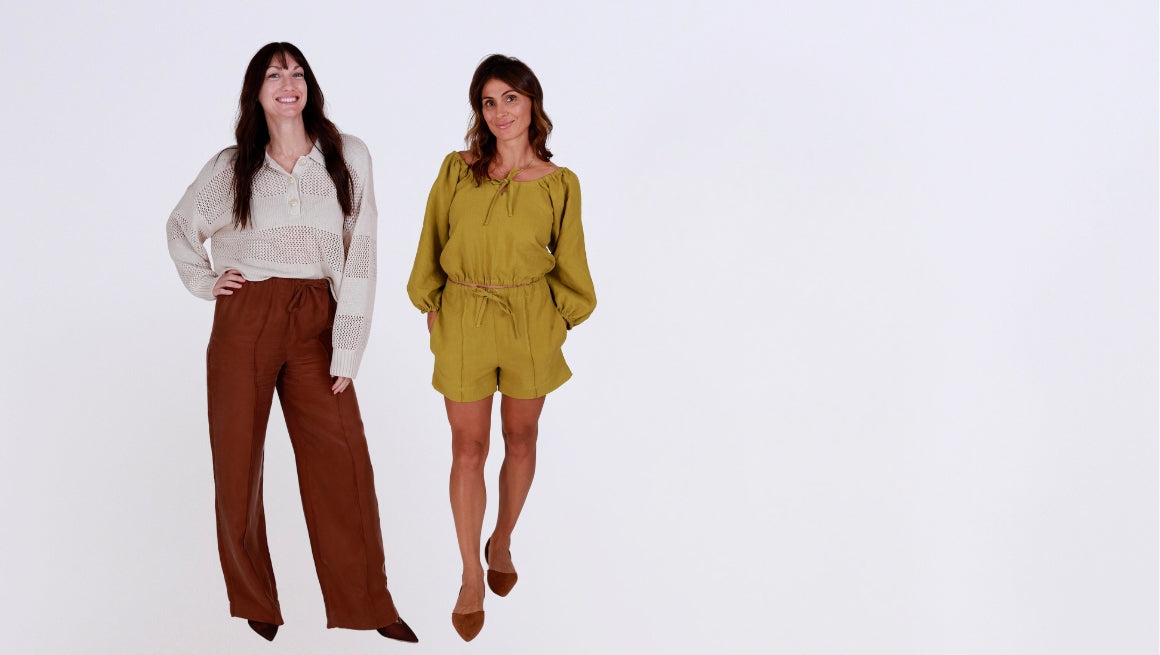
Reya Pants and Shorts Release
THE REYA SEWING PATTERN IS HERE! Introducing a pattern you'll love to sew and wear year-round: The Reya Pants and Shorts! If you're ready for a fun sew with style that's easy to dress up or down an...
Read more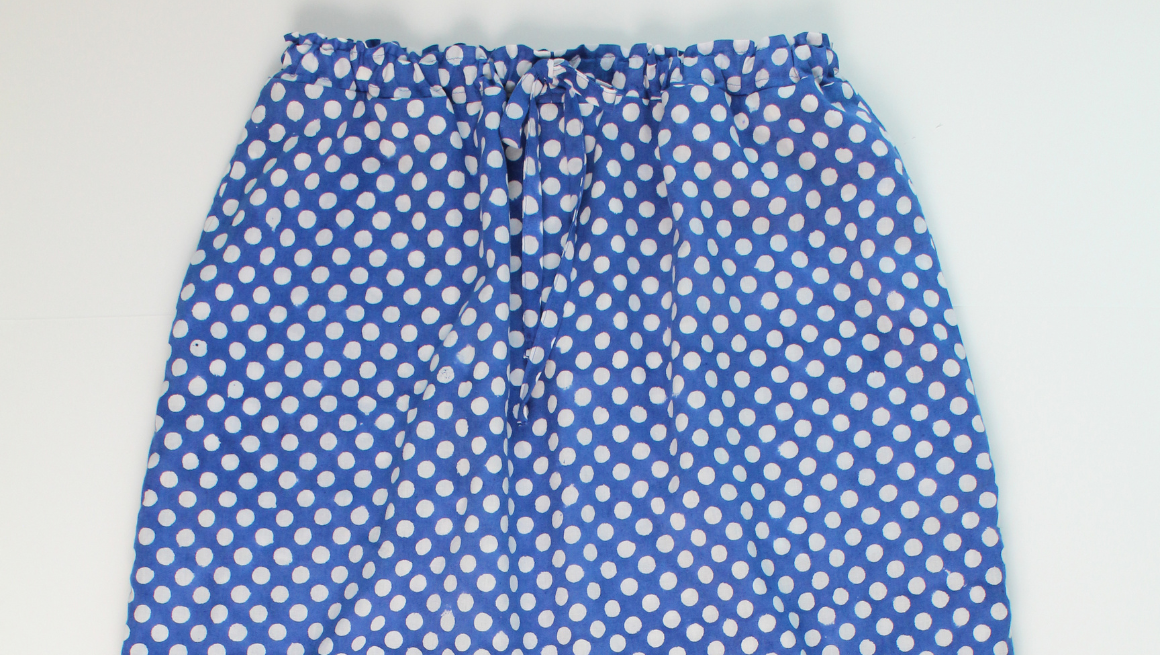
Ivie Sew Along | Sew the Skirt Ties & Skirt Waistband
In this post, we are going over our last steps to finish the Ivie Skirt. SKIRT | SEW THE SKIRT WAIST DRAWSTRING TIES With the wrong sides together, press the short ends in at 3/8” (1 cm). With the ...
Read more
Ivie Sew Along | Sew the Dress Waist Casing
In this post, we will sew the waist casing for the dress views. If you are finishing a set, you can finish the skirt here. DRESS | SEW THE BODICE TO THE SKIRT With the right sides together, sew the...
Read more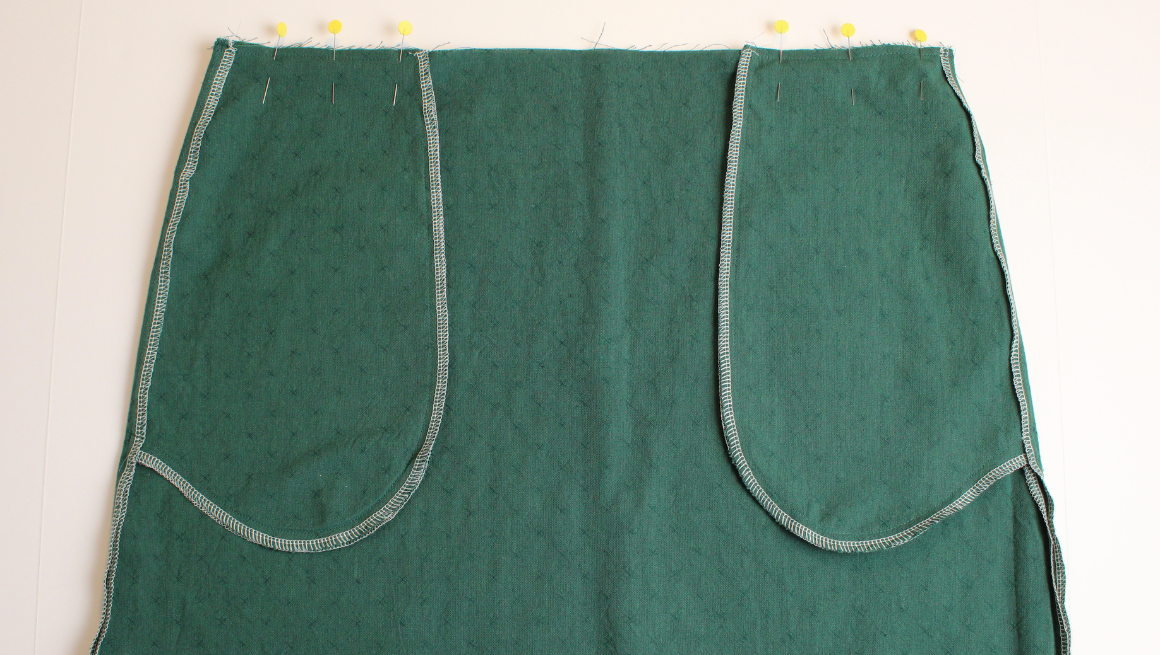
Ivie Sew Along | Sew the Pockets & Skirt Tiers
In this post, we will add the optional pockets and sew the skirt tiers if you are sewing the dress or skirt. SKIRT & DRESS | SEW THE SKIRT SIDE SEAMS WITHOUT POCKETS If omitting the skirt pock...
Read more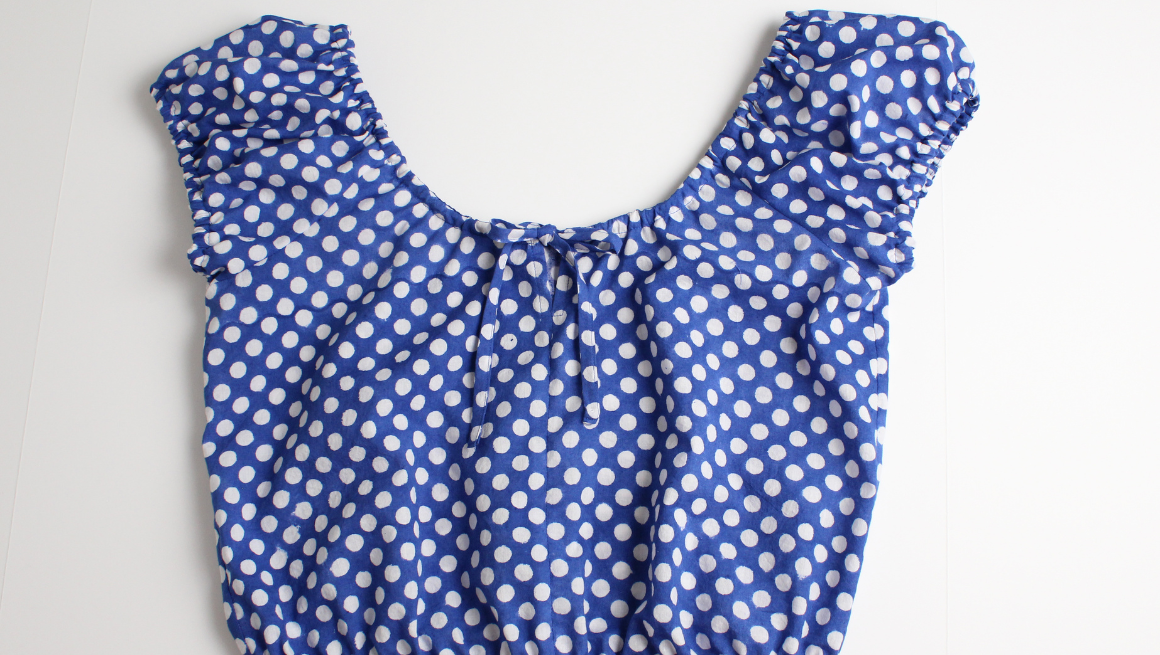
Ivie Sew Along | Sew Neckline & Hem Top Bodice
In this post, we are going to sew the neckline bias casing. This is the same construction for all views. Then, if you are sewing just the top, we will finish the hem. We have a video of the necklin...
Read more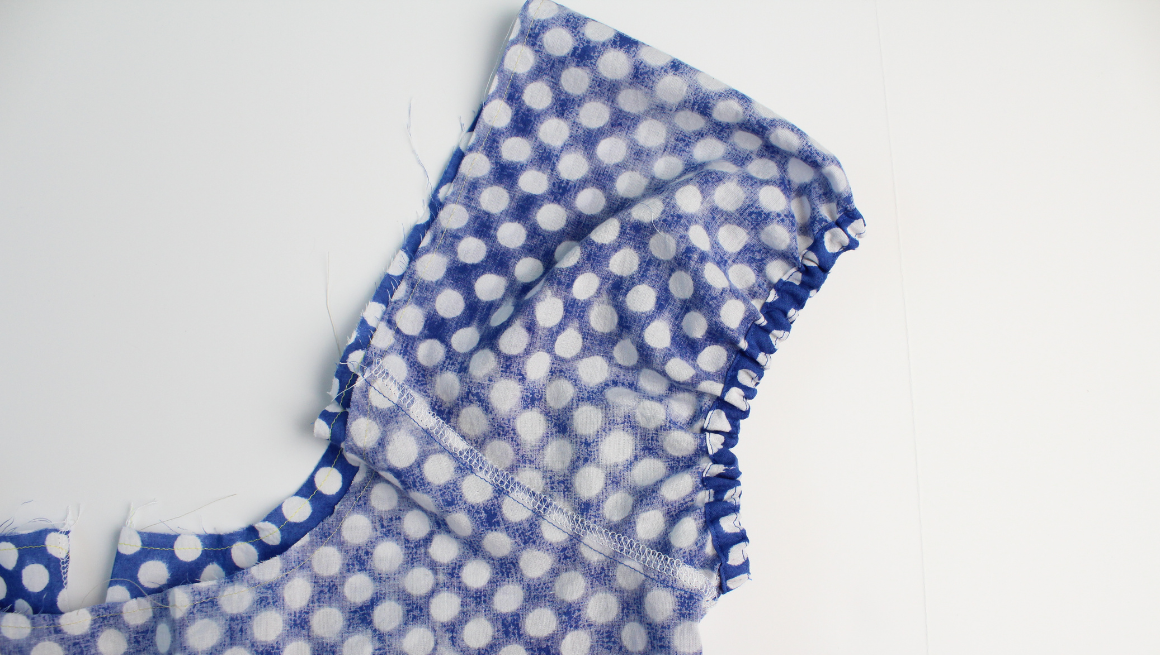
Ivie Sew Along | Sew Cap or 3/4 Sleeves
In this post, we will be sewing the cap sleeves but the sewing instructions are the same if sewing the 3/4 sleeves. If sewing the tank view, you can find that post here. TOP OR DRESS WITH SLEEVES |...
Read more
Ivie Sew Along | Sew Tank Sleeve
In this post, we will be sewing the tank top or dress ruffle sleeves. If sewing the cap or 3/4 sleeves skip to this post here. TANK OR TANK DRESS | HEM THE RUFFLE SLEEVES Prep the hem (the longer s...
Read more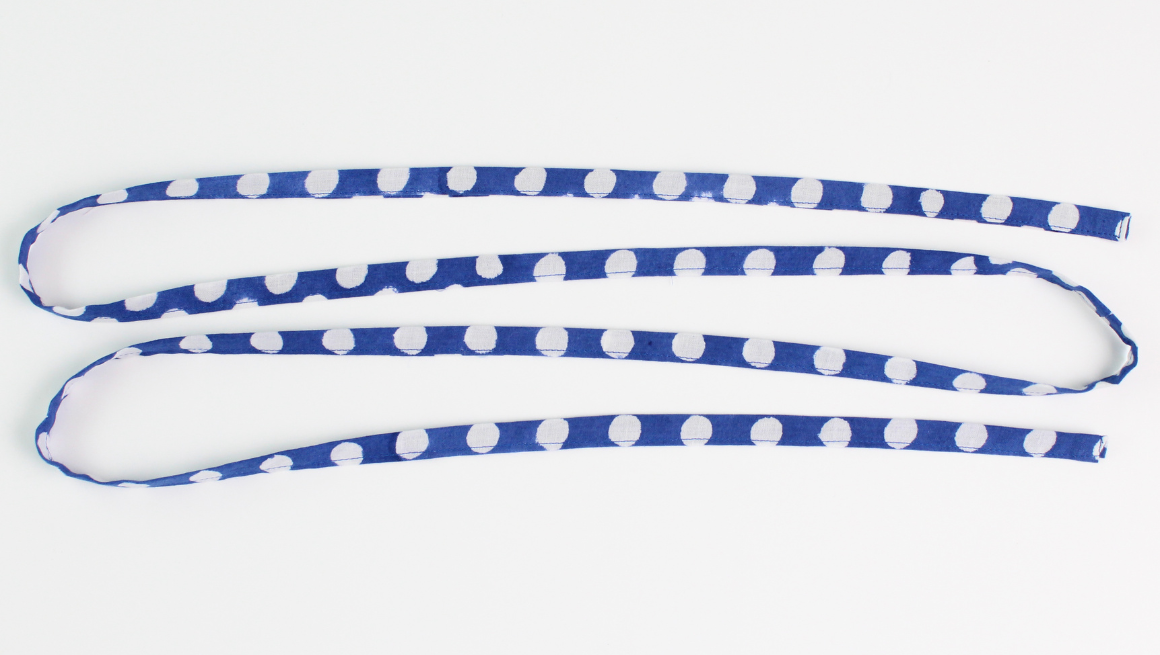
Ivie Sew Along | Prep Pattern, Sew Drawstrings & Bodice
In this post, we are going to prepare our pattern by marking our pattern, finishing a few seams, adding a bit of fusible, and making our neckline drawstring. SEAM ALLOWANCE, MARKINGS Unless noted, ...
Read more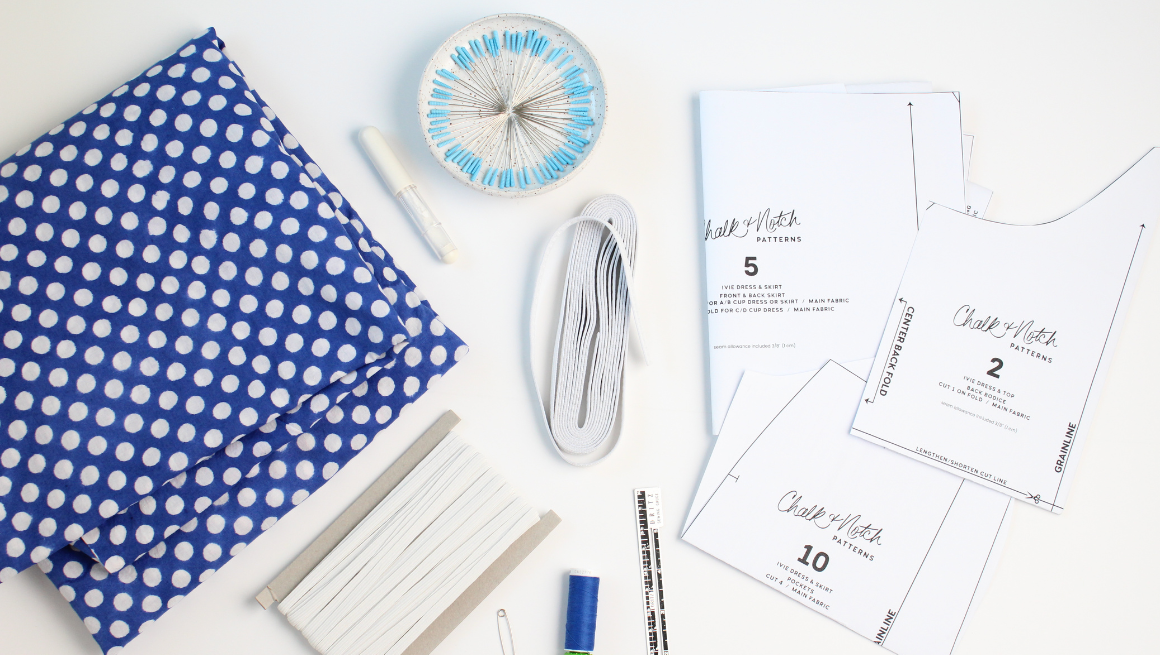
Ivie Sew Along | Getting Started
To help you in your sewing experience, we're thrilled to share the Ivie Sew Along. This sew along features step-by-step photos for the entire sewing process! In addition to the sew along, we also h...
Read more
Tutorial | Ivie Shift Dress
Recently, a customer shared a photo of a shift dress in our Facebook group. The neckline was similar to the Ivie tank bodice, and it looked like the perfect summer dress for the heatwave we were ha...
Read more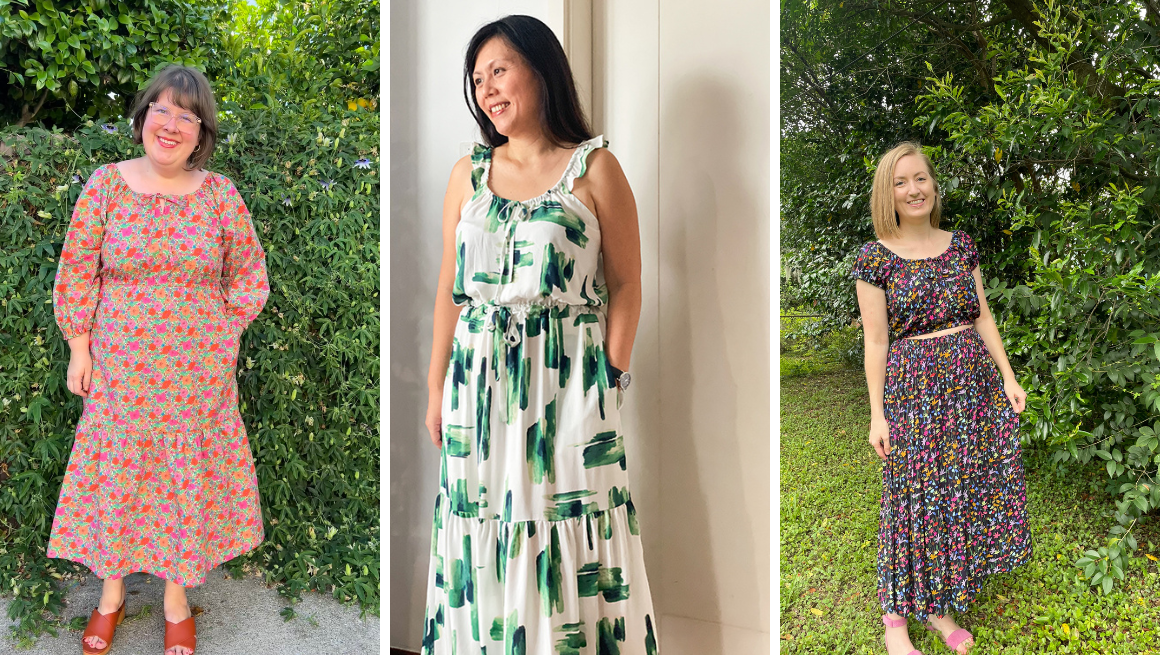
Thank You Ivie Sewing Pattern Testers!
Testing the Ivie Pattern was such a delight with this group of talented and kind testers. They were so helpful in providing insight on fit, instructions, and final details of the Ivie Dress and Set...
Read more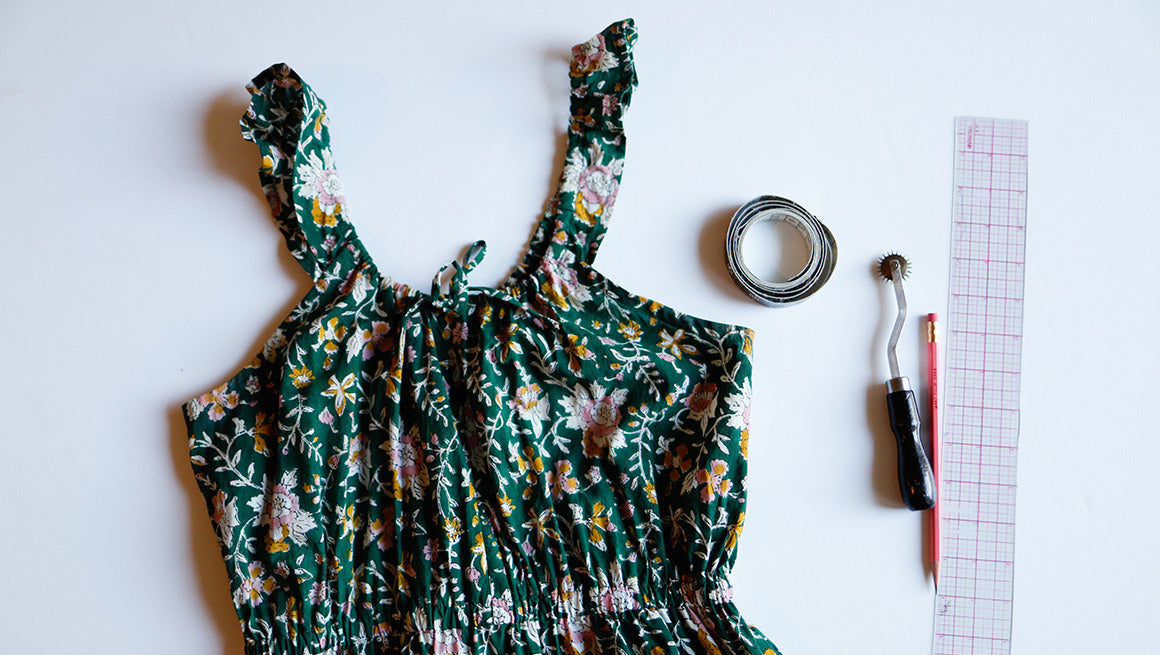
Ivie Dress and Set Fitting and Custom Adjustments
Looking for assistance fitting the Ivie? You've come to the right place! We have put this post together to cover the most common fitting adjustments you may need for the Ivie sewing pattern. Find f...
Read more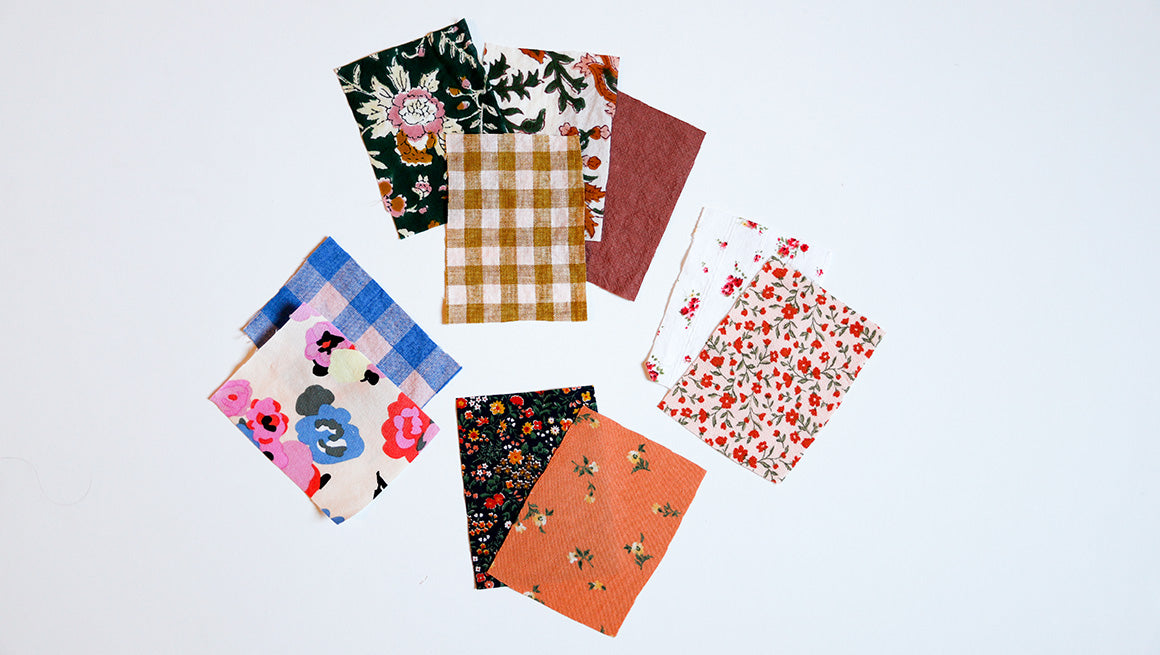
Ivie Dress and Set Fabric Recommendations and Inspiration
The fabric recommendations post is always one of my favorites to write for a new pattern release because I just can't get enough beautiful fabrics. Before we get started, I wanted to share a bit of...
Read more
Ivie Dress and Two-Piece Set Release
THE IVIE SEWING PATTERN IS HERE! We're excited to introduce you to a fun summer sew. Meet the Ivie Dress or Two-Piece Set! If you like a pattern with loads of options, that's comfortable to wear, a...
Read more
Den Sew Along | Sew Yoke, Shoulders, and Sleeves
SEW THE BACK YOKE TO THE BACK With the right sides together, pin and sew the back yoke to the back. Finish and press the seams up. Optional: Topstitch the seam at 1/4" (0.6 cm) from the seam edg...
Read more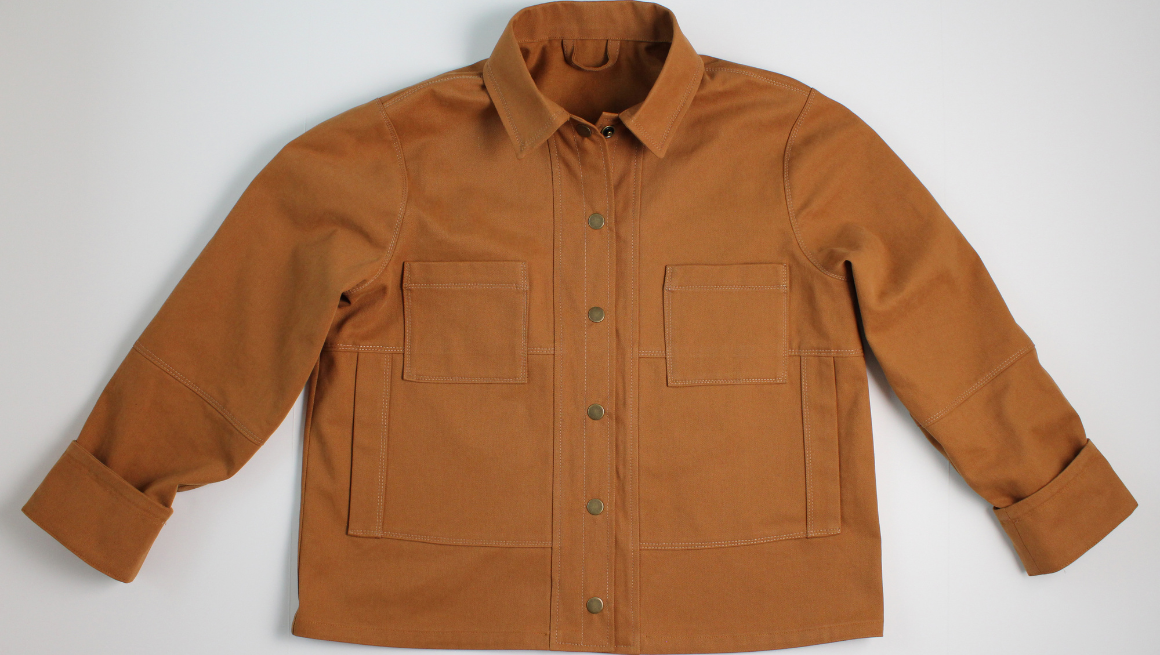
Den Sew Along | Add Buttons or Snaps
ADD BUTTONS OR SNAPS TO THE CENTER FRONT Try on the jacket to mark the buttonholes/snaps before sewing. The center front is 5/8" (1.5 cm) from the front edge. The pattern is designed for 1/2" (1...
Read more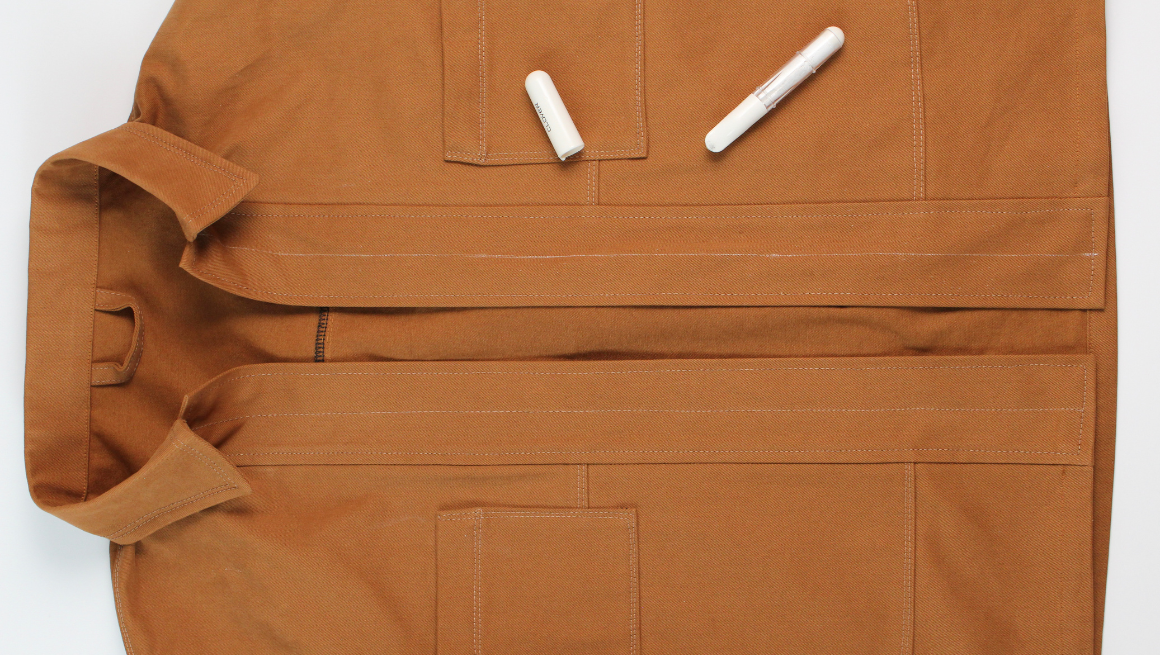
Den Sew Along | Attach Collar and Topstitch Placket
ATTACH THE UNDER COLLAR Starting at the front neckline, pin the right side of the under collar to the right side of the neckline where the extension begins. Match the notches along the neckline. ...
Read more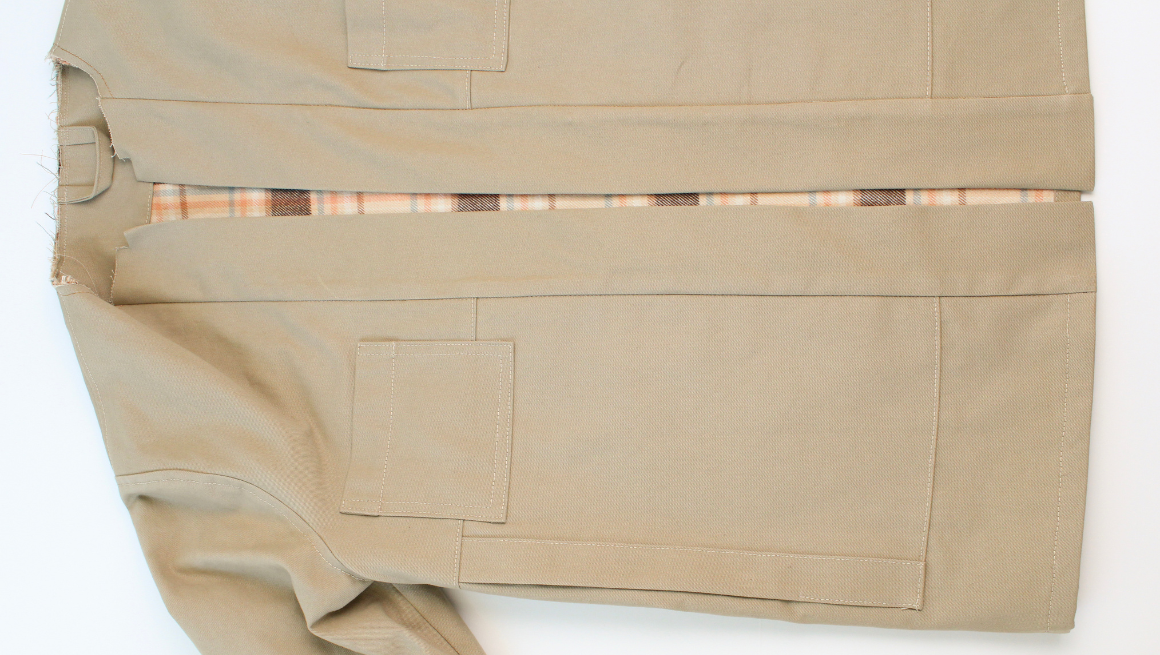
Den Sew Along | Sew Front Placket and Hem
The following steps are for the jacket lining only. If you aren't lining your Den Jacket, skip to the next post: Sew Front Placket and Hem UNLINED ONLY | ADD THE SLEEVE CUFF FACING TO THE HEM This ...
Read more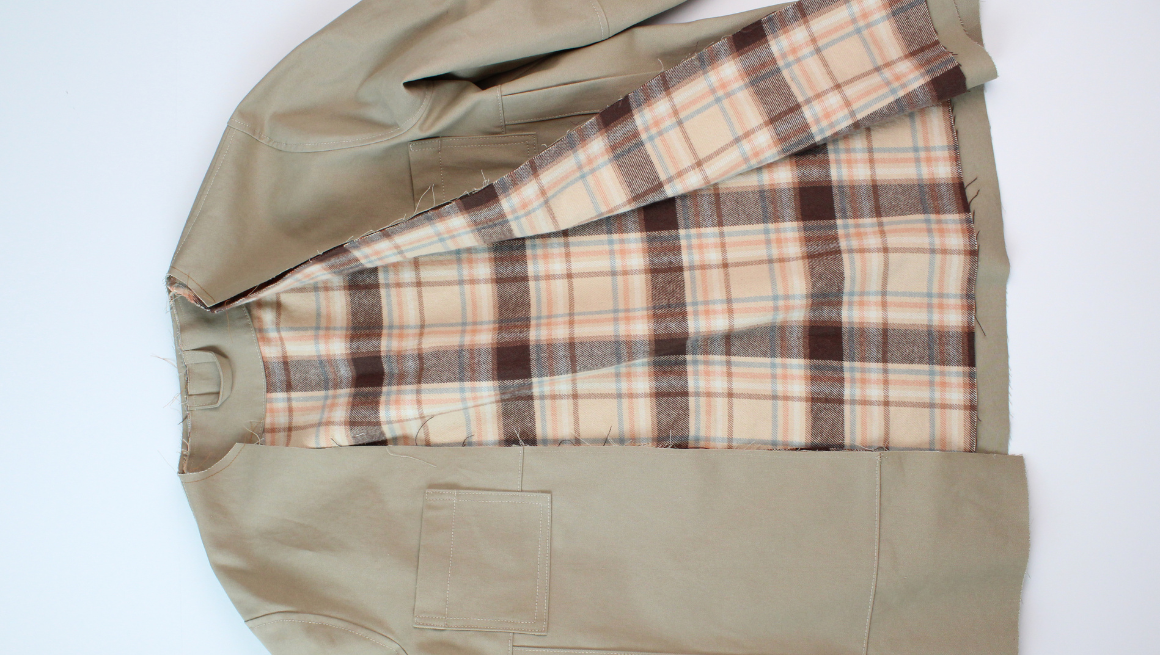
Den Sew Along | Prepare and Sew Jacket Lining
The following steps are for the jacket lining only. If you aren't lining your Den Jacket, skip to the next post: Sew Front Placket and Hem PREP THE BACK NECK FACING If you're adding a lining, now i...
Read more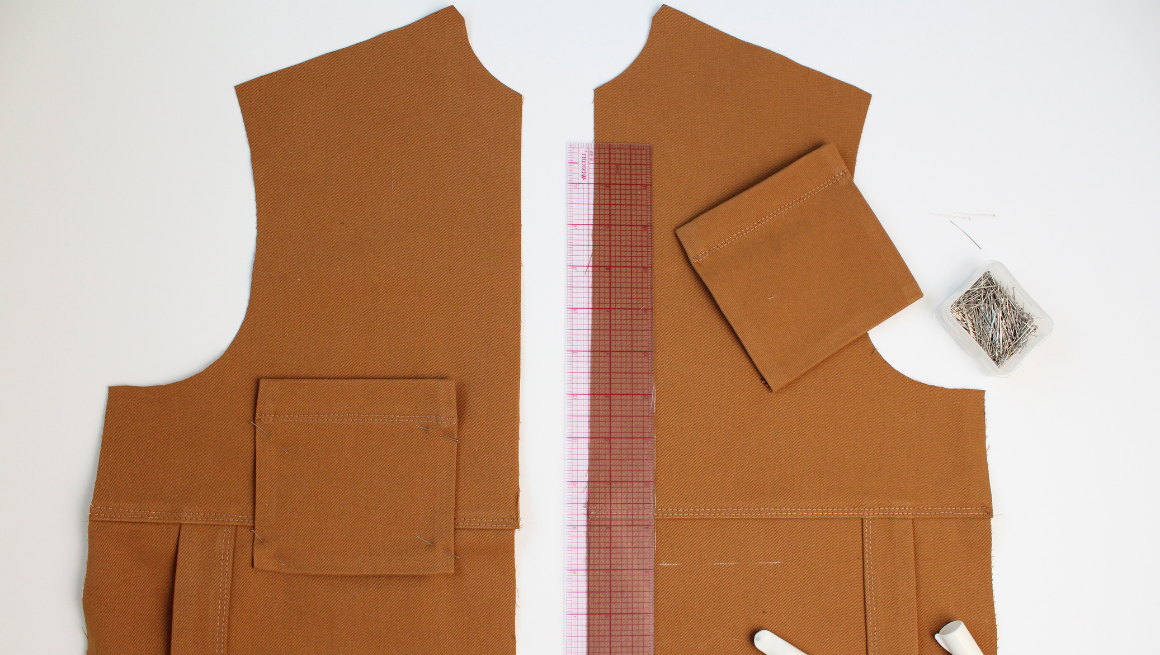
Den Sew Along | Sew and Attach Pockets
PREP THE SIDE POCKETS Sew a fold guide on the side pocket facing on the long side without notches, just under 3/8" (1 cm). Press the edge in 3/8" (1 cm), wrong sides together. The pocket facing ...
Read more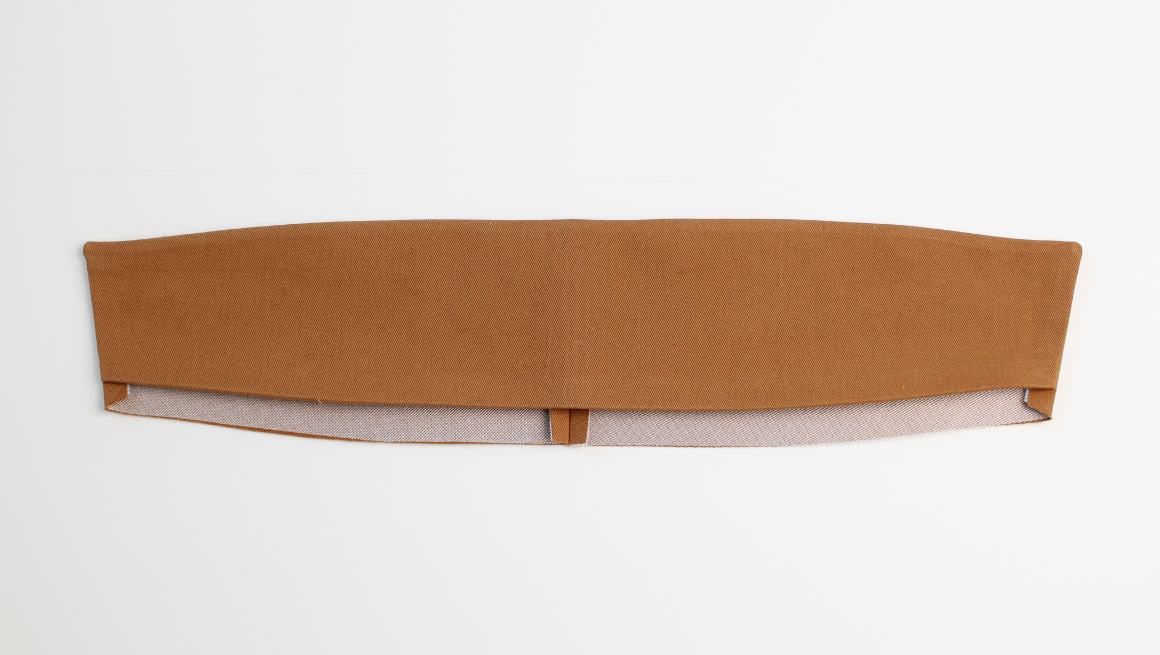
Den Sew Along | Staystitching, Interfacing, and Collar
SEAM ALLOWANCE, MARKINGS & NECKLINE STAYSTITCHING Unless noted, the seam allowance included is 3/8" (1 cm) for joined seams. Clip or mark the notches. Notches are indicated on the pattern by "T...
Read more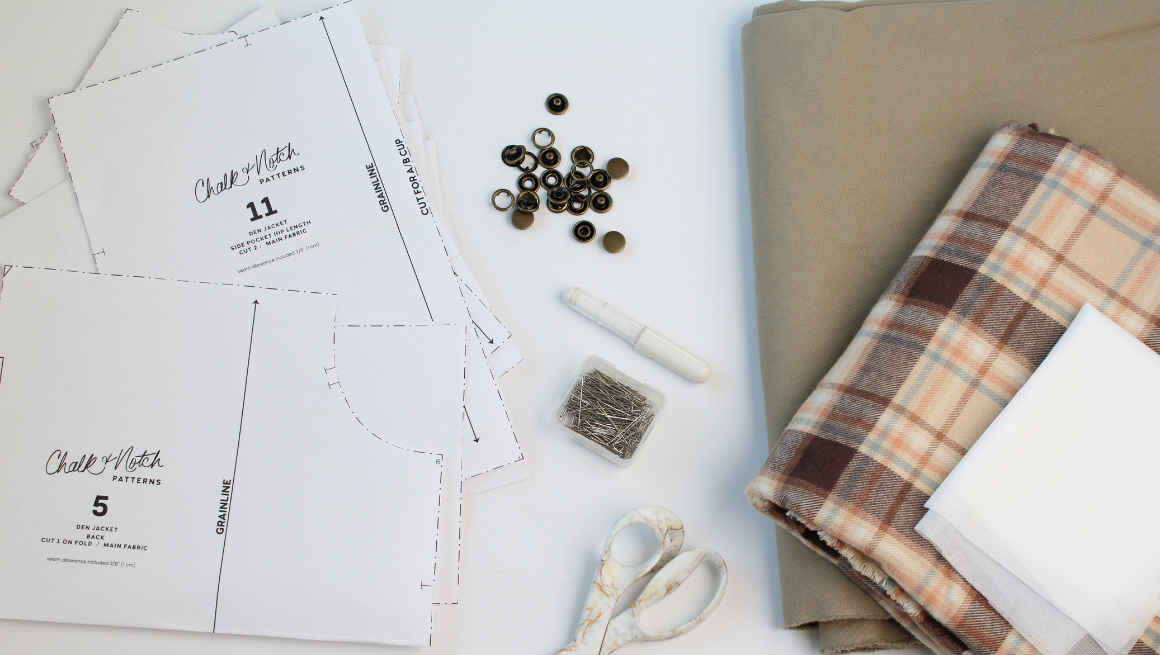
Den Sew Along | Getting Started
To help you in your sewing experience, we're thrilled to share the Den Sew Along. This sew along features step-by-step photos for the entire sewing process! In addition to the sew along, we also ha...
Read more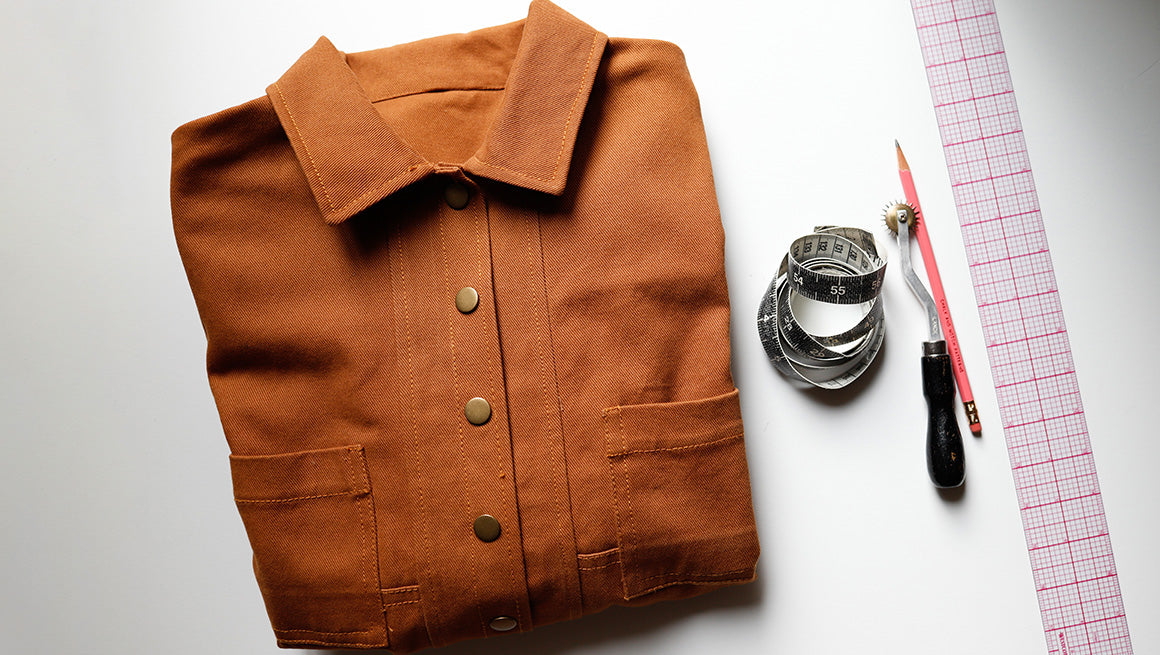
Den Jacket Fitting and Custom Adjustments
Looking for assistance fitting the Den Jacket? You've come to the right place! We have put this post together to cover the most common fitting adjustments you may need for the Den Jacket sewing pat...
Read more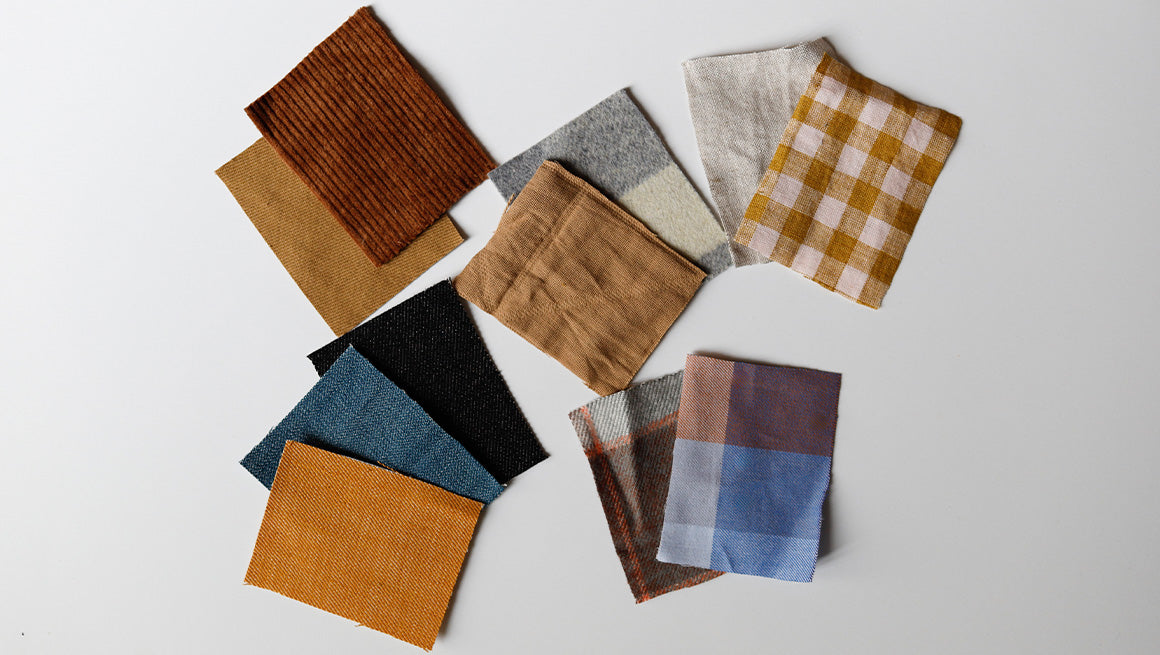
Den Jacket Fabric Recommendations and Inspiration
Fabric selection is one of my favorite parts of the sewing process, and I thoroughly enjoyed seeing how each fabric changed the look and feel of the Den Jacket pattern. There are so many good jacke...
Read more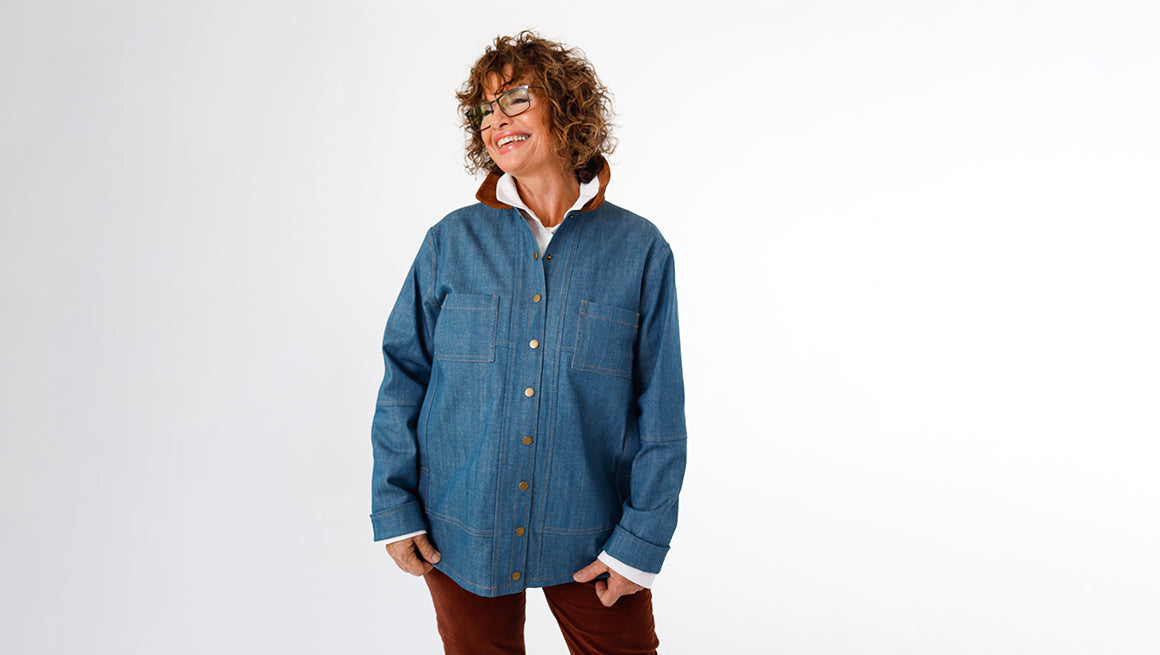
Den Jacket Release
THE DEN JACKET PATTERN IS HERE! We have a new outerwear pattern for you just in time to stay warm! With a name inspired by its cozy features, we are excited to introduce the Den Jacket Pattern. The...
Read more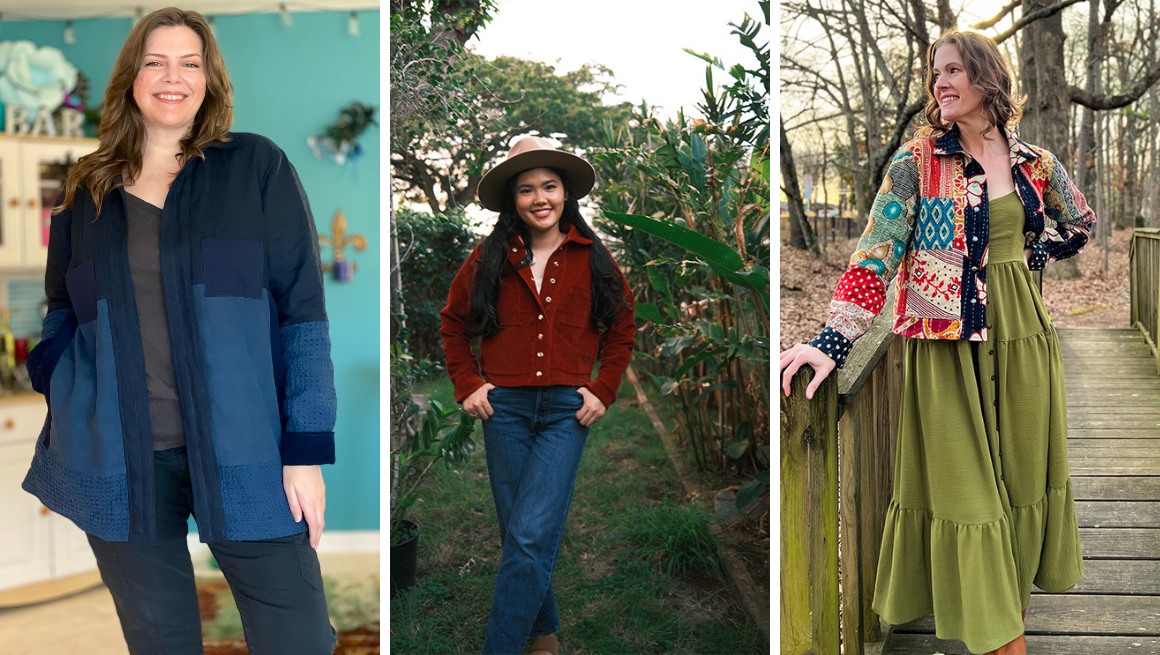
Thank You Den Jacket Testers!
It's time to introduce some of our Den Jacket Testers! This group knocked it out of the park with their feedback and gorgeous jackets. Their input is such a valuable part of the development process...
Read more
Crew Sew Along | Sew Inseam and Rise
SEW INSEAMS With the right sides together, sew the inseams with a 3/8" (1 cm) seam allowance. Finish the seams together and press towards the back. Repeat for the other side. SEW RISE Put one le...
Read more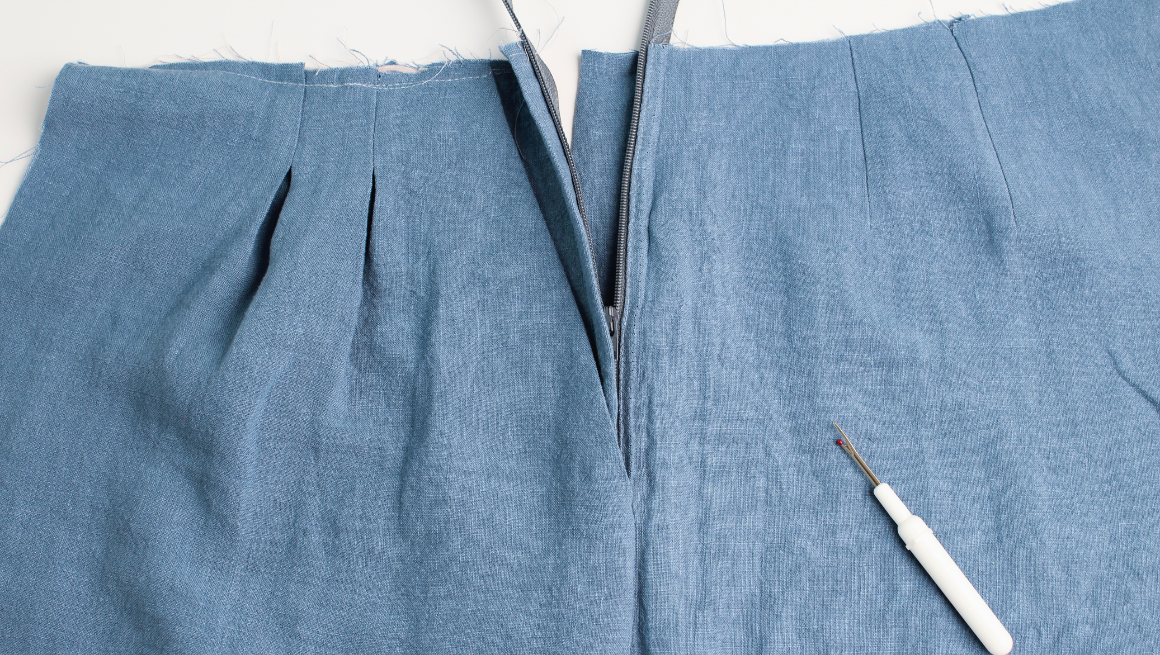
Crew Sew Along | Sew Zipper and Side Seams
FINISH THE SIDE SEAMS Finish the front and back side seams separately on all four pieces. MARK THE STITCHING ON THE WEARER'S LEFT SIDE SEAM Take the wearer's left front and left back pieces. The...
Read more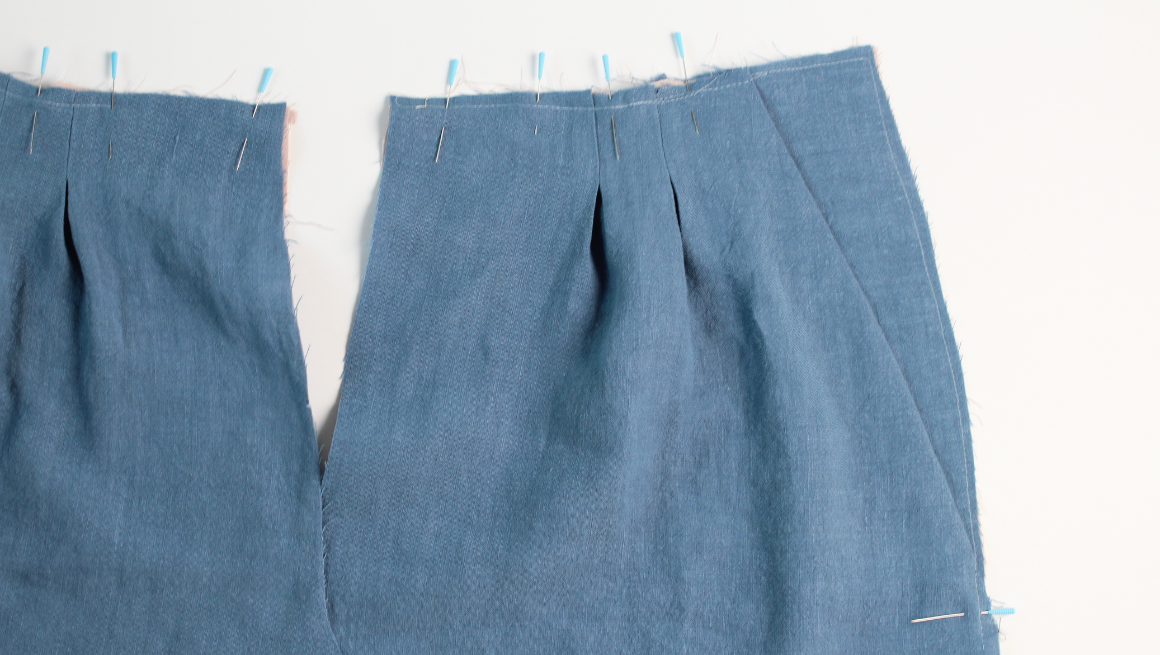
Crew Sew Along | Prepare Pockets
OPTIONAL POCKET FACING Finish the angled edge of the pocket facing or fold it under at 3/8" (1 cm). Pin the pocket facing right side up to the right side of the under pocket lining. Edgestitch in p...
Read more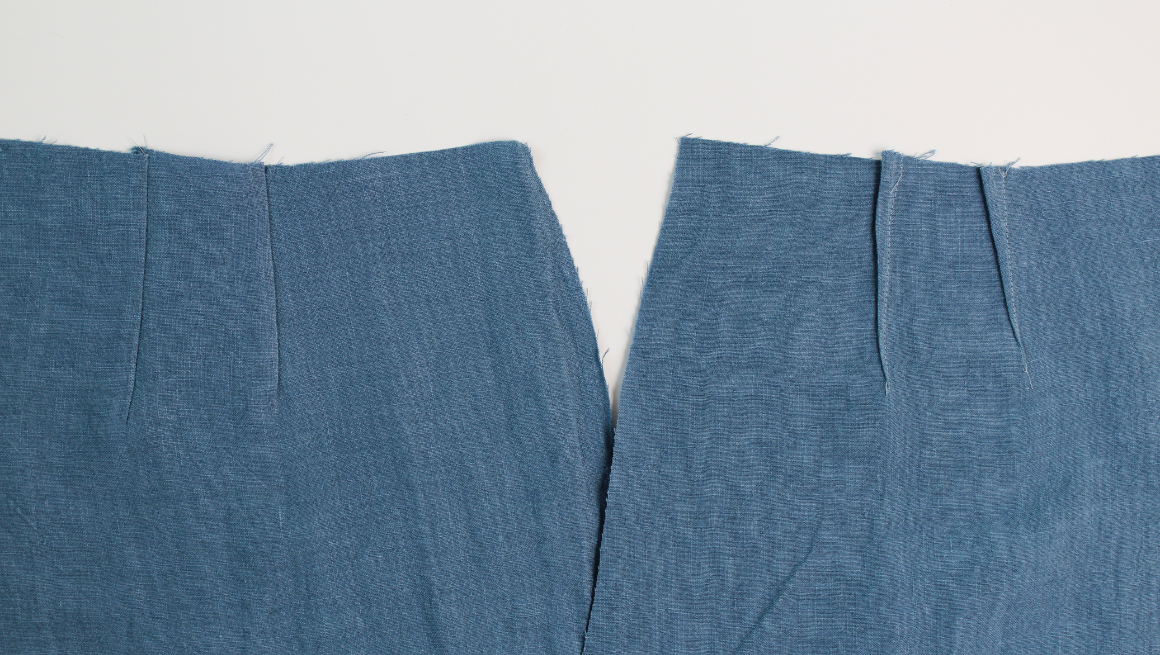
Crew Sew Along | Interfacing, Pleats, and Darts
SEAM ALLOWANCE & MARKINGS Unless noted, the seam allowance included is 3/8" (1 cm) for joined seams. The side seams have a 3/4" (2 cm) seam allowance to allow for the side seam lapped zipper. T...
Read more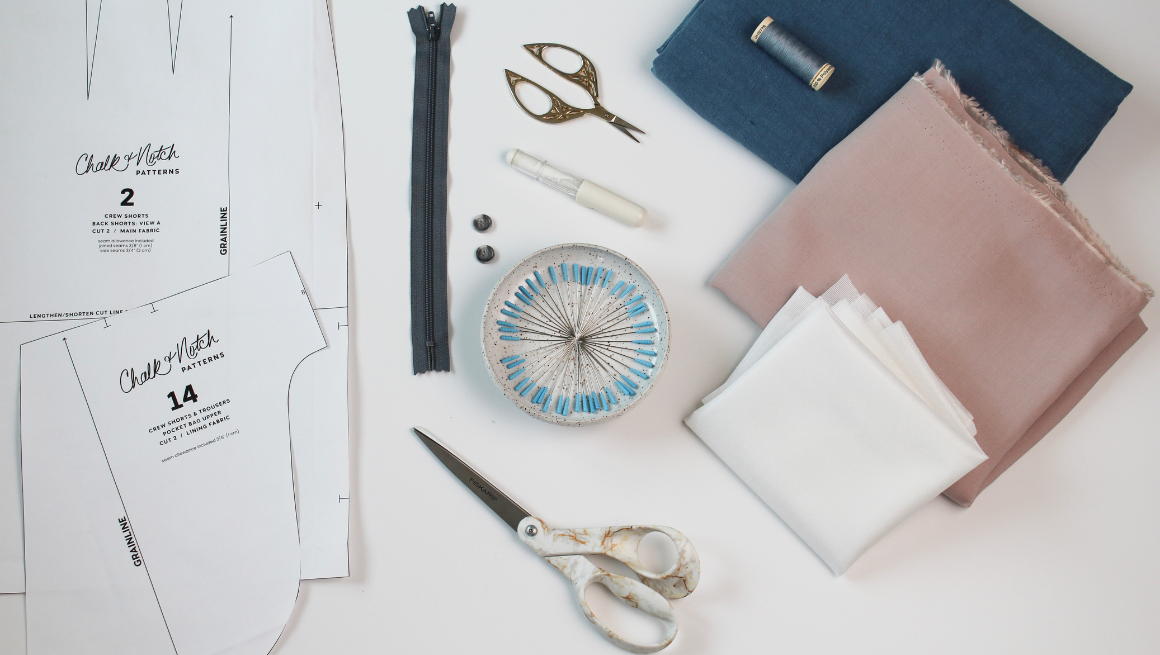
Crew Sew Along | Getting Started
We are happy to bring you a sew along for the Aria Top sewing pattern. The sew along features step-by-step photos for the entire sewing process! In addition to the sew along, we also have community...
Read more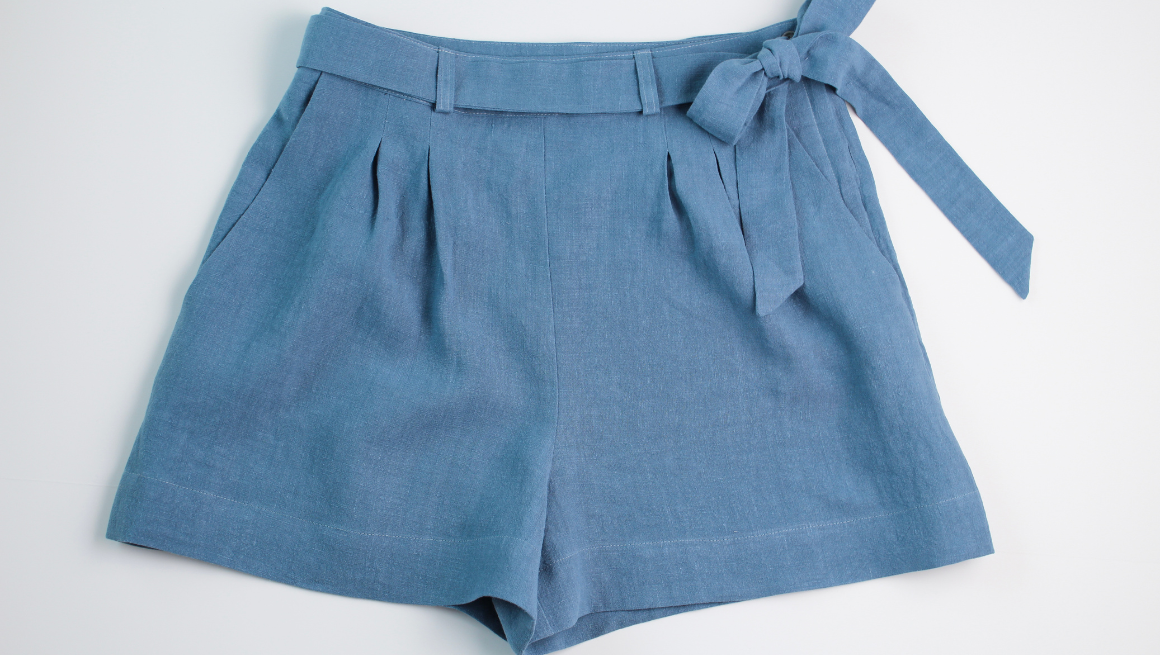
Crew Sew Along | Sew Hem and Finishing
STITCH HEM GUIDE AT 1/2″ (1.2 CM) & FOLD EDGE UP Prep the hem by stitching a fold guide at 1/2" (1.2 cm). Press the hem up 1/2" (1.2 cm), wrong sides together. FOLD AGAIN AT 1 3/4″ (4.5 ...
Read more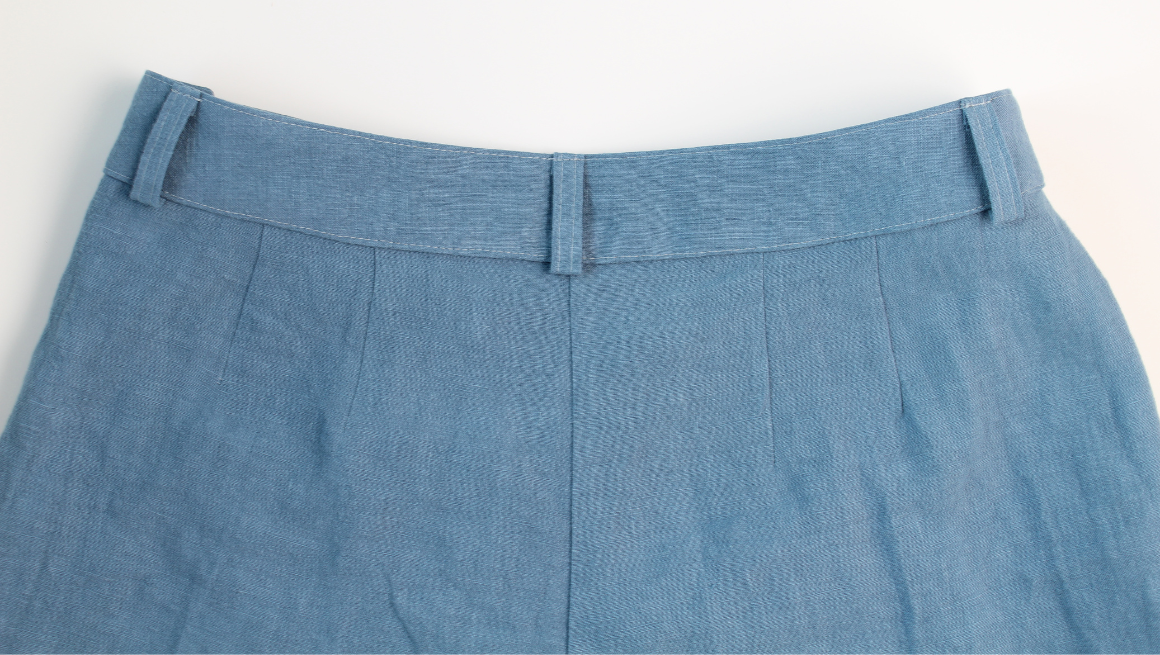
Crew Sew Along | Sew Waistband
BASTE STITCH THE BELT LOOPS Pin the belt loops right sides together at the waistline. Line up the raw edge of the two loops with the center front pleats. One belt loop will be at the center back...
Read more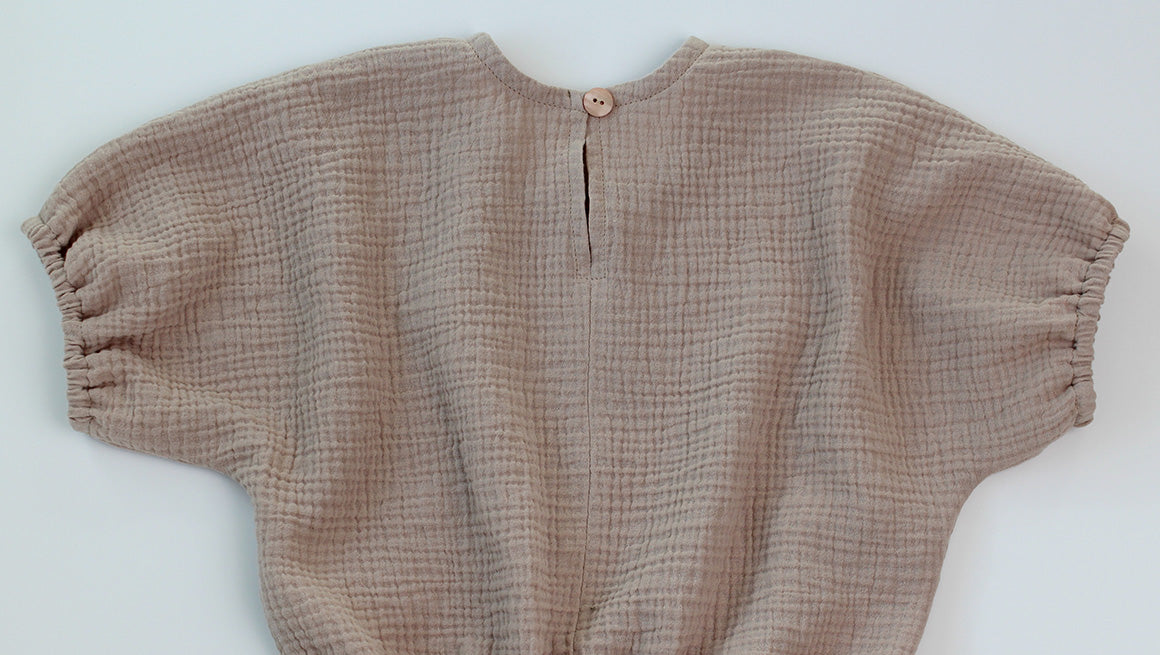
Aria Sew Along | Mini Aria View A
If sewing the Mini Aria, View A (high back) requires a button-back opening. The construction is slightly different from the adult version. If sewing View B (low back), you can follow the adult sew ...
Read more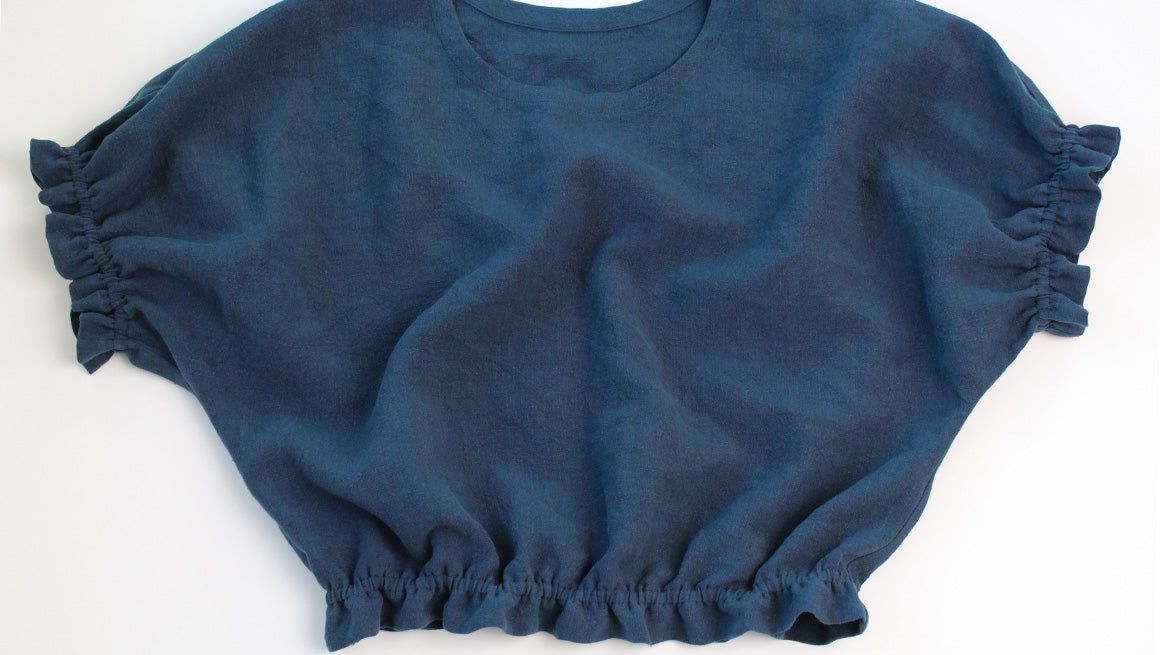
Aria Sew Along | Sew Side Seams and Hem
SEW THE SIDE SEAMS With the right sides together, sew the front and back bodice side seams, matching the side seam notch. Finish the seams and press to the back. SEW A FOLD GUIDE ON THE SLEEVE AN...
Read more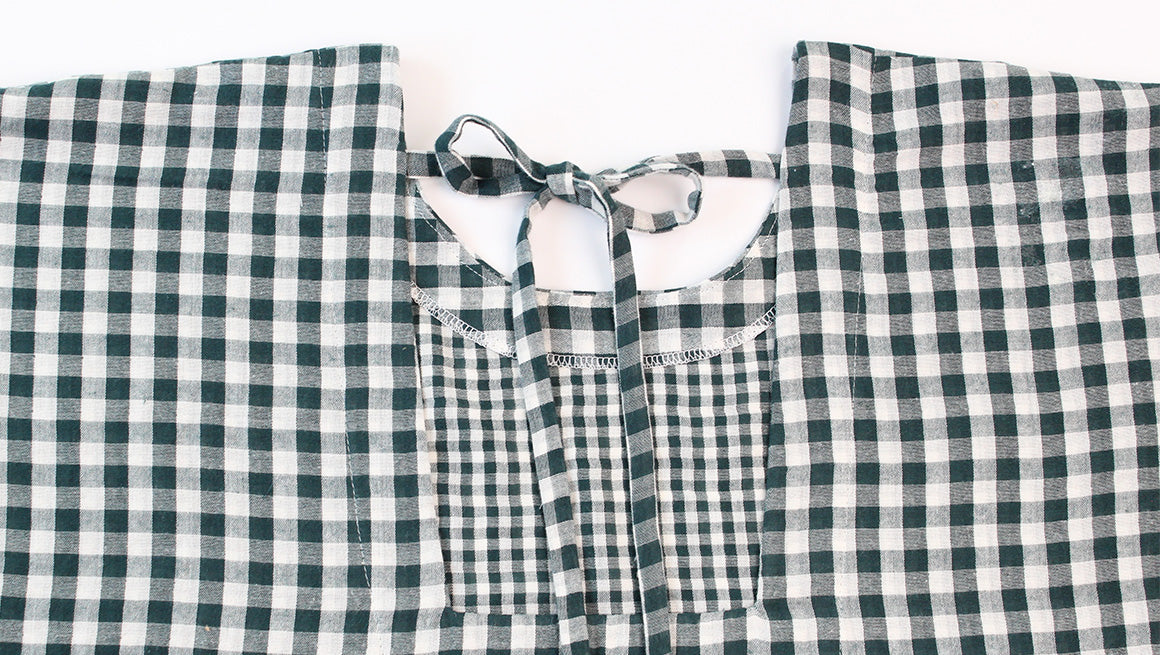
Aria Sew Along | Sew Facing Neckline
LOW BACK | SEW THE TIES If sewing the high back view with facings, skip to Sewing the Facing Shoulder Seams instructions below. With the right sides together, fold the ties in half lengthwise. Redu...
Read more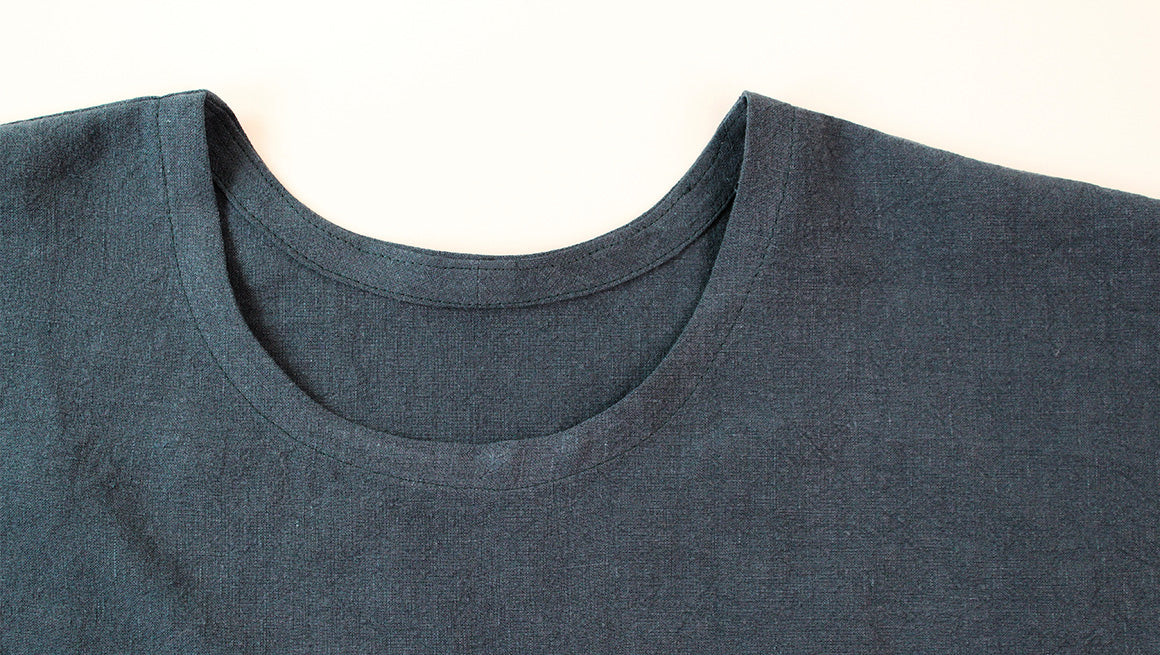
Aria Sew Along | Sew Bias Neckline
BIAS NECKLINE | SEW THE SHORT ENDS OF THE BIAS With the right sides together, fold the bias neckband in half. Sew the short seams of the bias neckband together. Press the seam open. ATTACH BIAS ...
Read more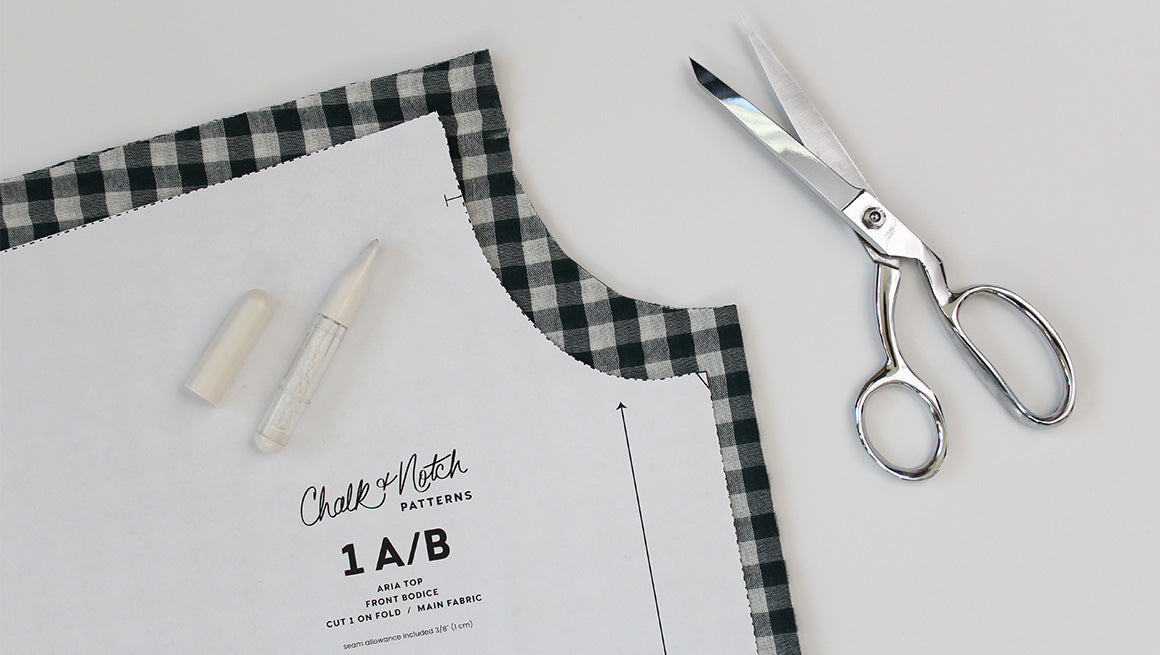
Aria Sew Along | Prepare Neckline, Sew Shoulder Seams
SEAM ALLOWANCE, MARKINGS & STAYSTITCH THE NECKLINE Unless noted, the seam allowance included is 3/8″ (1 cm) for joined seams. Clip or mark the notches. The notches are indicated by ‘T’ marks ...
Read more
Aria Sew Along | Getting Started
We are happy to bring you a sew along for the Aria Top sewing pattern. The sew along features step-by-step photos for the entire sewing process! In addition to the sew along, we also have community...
Read more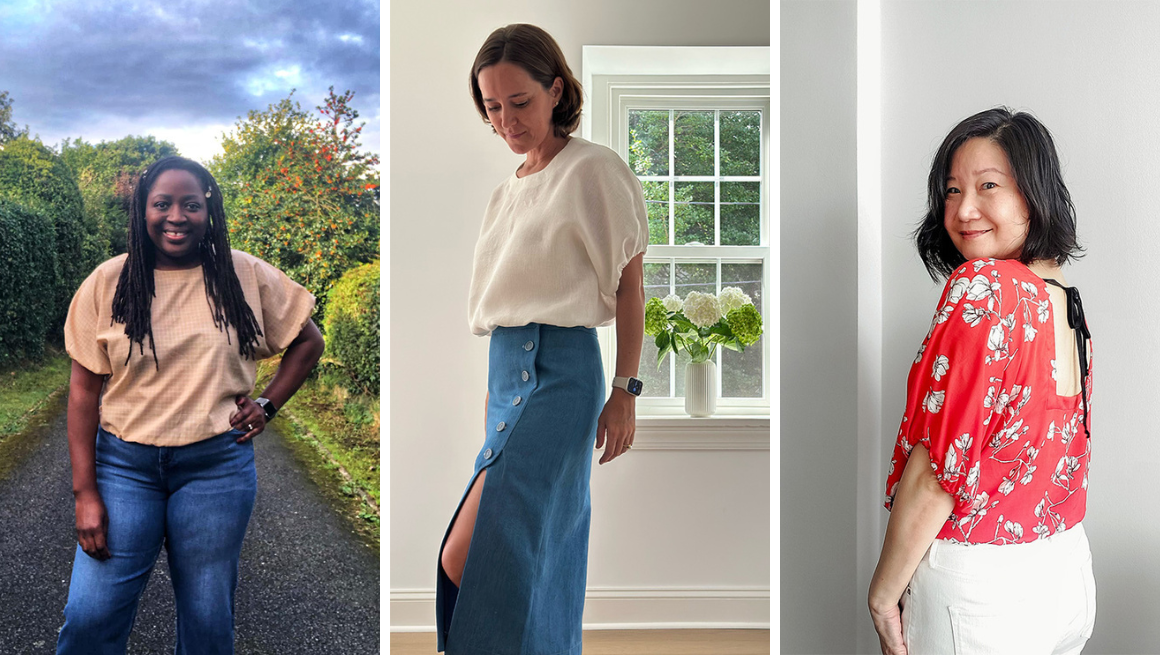
Thank You Aria and Mini Aria Testers!
It's time to share all about our Aria Testers! Our testers created so many lovely versions, many of them sewing more than one. Their input is such a valuable part of the development process and we'...
Read more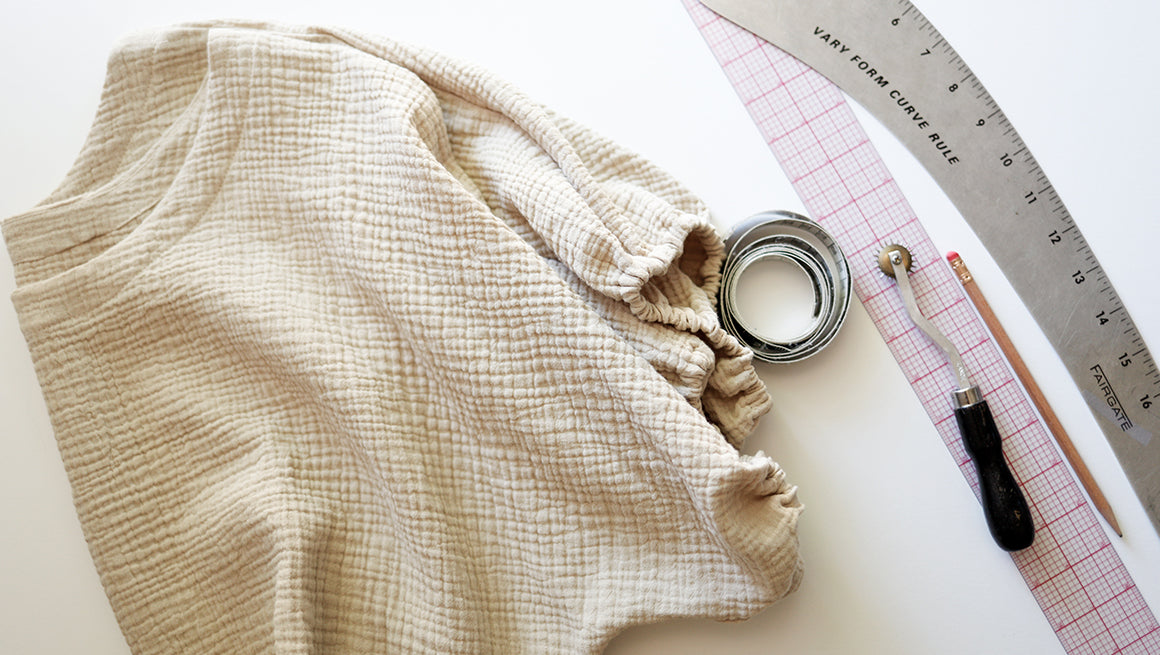
Aria Top Fitting and Custom Adjustments
If you are looking for help fitting your Aria Top pattern, you've found the right post! We have put together this post covering the most common fitting adjustments for the Aria. Find fitting posts ...
Read more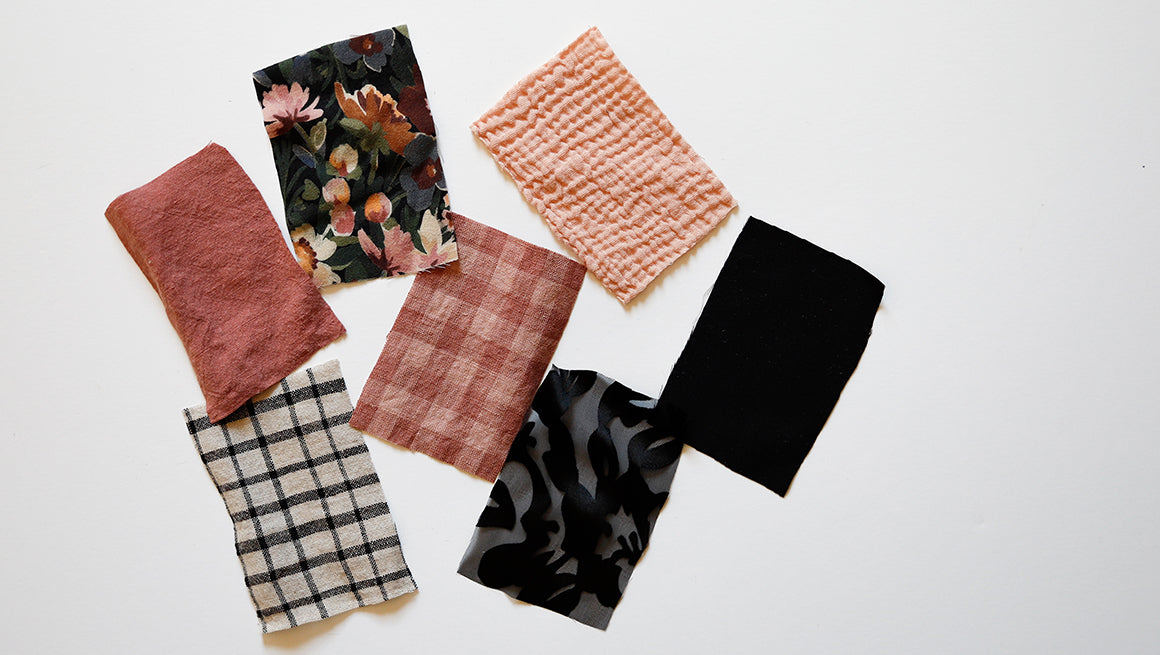
Aria Top Fabric Recommendations and Inspiration
Selecting fabrics for a pattern is always such a joy, and finding these Aria Top fabric recommendations and inspiration photos was no exception. There are SO many wonderful options, and each gives ...
Read more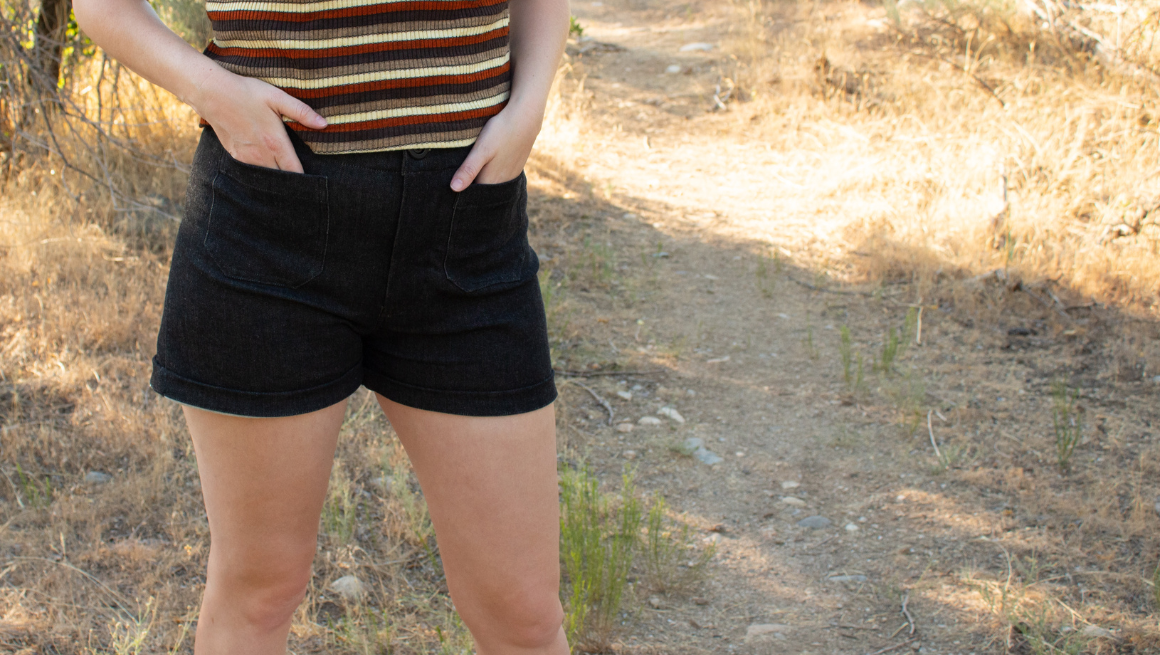
Tutorial | Isle Jean Shorts
Hi! Nicole here. I've had a pair of Isle Shorts in my mind since first sewing the pattern back in January, and I can't believe it's taken me halfway through summer to make it happen. Inspired by hi...
Read more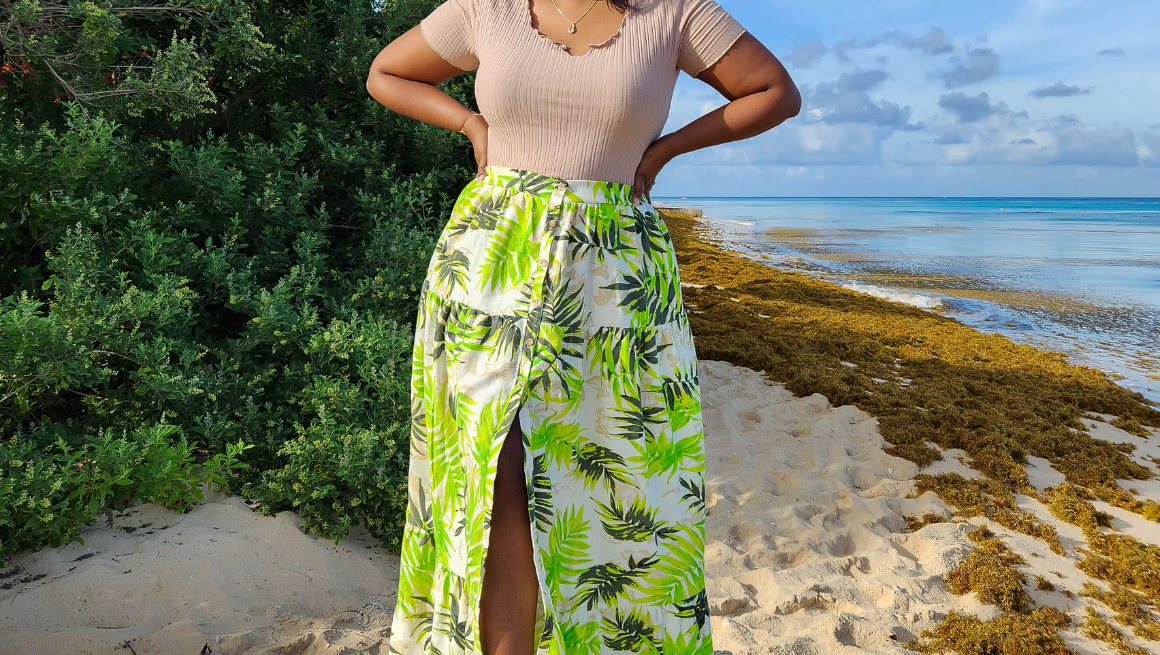
Tutorial | Shay Button Front Maxi Skirt with Pockets
Today we're lucky to be joined by Keira (@islandsewcialist on Instagram or check out her blog here) for our first Shay pattern hack tutorial. We'll let her take it away below: When I first laid eye...
Read more