
Rivi Sew Along | Sew the Collar & Collar Stand
There are a few ways to attach a collar to a collar stand. This is my favorite way to do it, and I hope you enjoy it. If you prefer a video tutorial, sewing the collar (steps 15-22) can be found on your YouTube channel here.
With the right sides together, pin the under collar at the center back seam, matching the double notches.

Sew the seam at 3/8” (1 cm). Press the seam allowance open.

With the right sides together, pin the upper collar to the under collar on three sides. Match the center back seam of the under collar to the center back notch of the upper collar. Sew at 3/8” (1 cm). Reduce the stitch length to get a sharp corner. Clip the corners and trim the seam allowance to half at the long edge. Turn right side out, making your corners square. A point turner can be helpful. Press the collar.

Topstitch the collar at 1/4” (0.6 cm) from the seam edge.

Press the collar and set it aside.

Prep the collar stand without fusible. Sew a fold guide on the bottom edge of the collar stand, just under 3/8” (1 cm).

Press the bottom edge in 3/8” (1 cm), wrong sides together. Set aside.

Place the sewn collar on top of the collar stand facing. The underside of the collar will face the right side of the collar stand facing. Sew them together at the top edge at 1/4” (0.6 cm), matching the notches.

With the right sides together, pin the collar stand facing to the neckline.

Starting at the center back neck, match the notch and continue around to match the notch at the shoulder seam.

The collar stand facing will extend past the center front by 3/8” (1 cm). The notch at the end of the collar stand facing will match the end of the placket.

Sew the neckline at 3/8” (1 cm).

Trim the seam allowance to half. Press the seam allowance towards the collar stand facing.

Draw a curve on the wrong side of the collar stand to help guide your stitching. This is the collar stand without fusible.

Pin the collar stand to the collar stand facing that is already attached to the bodice at the top edge. Sew the collar stands right sides together at 3/8” (1 cm).

The collar will be sandwiched between the collar stands. Make sure the hem of the collar stand is still folded.

Trim the seam allowance to half at the neckline, tapering to zero at the center front. Turn the collar stand right side out. A point turner can be helpful to smooth out the curved shape.

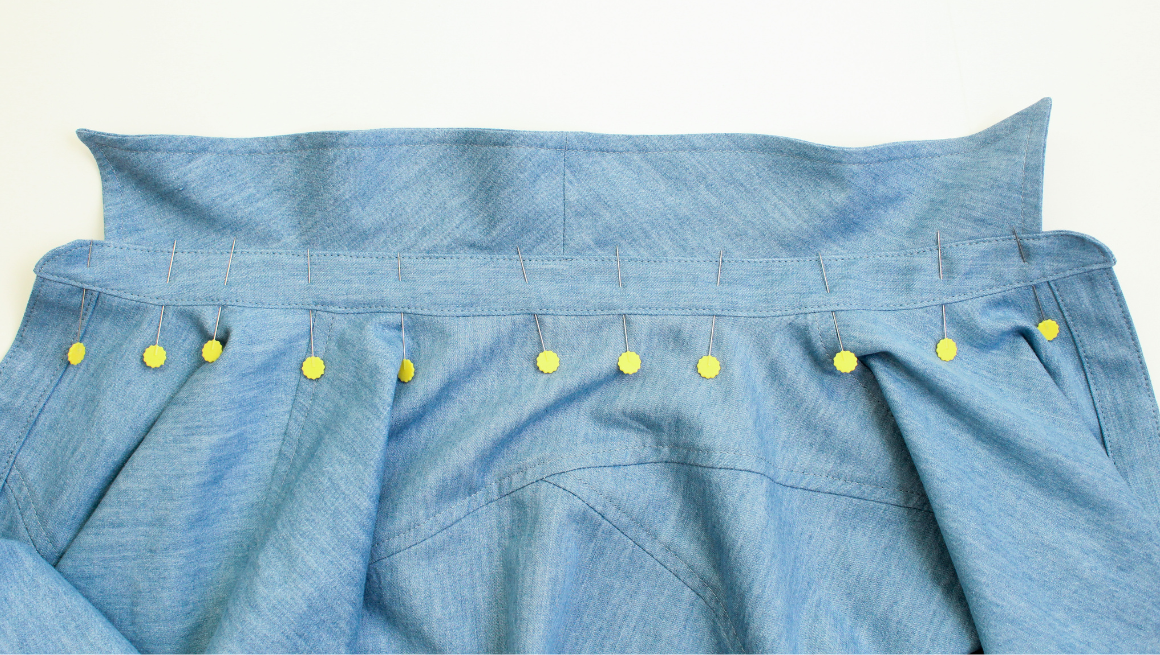
On the inside of the garment, pin the folded edge of the collar stand to cover the neckline seam. It can be helpful to hand baste the collar stand in place.

Then flip to the right side and add pins to the right side, keeping the collar stand in place. Remove the underside pins. Topstitch the collar stand by starting at the center back and stitching 1/8” (0.3 cm) away from the seam all the way around. Check to make sure you are catching the underside at the neckline. If sewing the blouse, skip to step 27.

If you are sewing the dress and adding pockets, find that post here, or if sewing the blouse, skip to this post.
Rivi Sew Along Posts: Getting Started | Staystitching & Fusing | Assemble the Bodice & Placket | Sew the Collar & Collar Stand | Sew the Pockets | Sew the Side Seam Slits | Sew the Sleeves | Hem & Sew Buttons
%20can%20be%20found%20on...)