
Bora Sew Along | Sew the Invisible Zipper
Bora Sew Along | Sew the Invisible Zipper (All Views)
29. PREP THE ZIPPER
If you prefer a bit more visual instruction. We have an IG Reel with steps 29-30 posted HERE.
Confirm the fit with a 3/4" (2 cm) seam allowance at the center back. Mark your center back seam with a washable marker or chalk. 
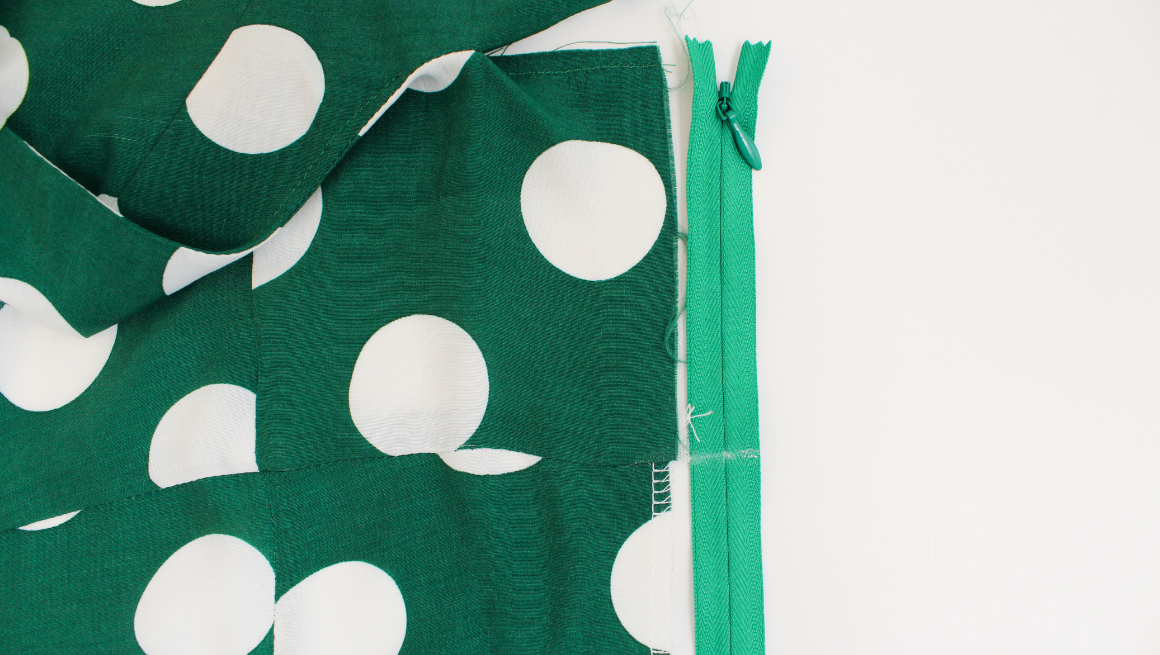
 Using a low heat setting, press the zipper coils open to help you sew close to the zipper teeth.
 To keep the placement consistent, transfer a few marks onto your zipper. Mark 1/2" (1.5 cm) above the zipper stop, at the waist seam, and at the end of the zipper on the back of the invisible zipper tape.

30. SEW THE ZIPPER TO THE MAIN BODICE
Switch to an invisible zipper foot if possible. 
With the bodice right side up, place the zipper right side down, aligning it with your marked center back seam. Open the zipper and pin the left side of the zipper in place. Line up the top cut edge with the first mark, the waist seam, and the end of the zipper.

Put the zipper teeth in the groove of the invisible zipper foot. Sew one side of the zipper, sewing as far as you can go. Repeat for the other side.
 Once you are happy with the zipper placement, you can sew a second pass, pulling open the coil and sewing even closer.

31. SEW THE LINING TO THE CENTER BACK
If you prefer a bit more visual instruction. We have an IG Reel with steps 31-33 posted HERE.
Turn the bodice wrong side out. Flip the bodice lining down so the right side of the center back lining is facing the center back seam allowance. Trim the center back lining 1/8" (0.3 cm). This will help the center back lining lie to the inside of the invisible zipper. 
Pin the cut edge of the lining to the cut edge of the main bodice. Sew close to the previous stitch line to clean finish the bodice lining.

Turn the bodice right side out to check the zipper. The top corner will still not be sewn. Repeat for the other side.
32. CLOSE THE CENTER BACK SEAM
With the right sides together, sew the center back seam under the zipper at 3/4" (2 cm). When near the zipper stop, hand crank your machine so you don't sew over it. If needed, you can sew to the inside of the zipper stitch line and just past it. 
Press the seam open.
 33. CLOSE THE CENTER BACK TOP EDGE
Switch to a regular sewing foot. With the bodice wrong side out, fold the center back seam towards the bodice lining to help make a sharp corner. Pin and sew the top edge of the center back to meet up with the neckline stitching.  Make sure both sides are even. Clip the corners, turn right side out, and press.

 34. TACK THE BODICE LINING IN PLACE
Try on the bodice to ensure no adjustments are needed. Pin the bodice lining in place at the waistline. Machine sew or hand tack the bodice together at the seams to hide the stitching. Alternatively, you can fold the lining hem under, and sew the waistline to the hem. If your skirt pieces are cut on the bias or if you are skipping the hem facing pieces, skip to step 39.

The Bora Dress is almost finished, click on our next post here to sew the hem.
Bora Sew Along Posts: Getting Started | Staystitching, Fusing Pattern Pieces | Sew the Bodice | Sew the Sleeves and Neckline (View A) | Sew Tank and Neckline (view B) | Sew the Skirt | Sew the Invisible Zipper | Sewing the Hem
%0A29.%20PREP%20THE%20ZIPPER%C2%A0%0AIf%20you%20prefer%20a%20bit%20more%20visual%20instruction.%20We%20have%20an%20IG%20Reel%20with%20steps%2029-30%20posted%20HERE.%0AConfirm%20the%20fit%20with%20a%203/4%22%20...)