News
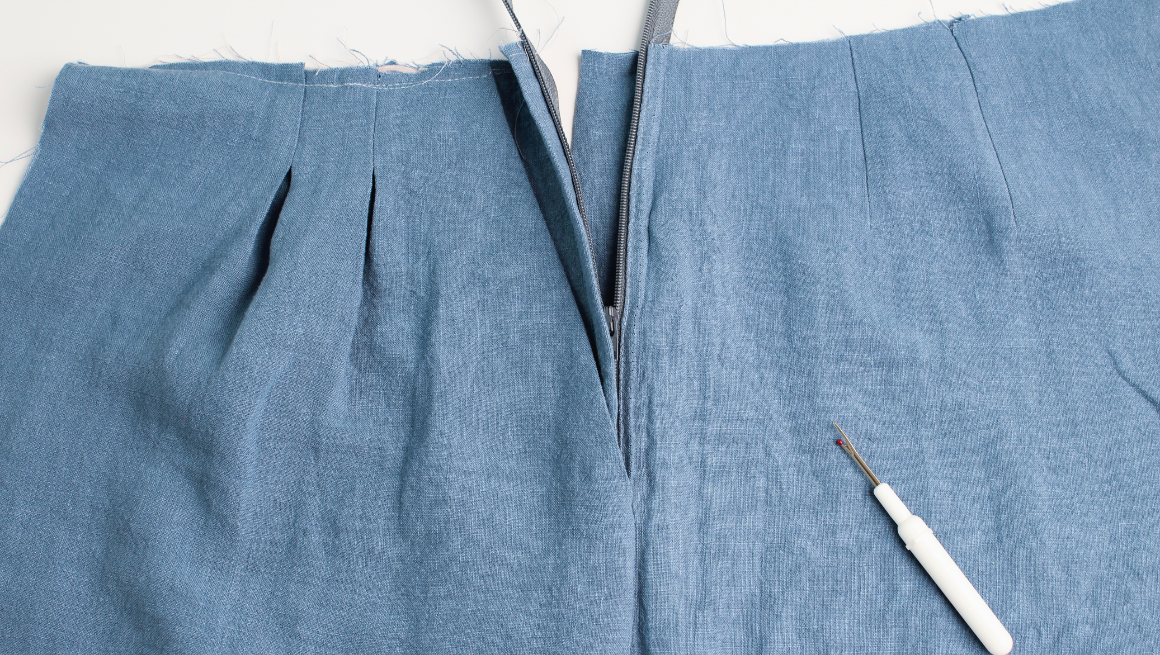
Crew Sew Along | Sew Zipper and Side Seams
FINISH THE SIDE SEAMS Finish the front and back side seams separately on all four pieces. MARK THE STITCHING ON THE WEARER'S LEFT SIDE SEAM Take the wearer's left front and left back pieces. The...
Read more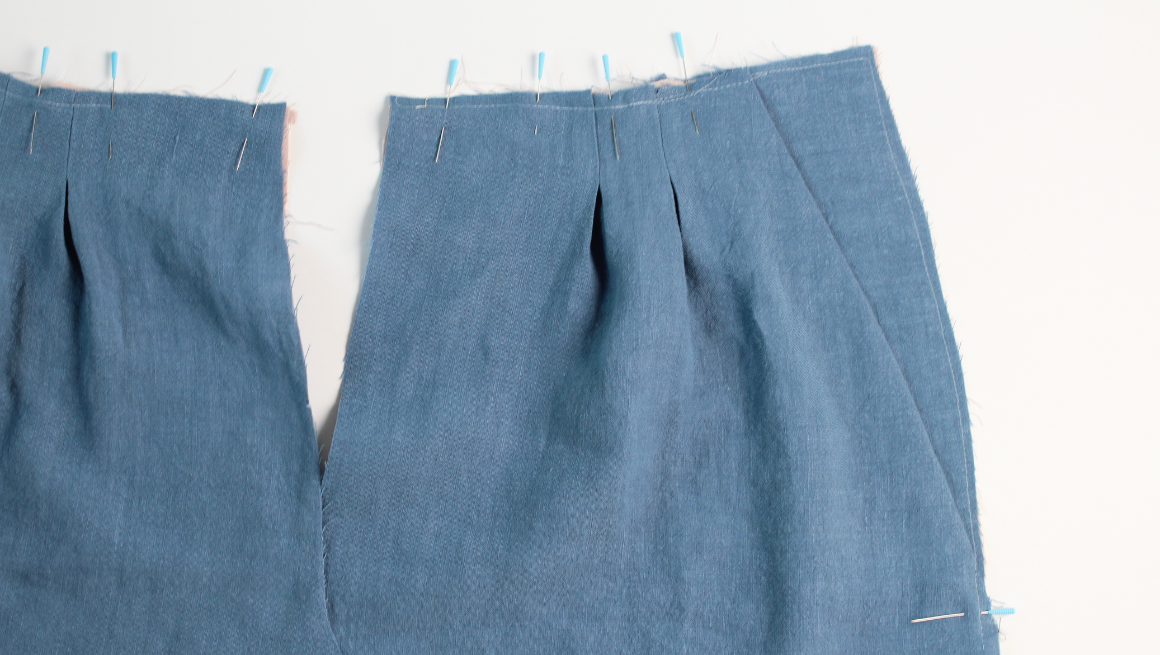
Crew Sew Along | Prepare Pockets
OPTIONAL POCKET FACING Finish the angled edge of the pocket facing or fold it under at 3/8" (1 cm). Pin the pocket facing right side up to the right side of the under pocket lining. Edgestitch in p...
Read more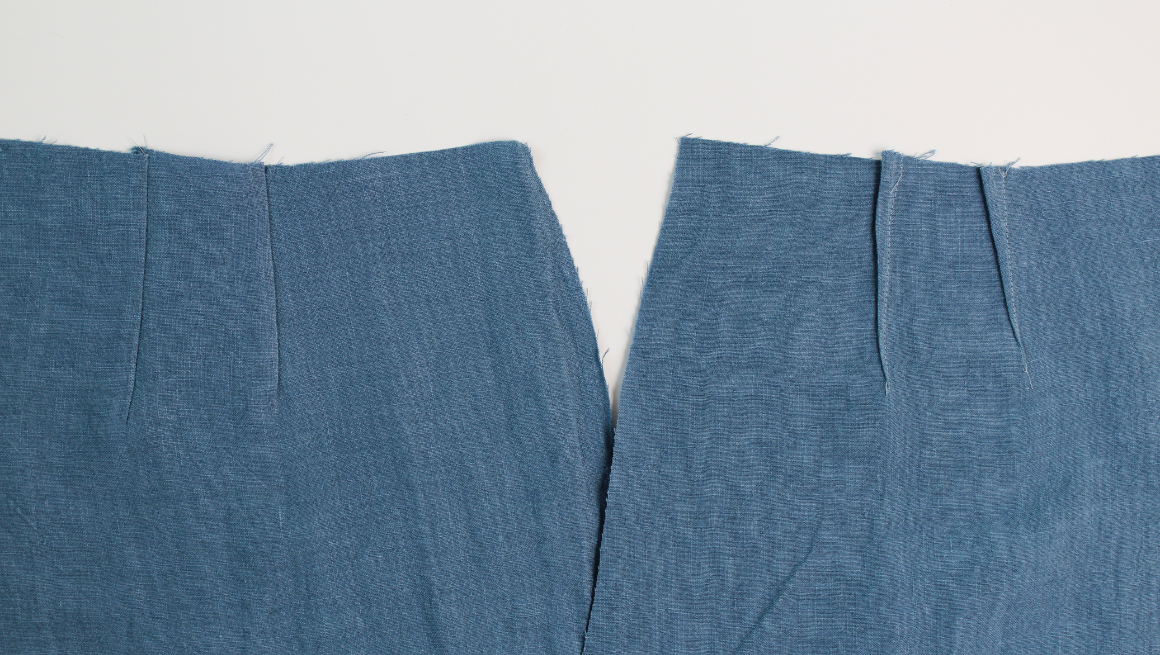
Crew Sew Along | Interfacing, Pleats, and Darts
SEAM ALLOWANCE & MARKINGS Unless noted, the seam allowance included is 3/8" (1 cm) for joined seams. The side seams have a 3/4" (2 cm) seam allowance to allow for the side seam lapped zipper. T...
Read more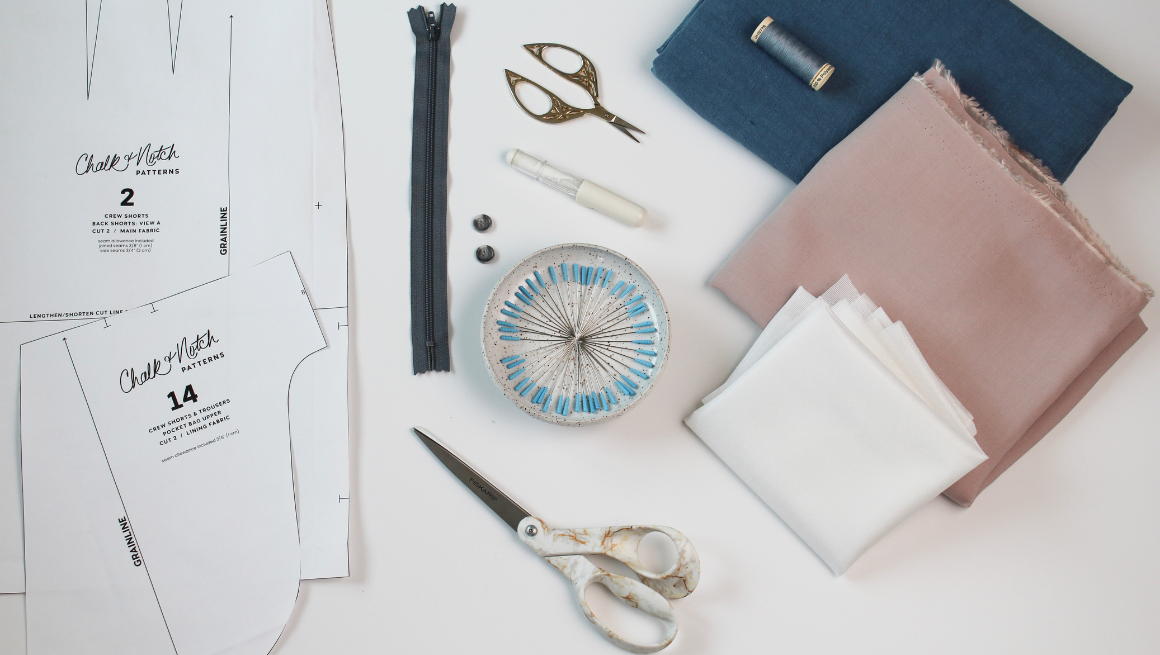
Crew Sew Along | Getting Started
We are happy to bring you a sew along for the Aria Top sewing pattern. The sew along features step-by-step photos for the entire sewing process! In addition to the sew along, we also have community...
Read more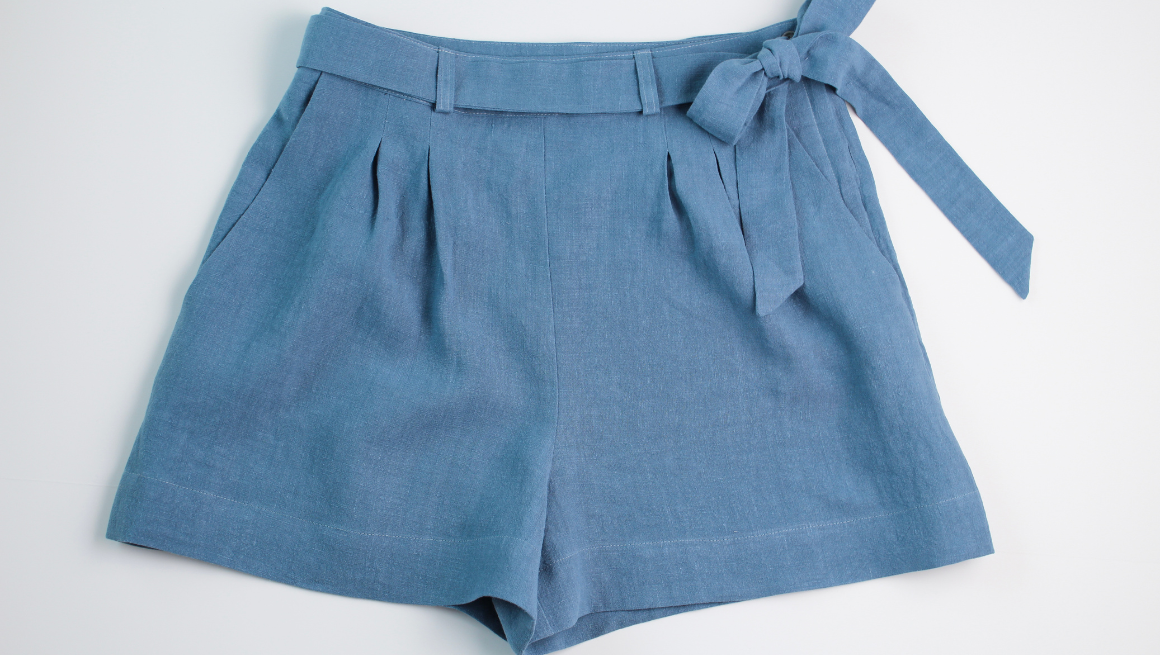
Crew Sew Along | Sew Hem and Finishing
STITCH HEM GUIDE AT 1/2″ (1.2 CM) & FOLD EDGE UP Prep the hem by stitching a fold guide at 1/2" (1.2 cm). Press the hem up 1/2" (1.2 cm), wrong sides together. FOLD AGAIN AT 1 3/4″ (4.5 ...
Read more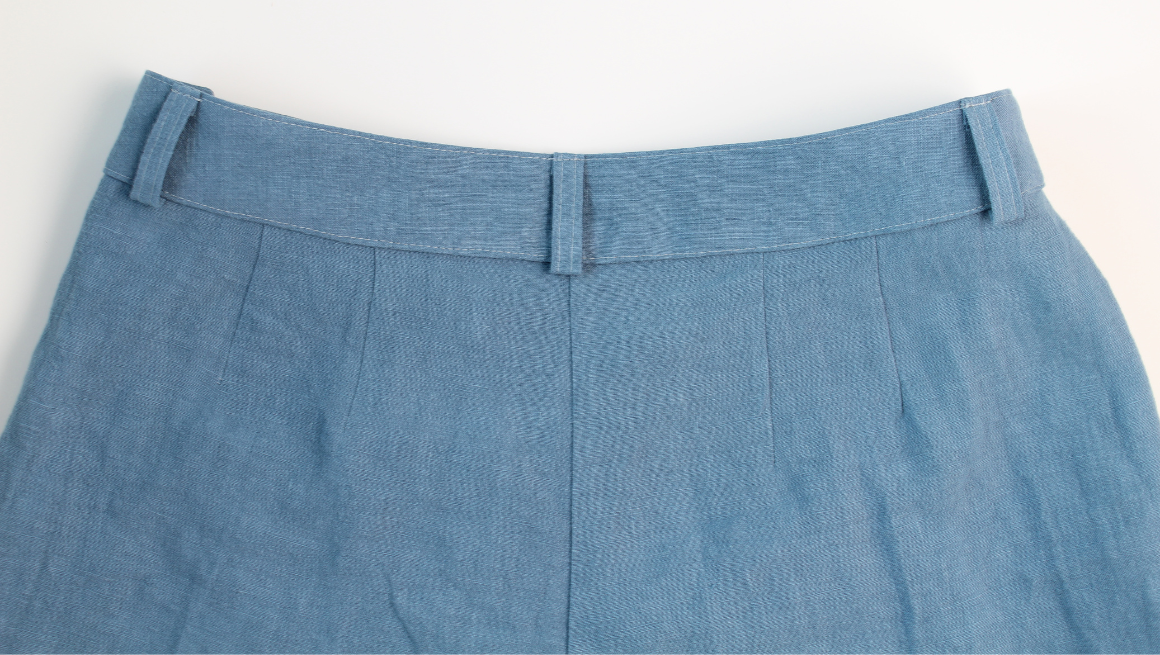
Crew Sew Along | Sew Waistband
BASTE STITCH THE BELT LOOPS Pin the belt loops right sides together at the waistline. Line up the raw edge of the two loops with the center front pleats. One belt loop will be at the center back...
Read more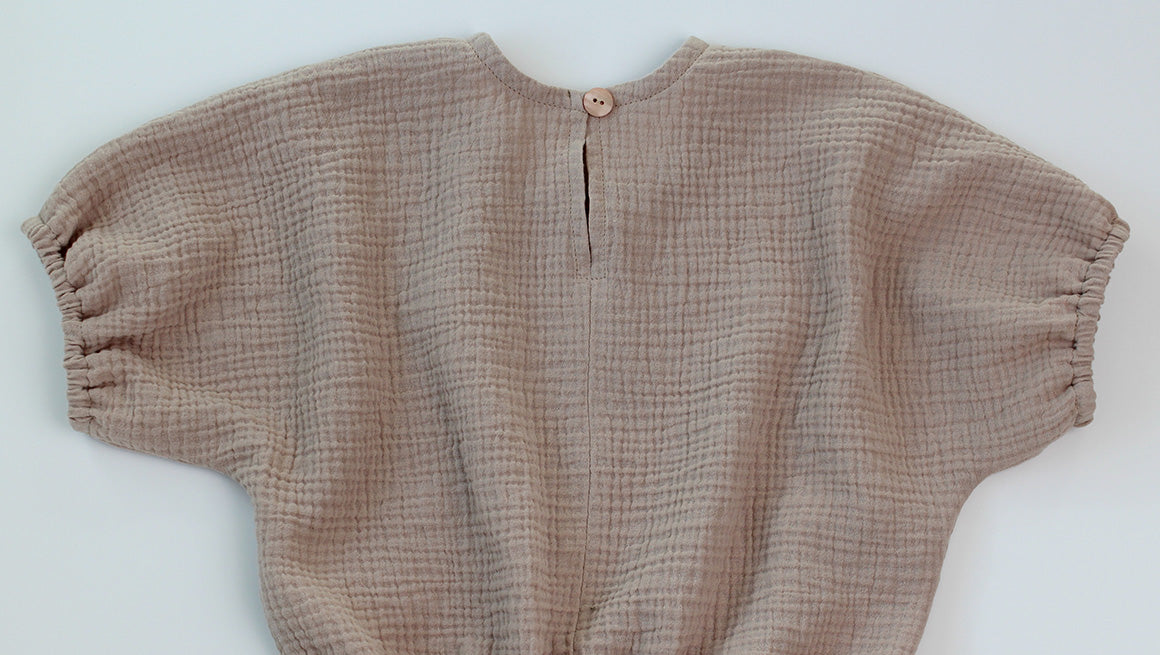
Aria Sew Along | Mini Aria View A
If sewing the Mini Aria, View A (high back) requires a button-back opening. The construction is slightly different from the adult version. If sewing View B (low back), you can follow the adult sew ...
Read more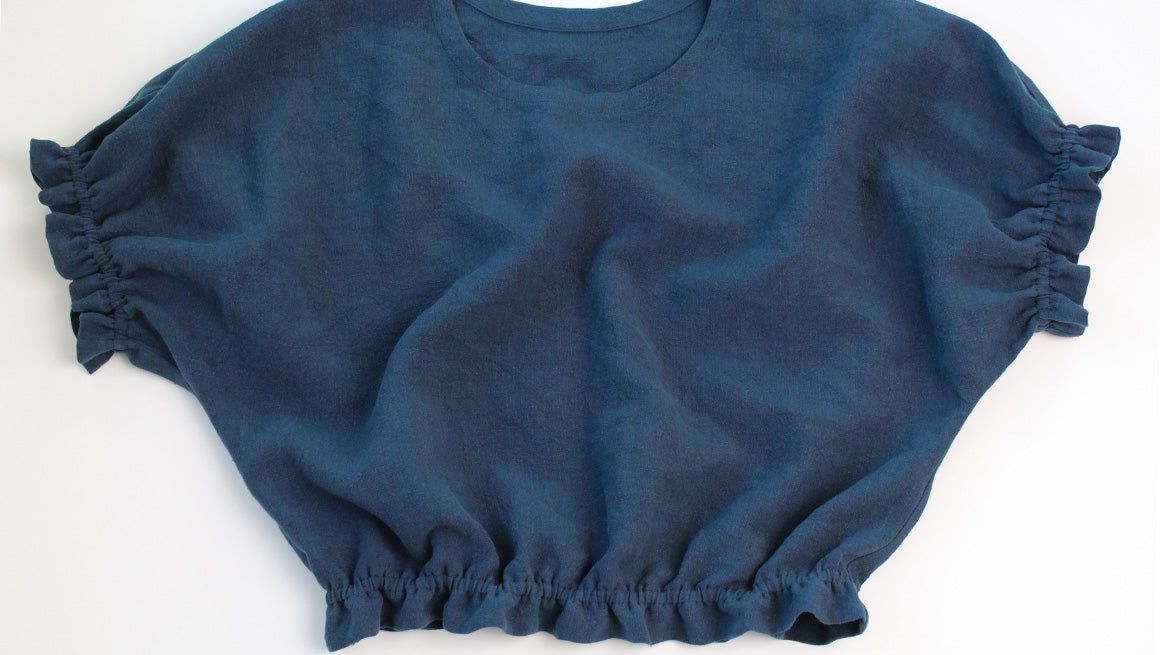
Aria Sew Along | Sew Side Seams and Hem
SEW THE SIDE SEAMS With the right sides together, sew the front and back bodice side seams, matching the side seam notch. Finish the seams and press to the back. SEW A FOLD GUIDE ON THE SLEEVE AN...
Read more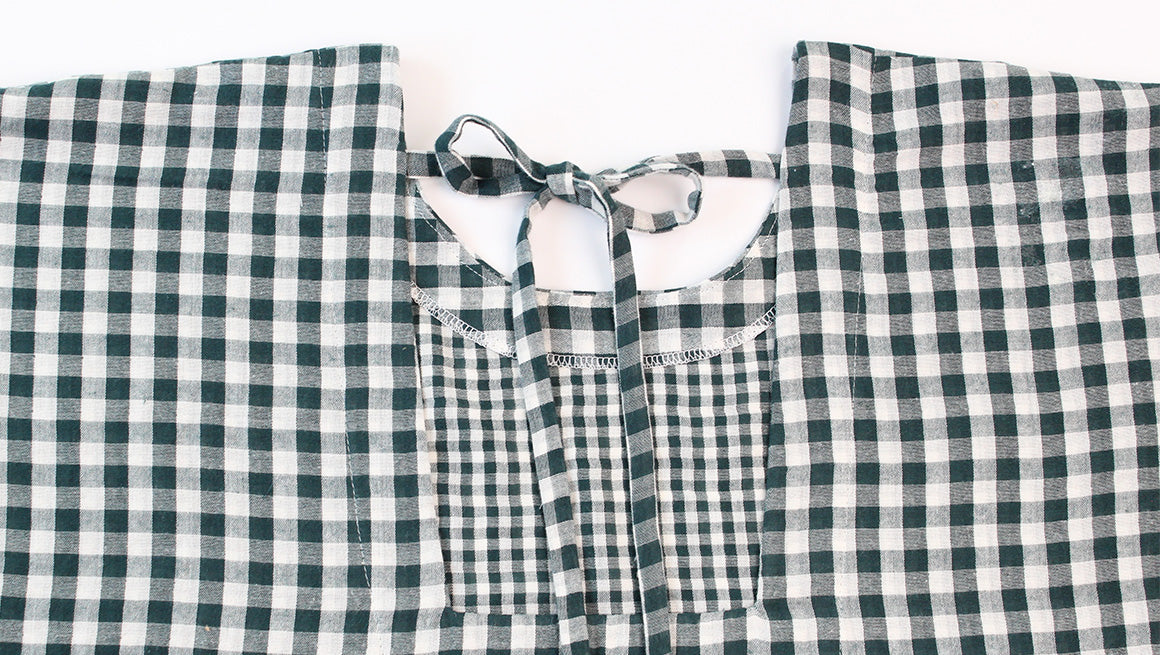
Aria Sew Along | Sew Facing Neckline
LOW BACK | SEW THE TIES If sewing the high back view with facings, skip to Sewing the Facing Shoulder Seams instructions below. With the right sides together, fold the ties in half lengthwise. Redu...
Read more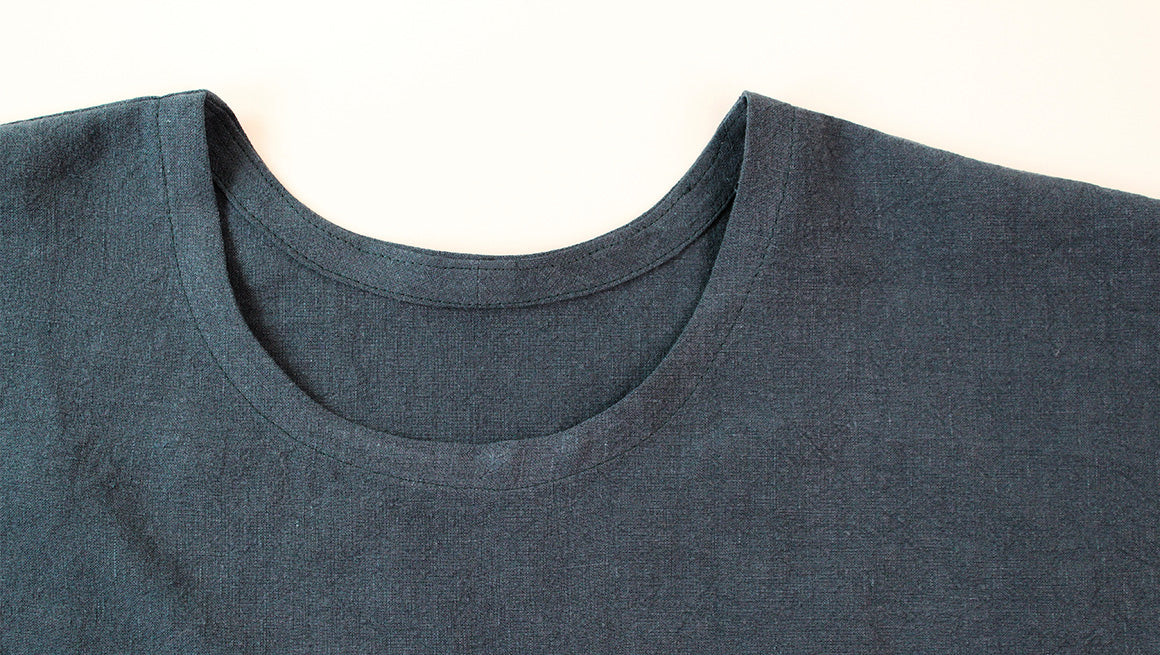
Aria Sew Along | Sew Bias Neckline
BIAS NECKLINE | SEW THE SHORT ENDS OF THE BIAS With the right sides together, fold the bias neckband in half. Sew the short seams of the bias neckband together. Press the seam open. ATTACH BIAS ...
Read more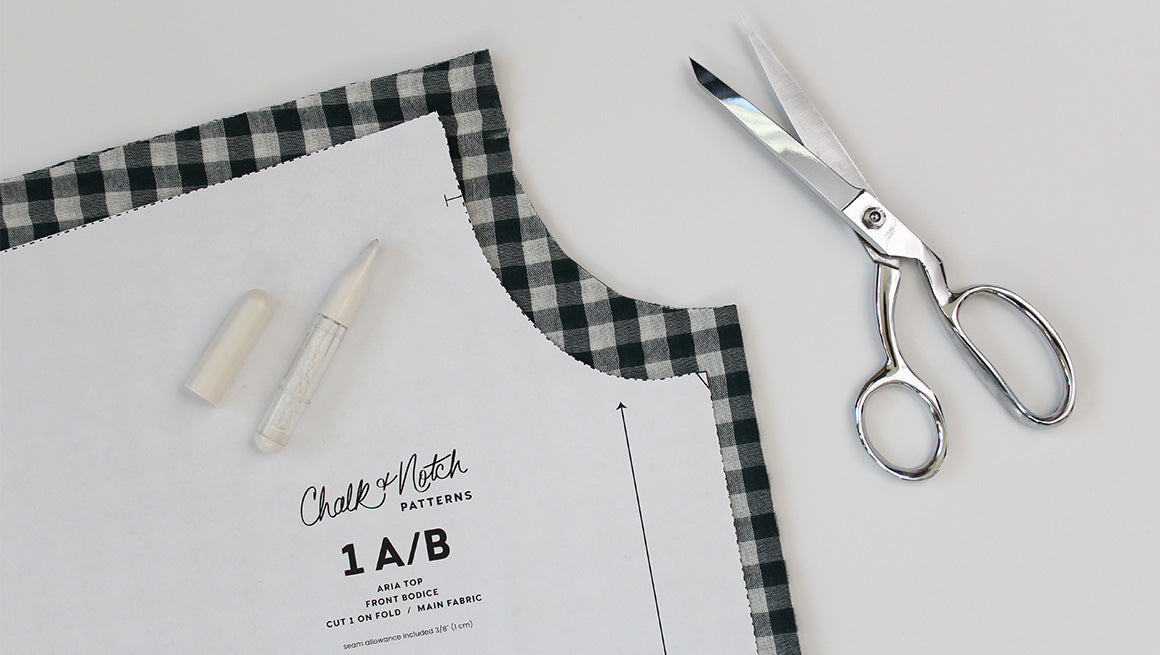
Aria Sew Along | Prepare Neckline, Sew Shoulder Seams
SEAM ALLOWANCE, MARKINGS & STAYSTITCH THE NECKLINE Unless noted, the seam allowance included is 3/8″ (1 cm) for joined seams. Clip or mark the notches. The notches are indicated by ‘T’ marks ...
Read more
Aria Sew Along | Getting Started
We are happy to bring you a sew along for the Aria Top sewing pattern. The sew along features step-by-step photos for the entire sewing process! In addition to the sew along, we also have community...
Read more
Shay Dress Sew Along | Button Placket and Finishing View B
SEW TIER 1 TO THE BODICE With the right sides together, sew the tier 1 skirt to the right side of the bodice main. Finish the seam and press towards the bodice. TURN RIGHT SIDE OUT Turn t...
Read more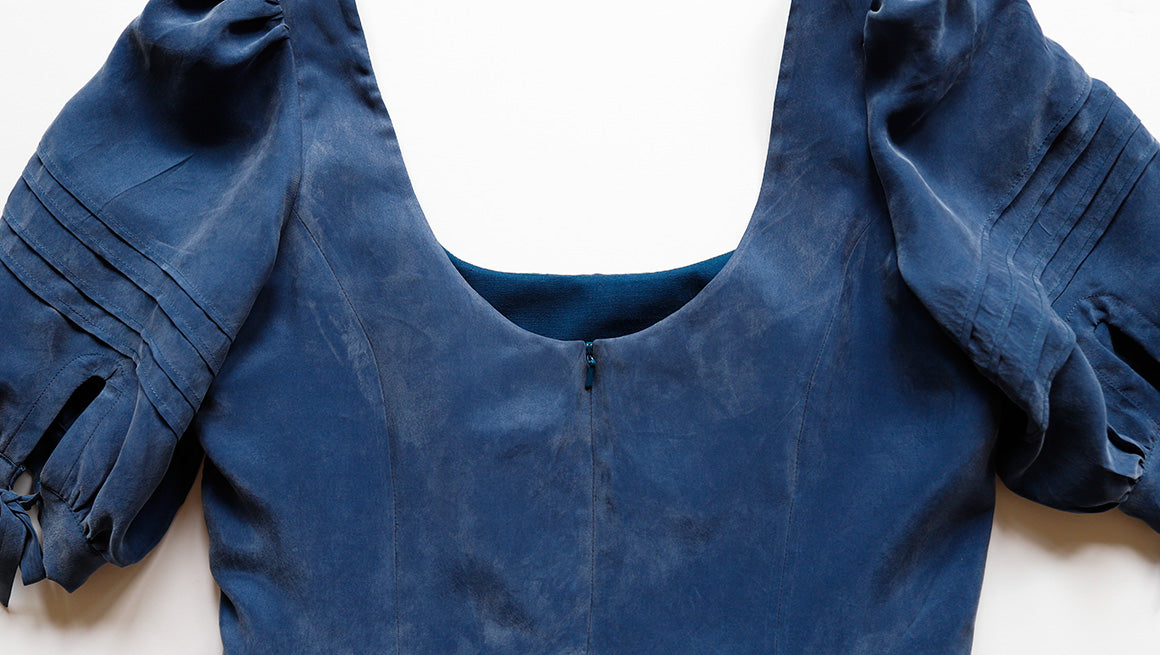
Shay Dress Sew Along | Zipper and Finishing View A
Let's finish up View A! SEW TIER 1 TO THE BODICE With the right sides together, sew the tier 1 skirt to the right side of the bodice main. Make sure not to catch the bodice lining. Remove...
Read more
Shay Dress Sew Along | Sew & Gather Skirt Tiers
SEW TIER 1 SKIRT With the right sides together, sew the tier 1 front and back pieces at the side seams. There are three pieces. Leave the center back finished edges (View A) or center front edge (V...
Read more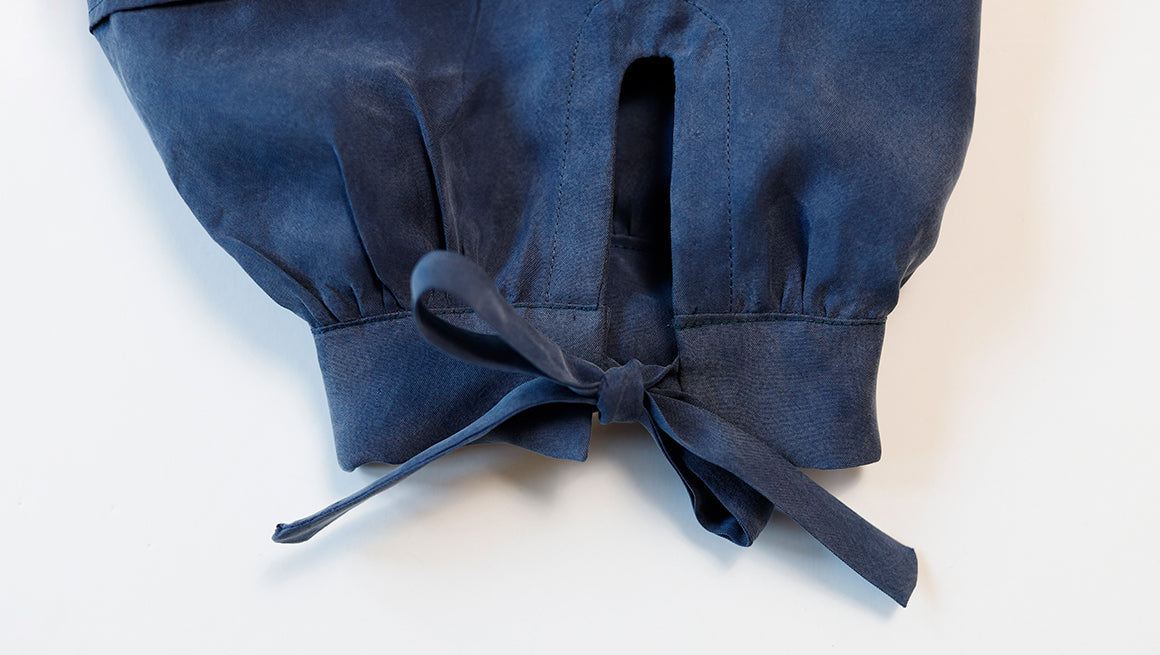
Shay Dress Sew Along | Sew and Attach Sleeves
PREP THE SLEEVE PIN TUCKS Mark the pin tucks on the right side of the sleeves. I try to do this right after I cut the sleeve pattern pieces if my fabric is shifty. There are four parallel lines 1" ...
Read more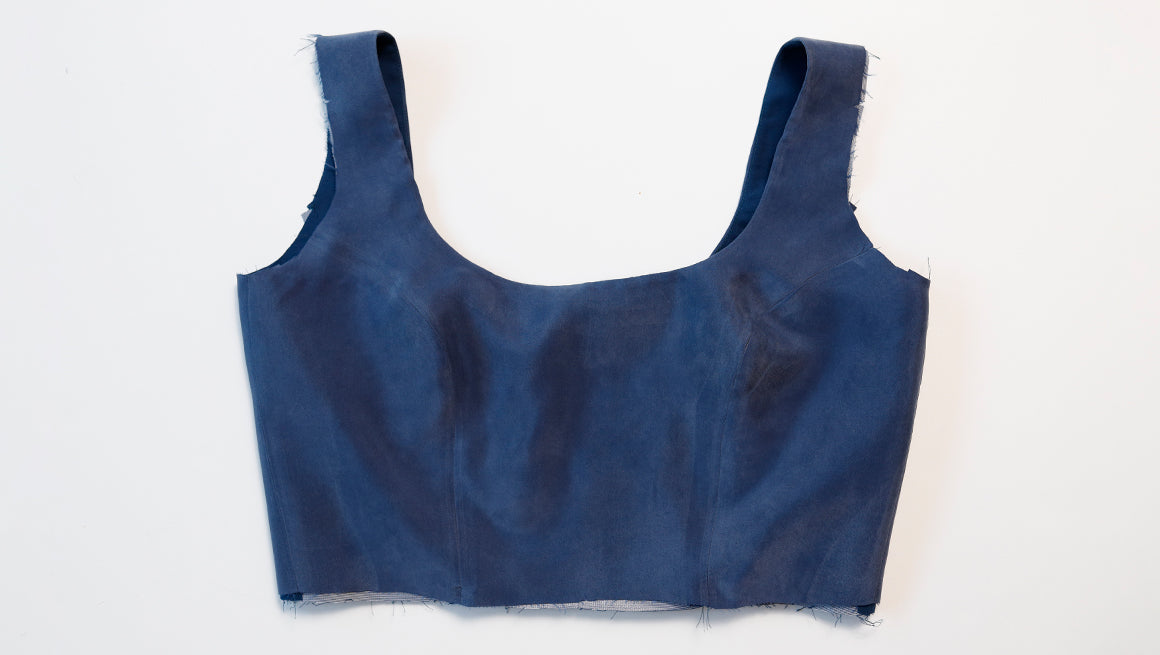
Shay Dress Sew Along | Sew Bodice and Neckline, Finish Tank Armhole
SEW THE SIDE BODICE TO THE CENTER BODICE FOR MAIN AND LINING Pin the side front bodice pieces to the center front bodice. Pin the side back pieces to the center back bodice pieces. Repeat for the l...
Read more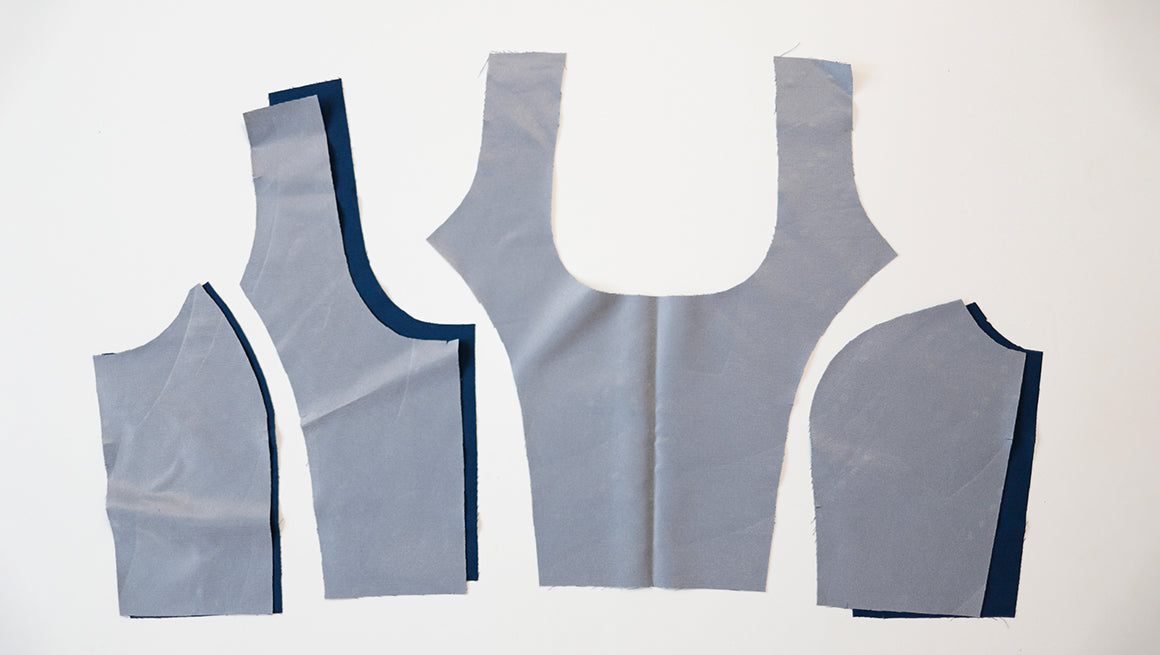
Shay Dress Sew Along | Preparing the Bodice
Unless noted the seam allowance included is 3/8" ( 1 cm) for joined seams. First, clip or mark notches indicated by 'T' marks. STAYSTITCH THE MAIN BODICE NECKLINE Before handling your cut pieces...
Read more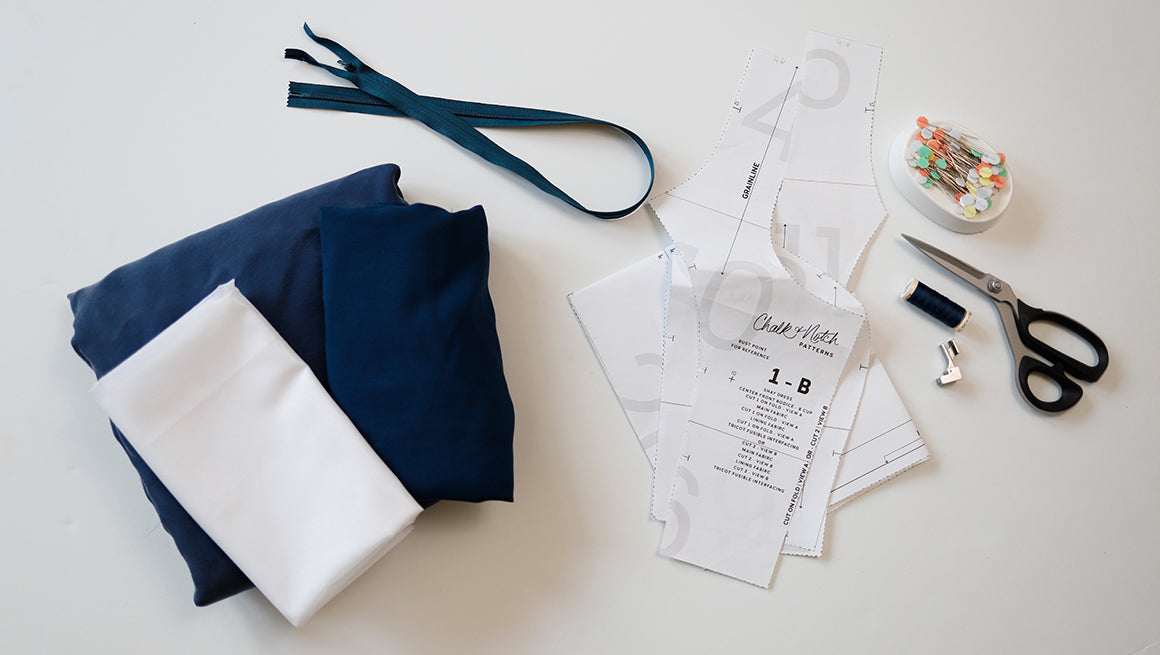
Shay Sew Along | Getting Started
We are happy to bring you a sew along for the Shay Dress pattern. The sew along features step-by-step photos for the entire sewing process! In addition to the sew along, we also have community-lead...
Read more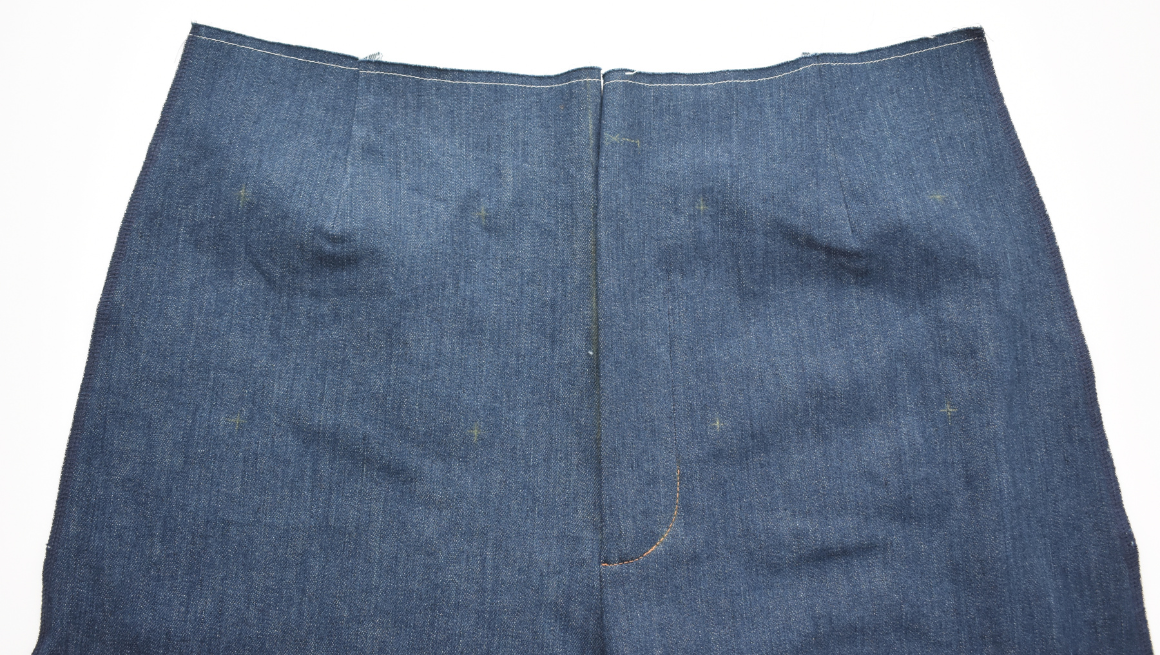
Isle Jeans Sew Along | Sew Front Rise, Attach Zipper & Sew Front Fly
In this post, we'll be constructing the front fly and attaching the zipper to our jeans. We will begin by sewing the front rise. SEW THE BOTTOM OF THE FRONT RISE Pin the front rise with the right s...
Read more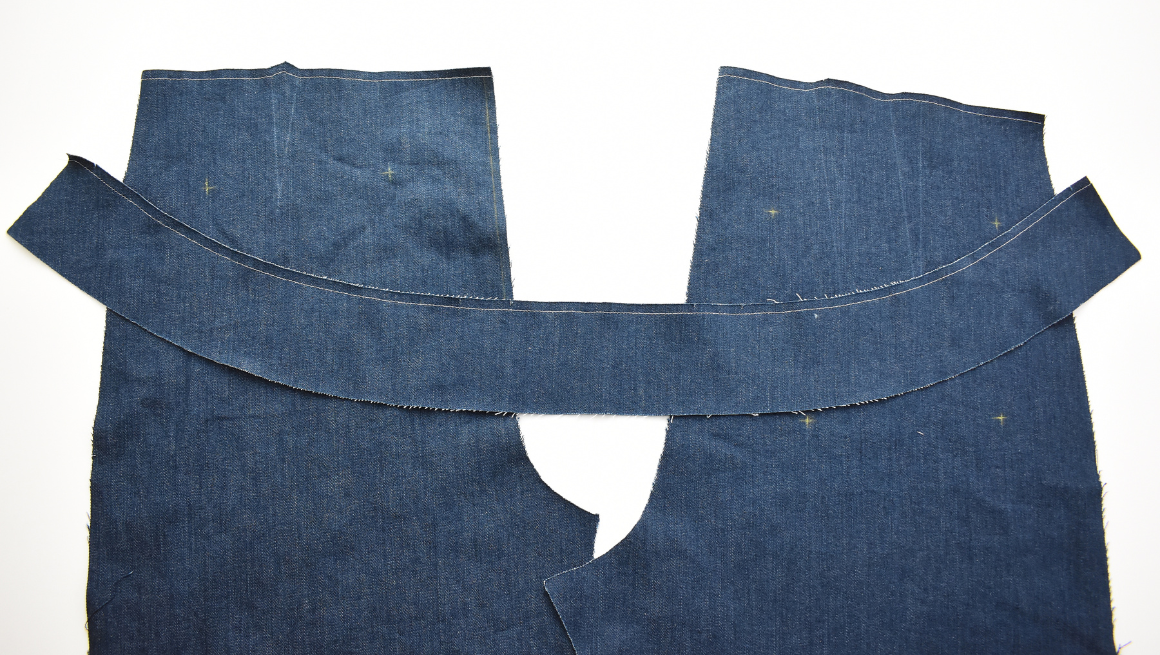
Isle Jeans Sew Along | Add Interfacing, Prep Center Fly & Sew Darts
We'll begin sewing our jeans by transferring markings, prepping the center fly, adding interfacing, and sewing the darts. SEAM ALLOWANCE, MARKINGS & TOPSTITCHING Unless noted, the seam allowanc...
Read more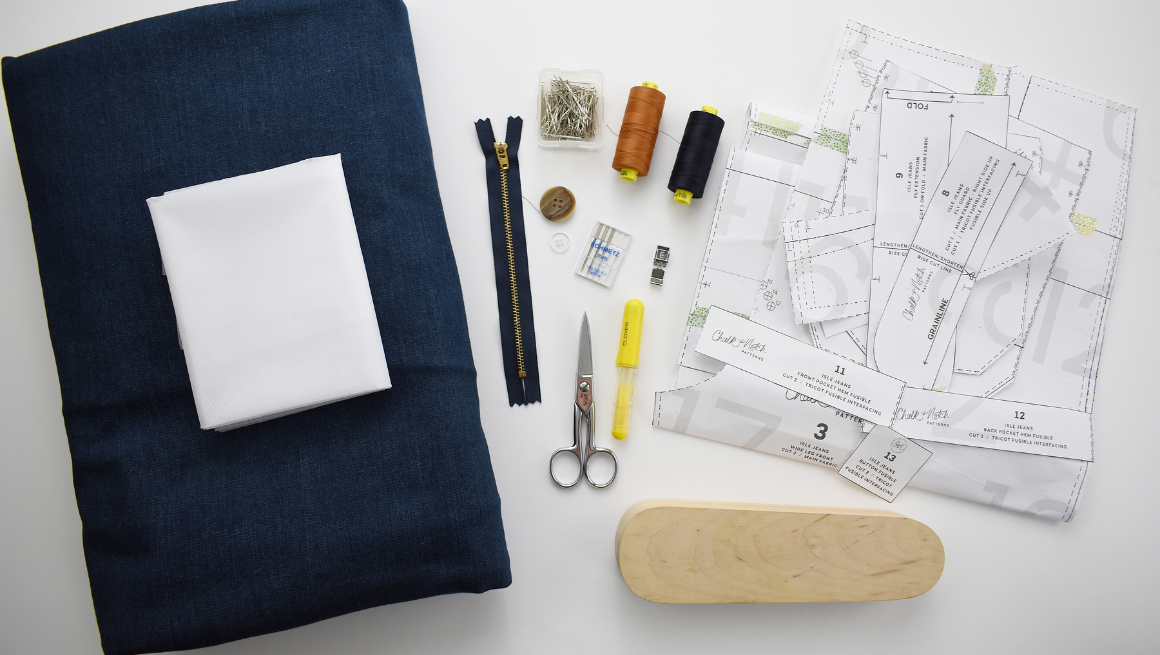
Isle Jean Sew Along | Getting Started
We are happy to bring you a sew along for the Isle Jeans pattern. We will be sewing the wide leg view since the construction is the same for each view. The sew along features step-by-step photos fo...
Read more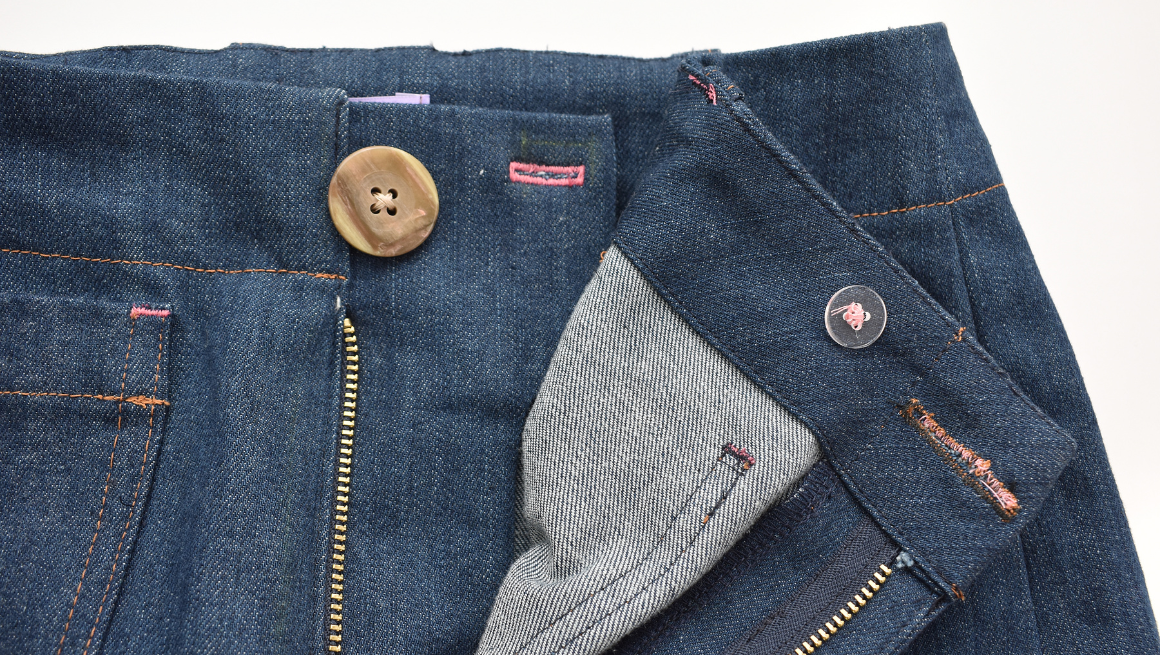
Isle Jeans Sew Along | Topstitch Fly, Sew Buttonholes, Attach Buttons & Sew Hems
It's time to finish our jeans! We'll add the final topstitching to the fly, sew the buttonholes, attach the buttons, and sew the hems. EDGESTITCH ZIPPER ON THE WEARER’S RIGHT SIDE Using a zipper fo...
Read more
Isle Jeans Sew Along | Sew & Attach Belt Loops & Waistband Facing
In this post, we'll be sewing and attaching our belt loops. We'll also attach our waistband facing. SEW THE BELT LOOPS Fold the raw edge of the belt loop in 3/8” (1 cm), wrong sides touching. Fold ...
Read more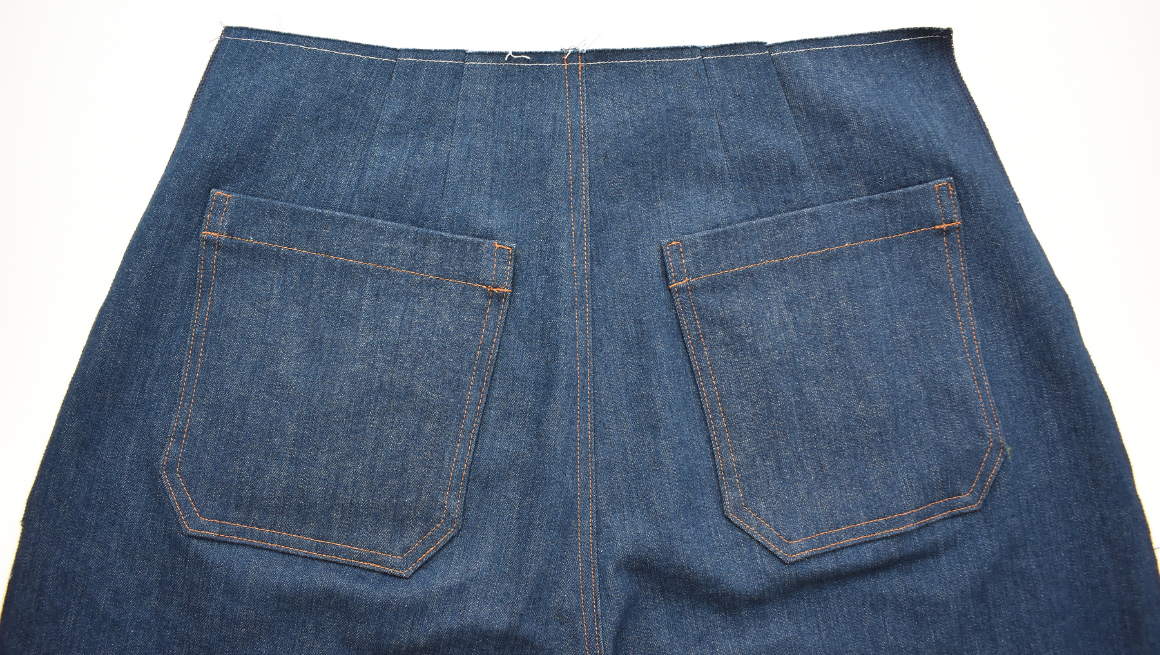
Isle Jeans Sew Along | Sew Back Rise, Attach Pockets, Sew Inseam & Side Seams
We are going to sew the back rise and move on to prepping and attaching the pockets. Then we'll sew inseam and side seams, which is a great time to check the fit and length of your jeans. SEW THE B...
Read more
Sun Tote Sew Along | Attach the Straps & Hem the Top
We're so close to finishing our Sun Tote! We'll wrap up the sew along by attaching the straps, hemming the top and adding an optional pocket snap. ATTACH THE STRAPS Pin the straps to the right sid...
Read more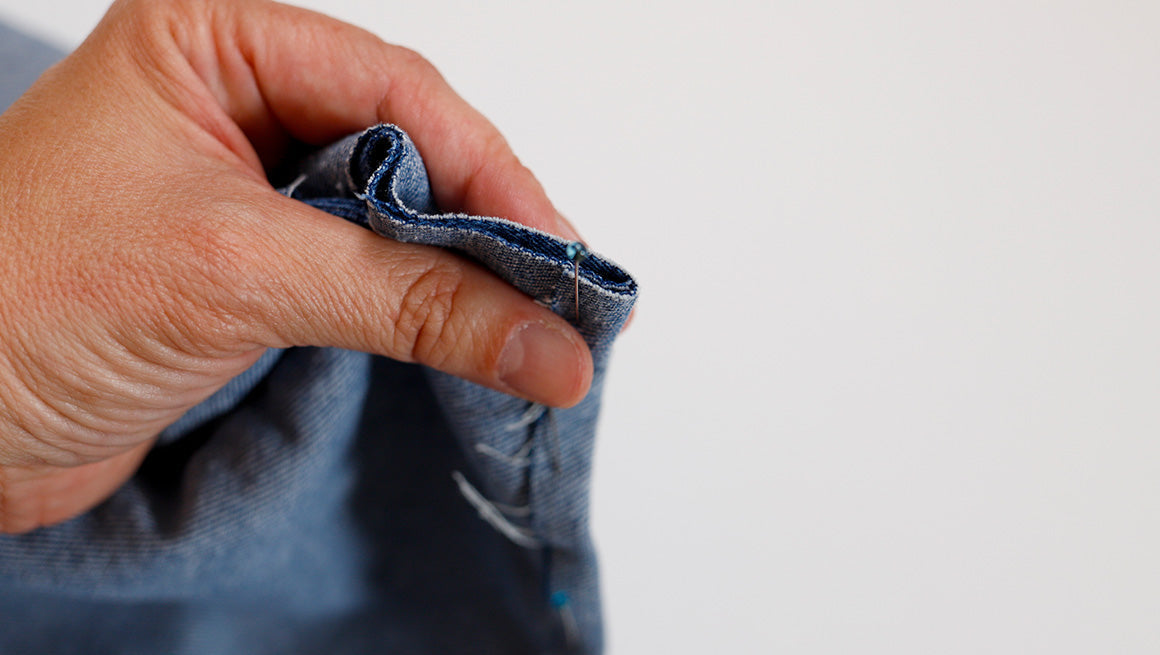
Sun Tote Sew Along | Sew the Flat Felled Seams & French Seams
Now that we've sewn our pockets, we're ready to sew up the bottom and sides of the tote, my favorite part of making the Sun Tote! In this post, we'll demonstrate how to sew the Sun Tote with flat f...
Read more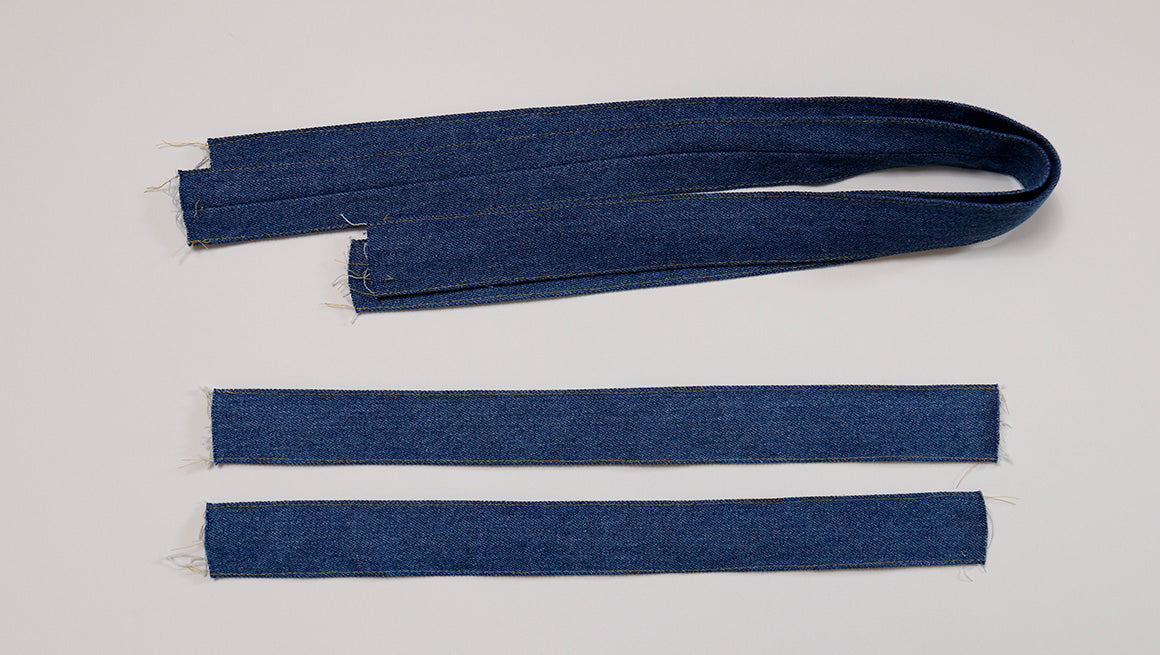
Sun Tote Sew Along | Sew the Straps & Pockets
We are ready to get started sewing! In this post, we'll demonstrate how to mark the pocket placements, sew the straps, and attach the patch pockets. These steps apply to all Sun Tote sizes. SEAM AL...
Read more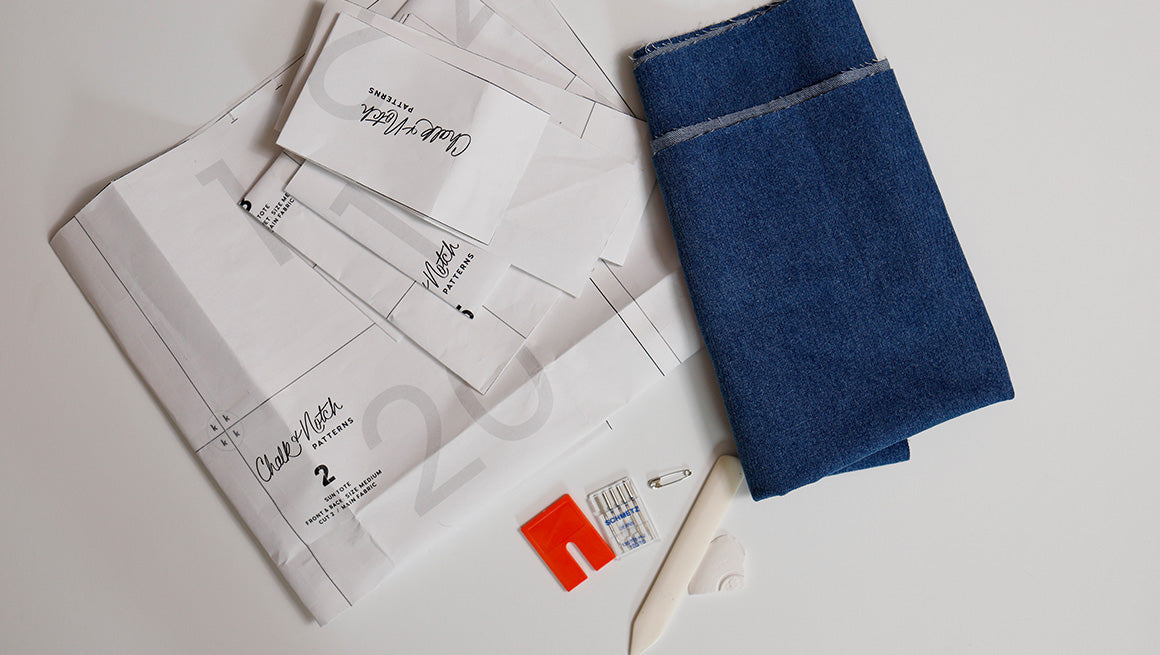
Sun Tote Sew Along | Getting Started
Welcome to the Sun Tote Sew Along! Over the next four posts, we will be showing you how to sew this unlined bag with flat-felled seams. We will be sewing the size medium but the construction is the...
Read more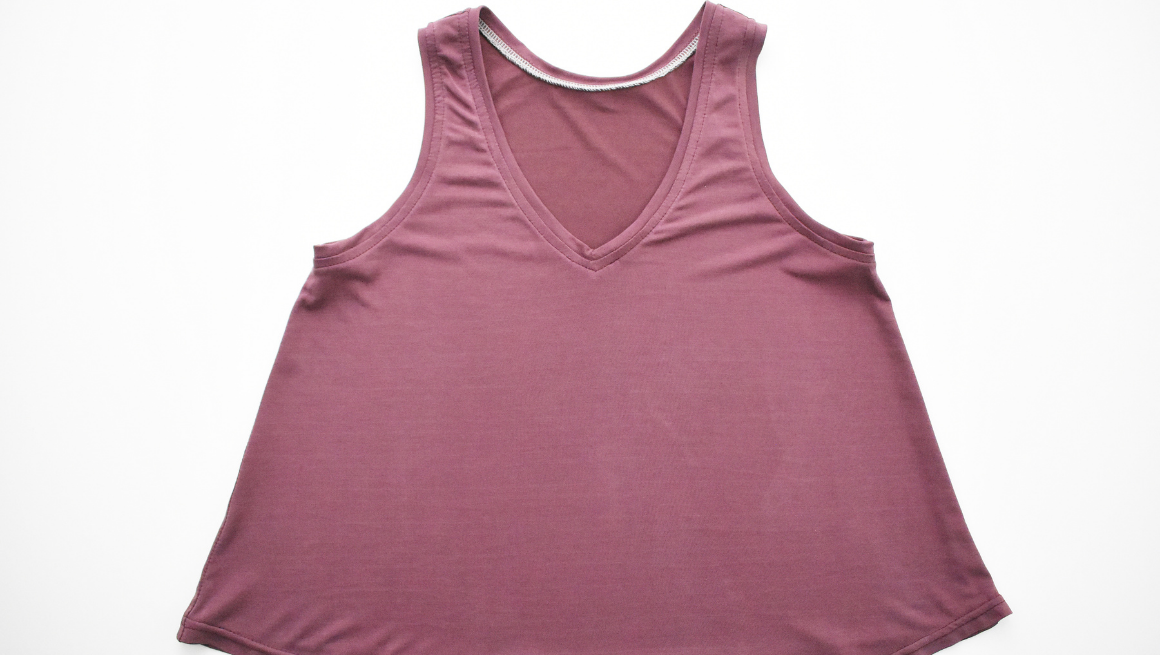
Pony Tank Sew Along | Sew Side Seams, Armhole Bands, and Hem
We're going to finish sewing our Pony tank! We'll conclude the sew along by sewing the side seams, attaching the armhole bands, and sewing the hem. SEW SIDE SEAMS With the right sides together, sew...
Read more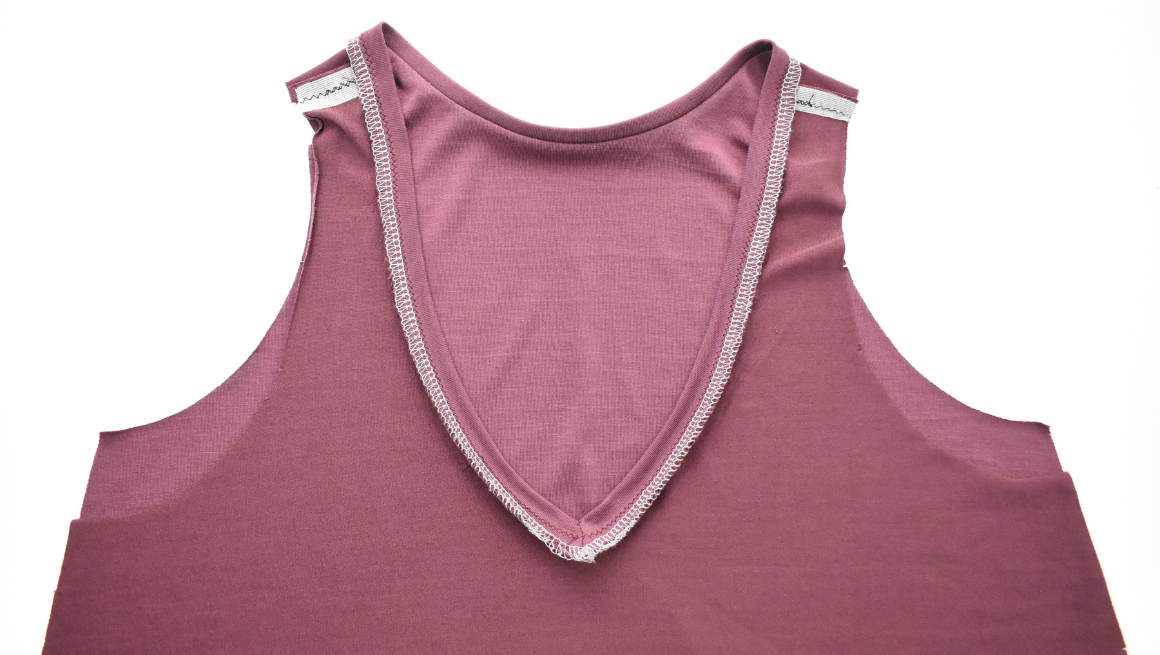
Pony Tank Sew Along | Sew Shoulder Seams and Attach the Neckband
Let's start sewing our Pony tanks! In this post, we'll demonstrate how to sew the shoulder seams and attach the neckband. We are demonstrating by sewing the crop length, but these steps apply to al...
Read more
Pony Tank Sew Along | Getting Started
Welcome to the Pony Tank Sew Along! We will be showing you each step of how to sew this v-neck swing tank. We will be sewing the cropped view since the construction is the same for each view. We ho...
Read more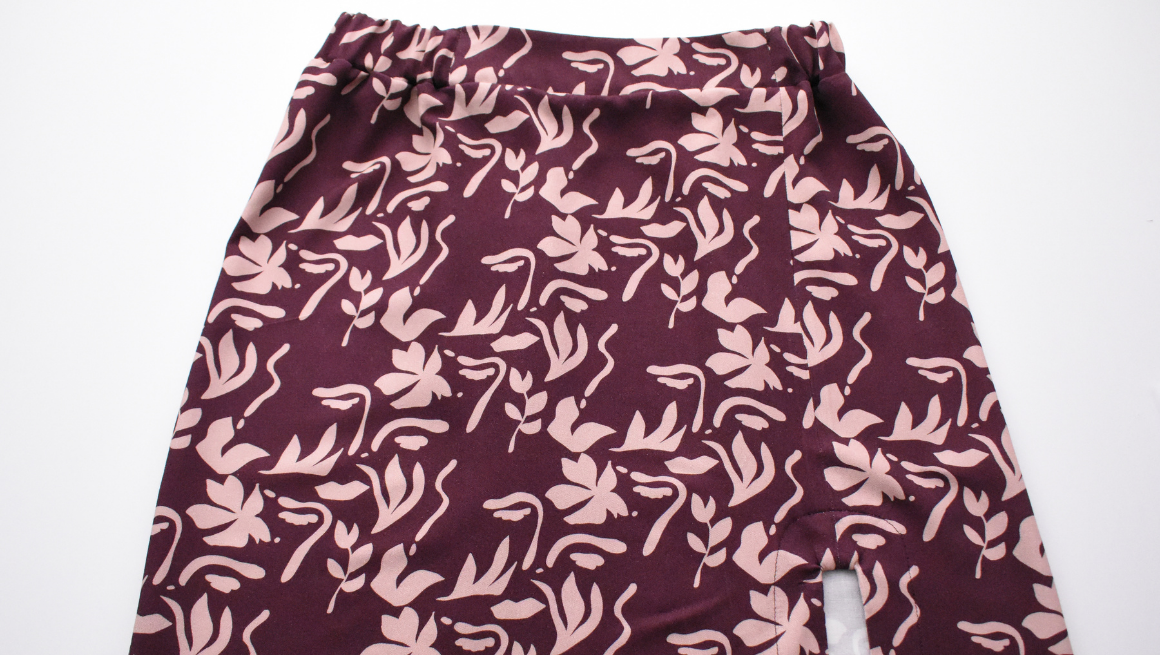
Evelyn Sew Along | Attach Waistband, Sew Slit Facing & Hem View C
Now we are ready to attach the prepared waistband. We'll also add the slit facing and sew the hem to finish our View C skirt. SEW THE WAISTBAND TO THE SKIRT Take your sewn waistband and pin the rig...
Read more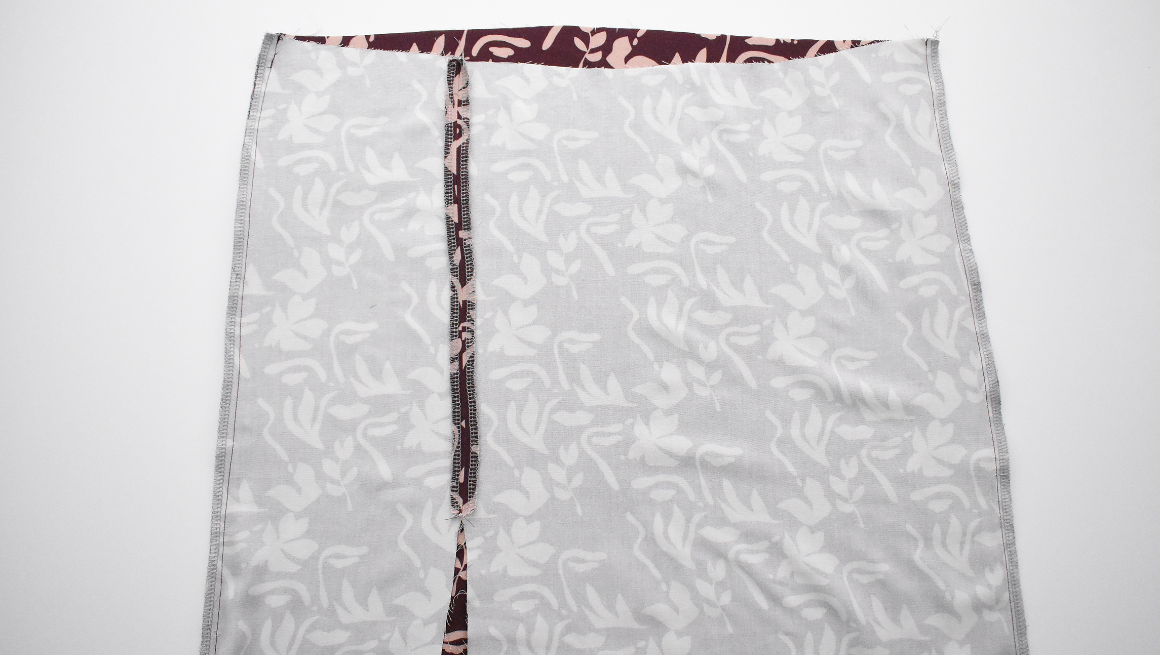
Evelyn Sew Along | Sew Skirt Seams, & Waistband of View C
We'll begin sewing View C by sewing the front seam, the slit facing, side seams, and assembling the waistband. FINISH THE FRONT AND SLIT EDGES Finish the straight edge above the slit curve on the f...
Read more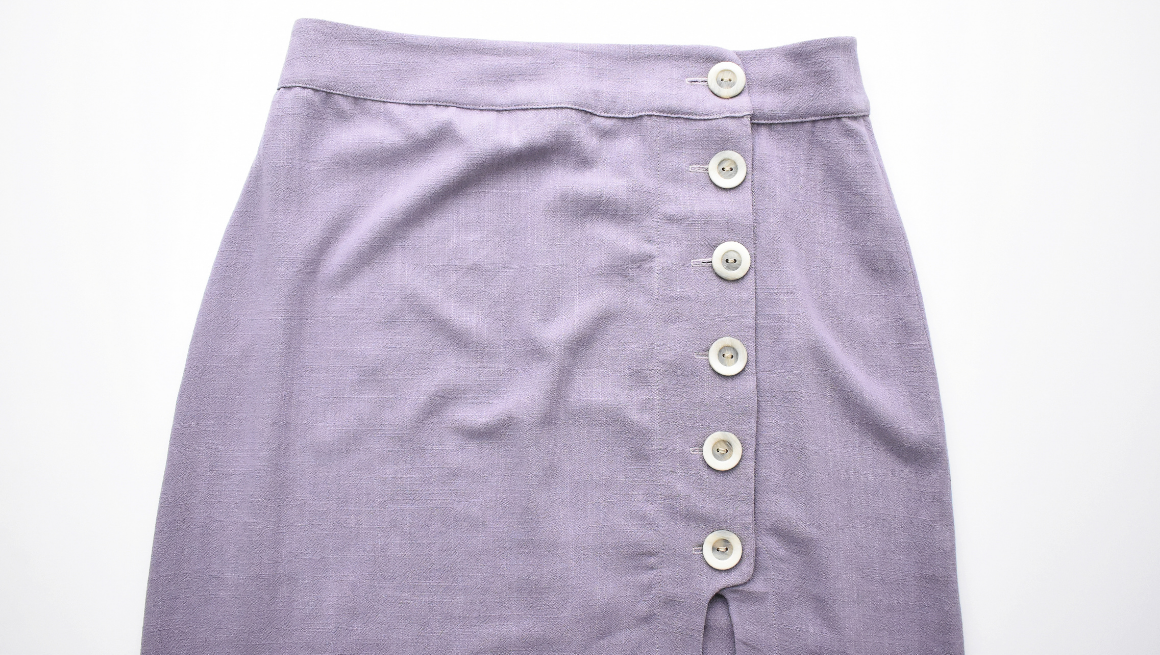
Evelyn Sew Along | Sew Waistband & Buttons of Views A&B
We're going to continue by sewing our waistband and attaching it to our skirt. We'll finish our skirt by adding the buttonholes and buttons. SEW THE WAISTBANDS AT THE SIDE SEAMS There is a waistban...
Read more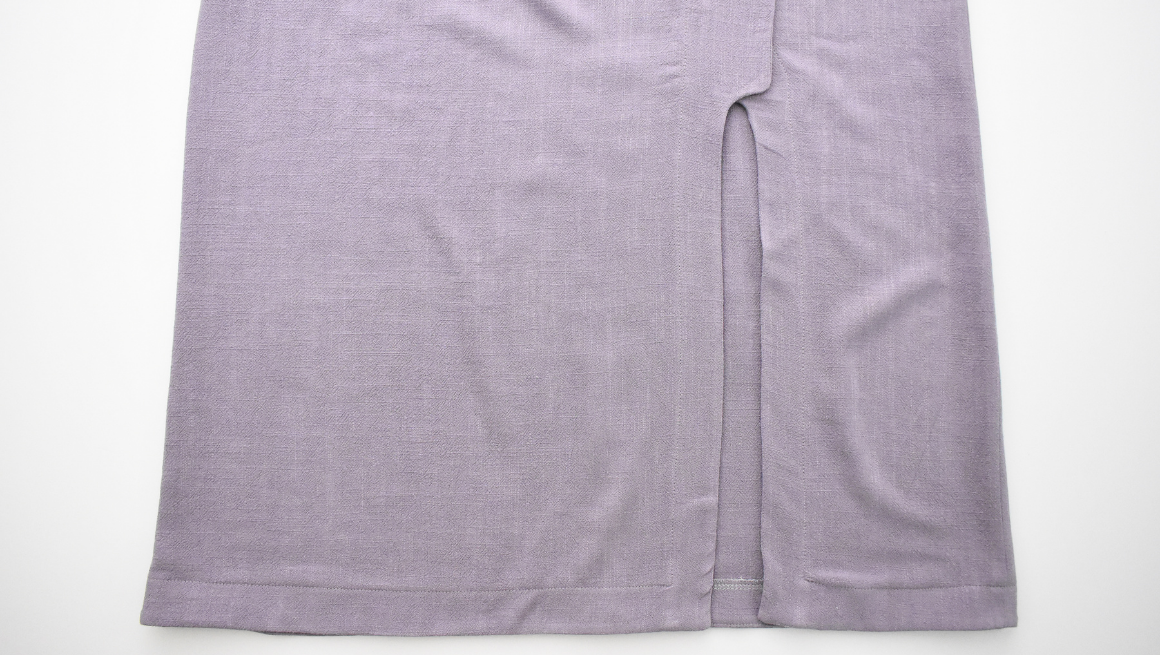
Evelyn Sew Along | Sew Skirt Seams & Facings of Views A&B
We'll begin sewing our View A or B skirt by sewing the skirt seams and attaching the hem and slit facings. FINISH THE SLIT AND HEM FACINGS Prepare the slit and hem facings by finishing the straight...
Read more
Evelyn Sew Along | Getting Started
We are happy to be able to bring you a sew along for the Evelyn skirt pattern. We will be sewing Views A and C in the sew-along. View B uses the same construction steps as View A, so if you are sew...
Read more
Max Tee Sew Along | Sew the Hem and Hem Facing
We're so close to finishing our Max tees! We'll wrap up the sew along by sewing a turned-up hem or attaching the hem facing. SEW THE HEM FACING With the right sides together, sew the hem facing to ...
Read more
Max Tee Sew Along | Sew the Neckbands and Neck Facings
Now that we've sewn our bodices, we're ready to finish the necklines. In this post, we'll demonstrate how to sew all three neckline options: the rib neckband, the mock neckband, and the neck facing...
Read more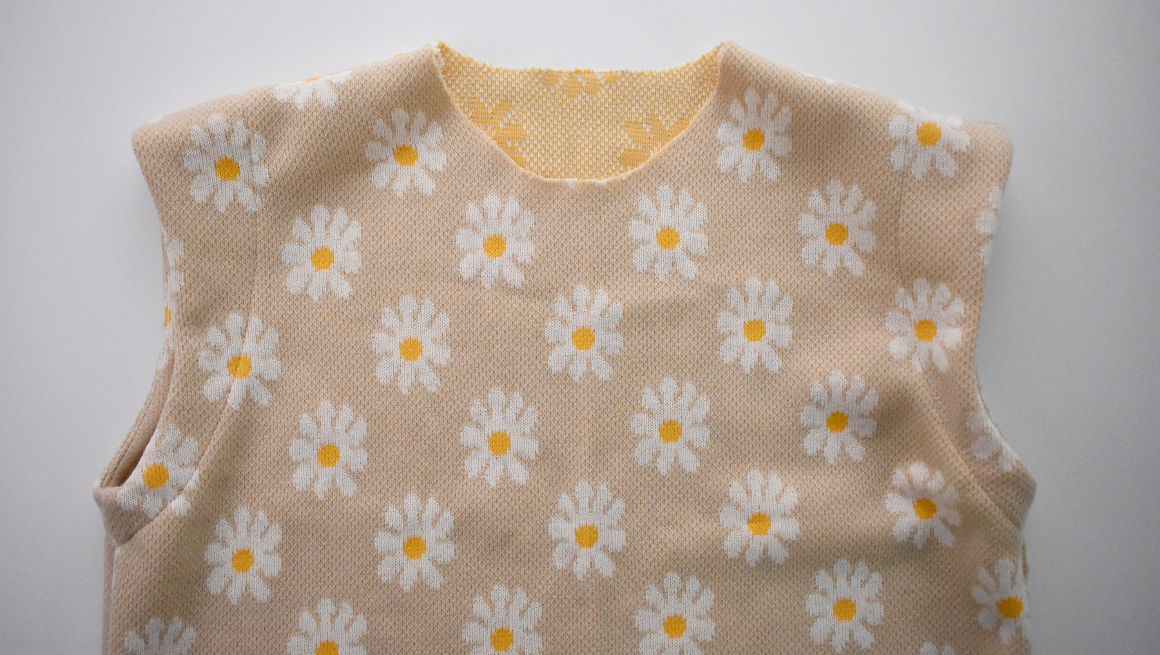
Max Tee Sew Along | Sew Shoulder Seams, Side Seams, and Armhole Facings
We are ready to get started sewing! In this post, we'll demonstrate how to sew the shoulder seams, and side seams, and how to attach the facings to the armholes. These steps apply to all three view...
Read more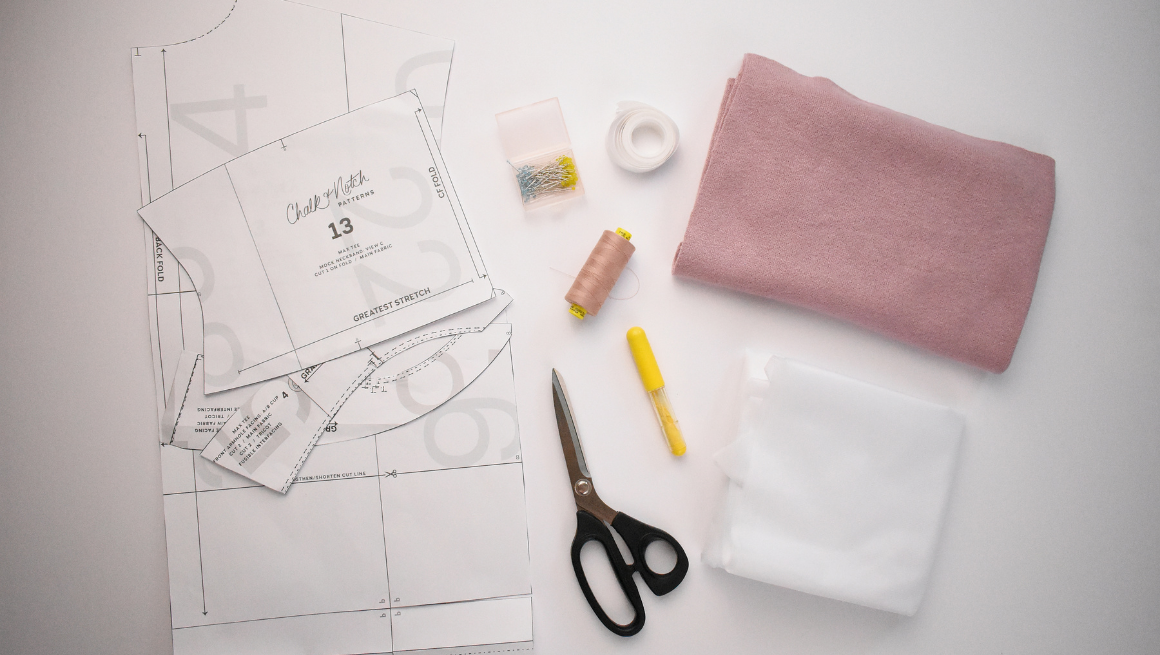
Max Tee Sew Along | Getting Started
Welcome to the Max Tee Sew Along! Over the next four posts, we will be showing you how to sew this elevated, boxy tee. We will be sewing each view, demonstrating the rib-knit neckband, the mock nec...
Read more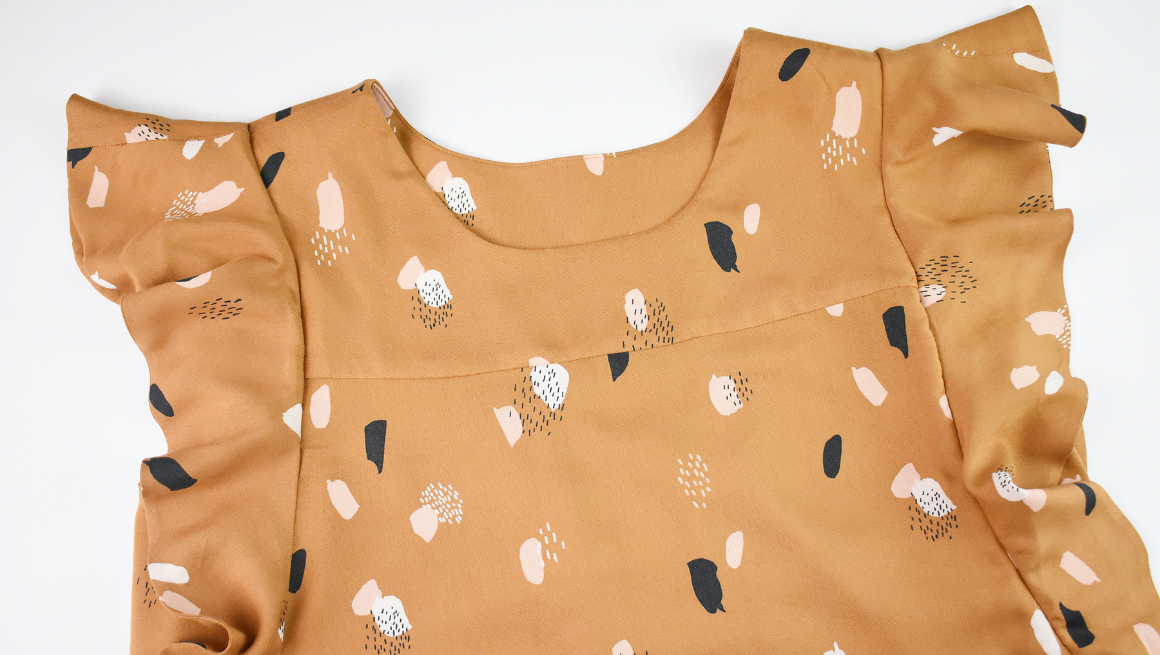
Farrah Sew Along | Sew the Underarm Gusset and Finish Armholes
We are almost done sewing our Farrah! Our last steps are to sew the underarm gussets and to finish the armholes. VIEW A The following steps finish the upper edge of the underarm gusset for view A. ...
Read more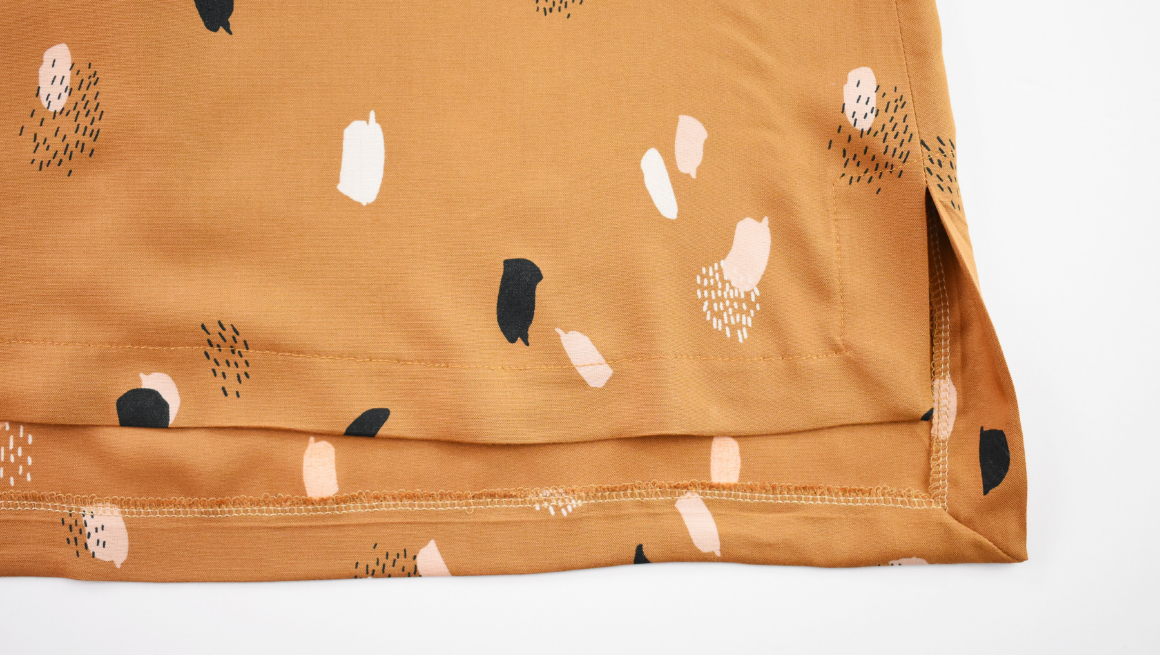
Farrah Sew Along | Attach Ruffle Sleeves and Sew Side Seams and Hem
Now we will attach the ruffle sleeves to View A. Then we'll move on to sewing the side seams and hem on both views. ATTACH THE SLEEVE RUFFLES (VIEW A) Pin the right side of the sleeve ruffle to the...
Read more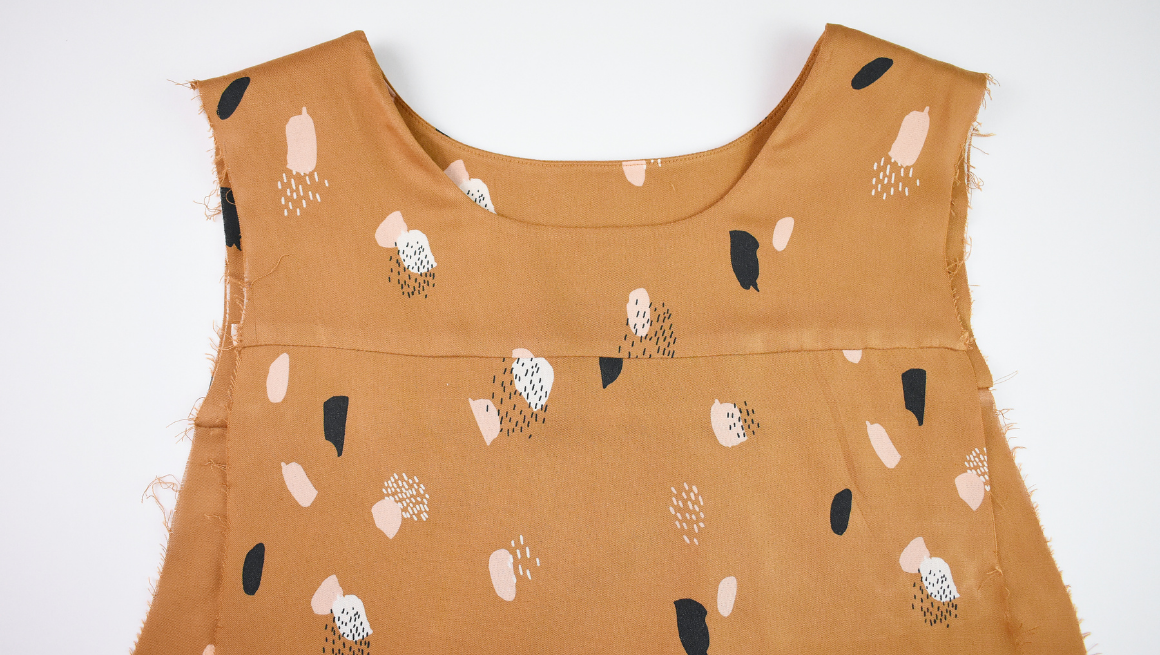
Farrah Sew Along | Sew Front and Back Bodices
We're going to continue sewing and attach the yokes with a clean finish. We'll also complete the neckline of our Farrah. GATHER THE BACK BODICE Change your stitch length to the longest possible len...
Read more