News
Farrah Sew Along | Prepare Bodice, Sew Ruffles
Now that pieces have been cut and interfaced, it's time to begin sewing. We'll start with staystitching then sew the ruffles for both views. STAYSTITCH THE NECKLINES Unless noted, the seam allowanc...
Read more
Farrah Sew Along | Getting Started
We are thrilled to be able to bring you a sew along for the Farrah pattern. We will be sewing the top length of both views in the sew-along since the construction of the dress uses the same steps. ...
Read more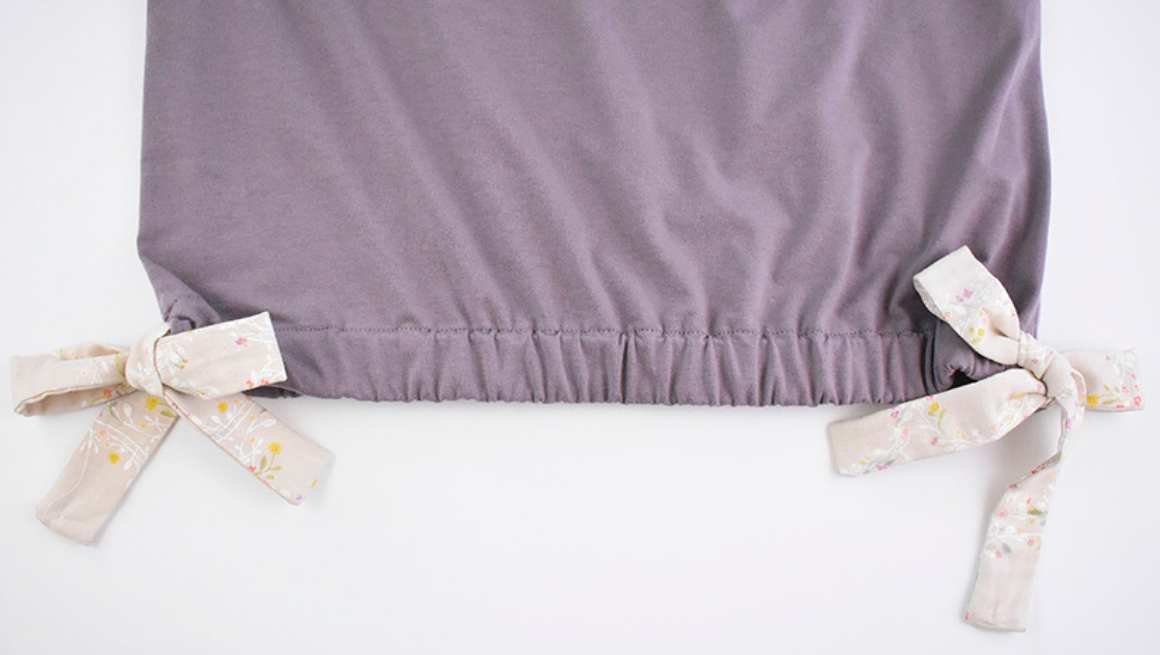
Pixie Tee Sew Along | Hemming All Views
We are close to finishing our Pixies! In this post, we'll finish the hems on all views of the pattern. FOLD AND STITCH THE SLIT - VIEW A The slit is already folded from pressing the seam allowance ...
Read more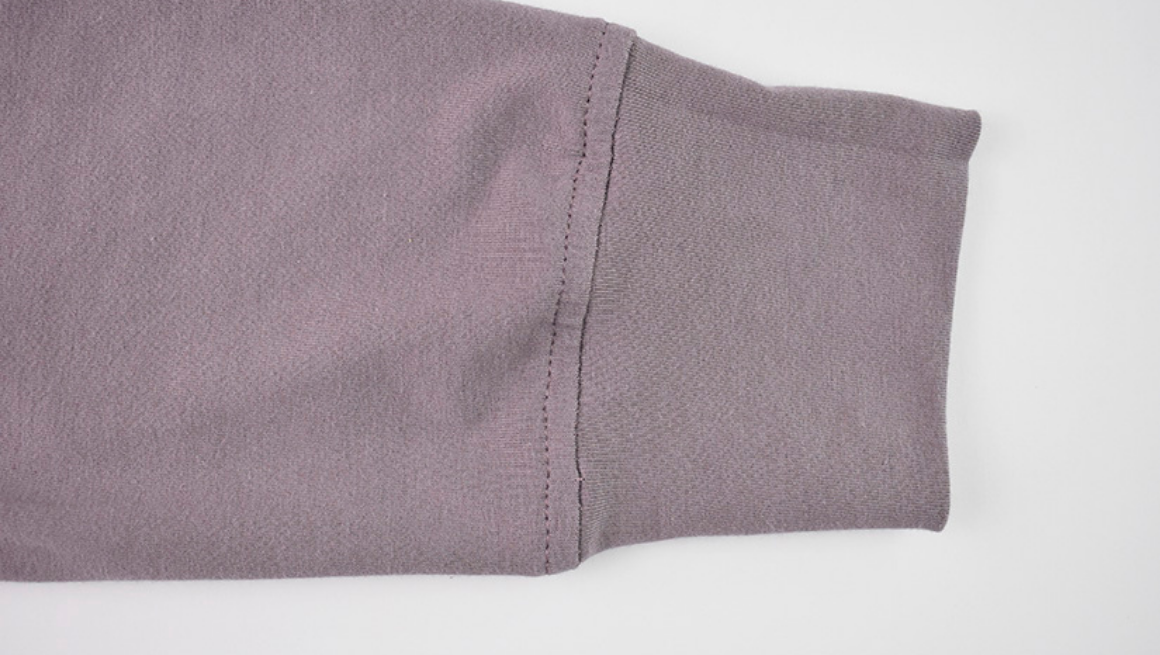
Pixie Tee Sew Along | Sew Long Sleeves & Side Seams Views B & C
We are continuing with attaching the sleeves to our front and back bodices. In this post, we'll demonstrate how to sew the long sleeves and side seams for Views B & C. SEW SLEEVES TO ARMHOLE Wi...
Read more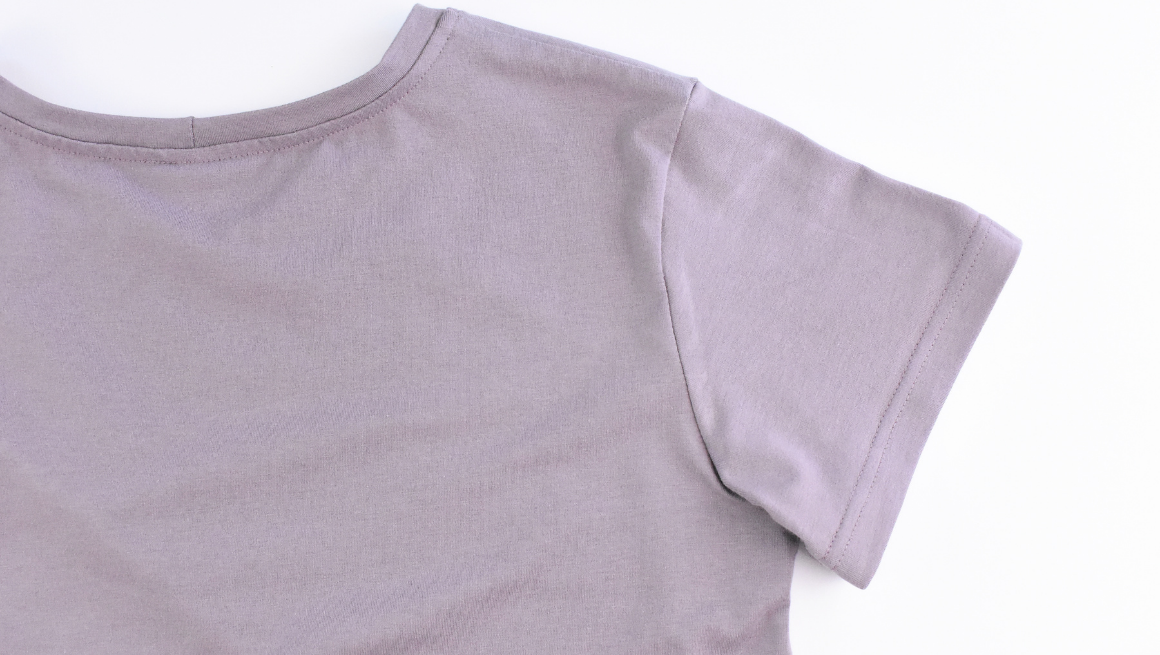
Pixie Tee Sew Along | Sew Short Sleeves & Side Seams View A
We are ready to attach the sleeves to our front and back bodices. In this post, we'll demonstrate how to sew and hem the short sleeves and side seams for View A. If you're sewing long sleeves, addi...
Read more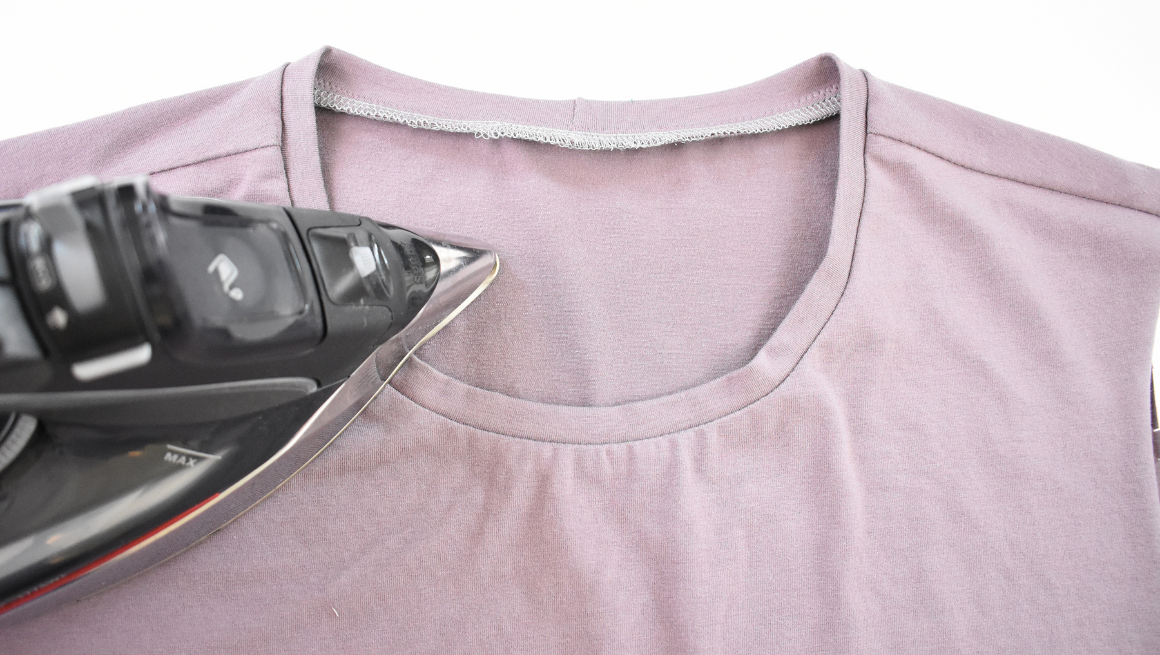
Pixie Tee Sew Along | Sewing Hem Ties, Shoulder Seams, and Attaching Neckband
Before you begin to sew, we recommend that you read over all of the instructions and make sure you are familiar with the seam allowances and markings. Our first step is to sew the hem ties for View...
Read more
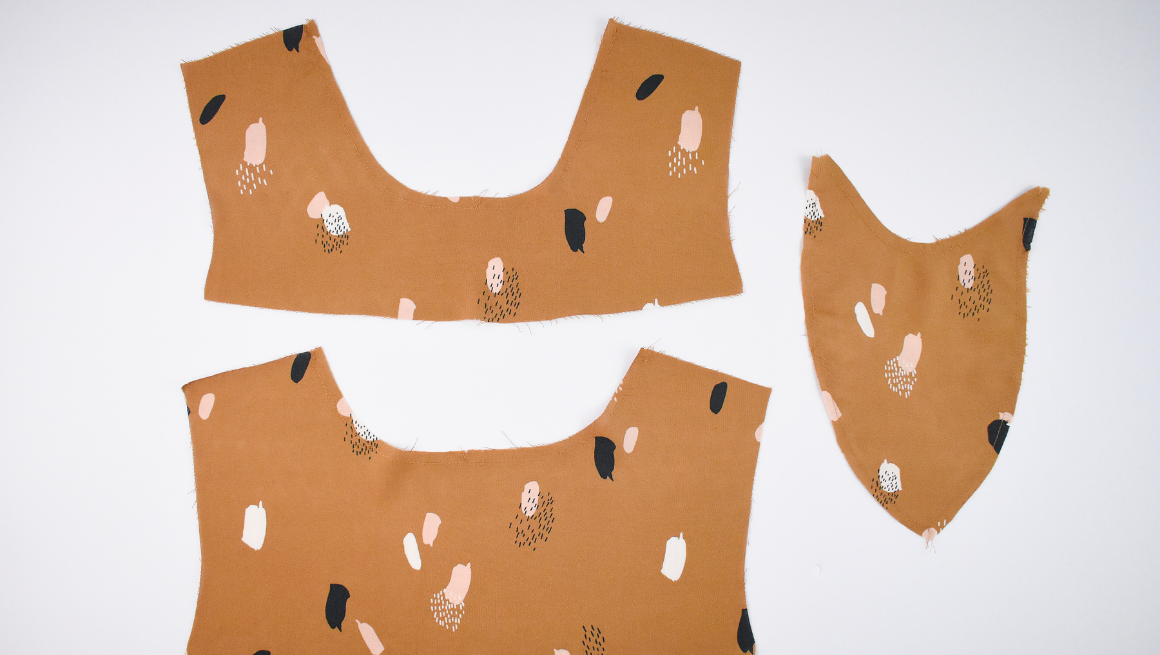
Pixie Tee Sew Along | Getting Started
Welcome to the Pixie Tee Sew Along! Over the next four posts we will be showing you how to sew this oversized tee. We will be sewing View A with the hem ties, but also demonstrating how to attach t...
Read more
Waterfall Raglan Sew Along | Attach Neckband & Hem Ruffle
The last steps on our Waterfall Raglans are to attach the neckband and hem the ruffles. Let's finish our new tops and dresses! SEW NECKBAND With the right sides together, sew the neckband at the sh...
Read more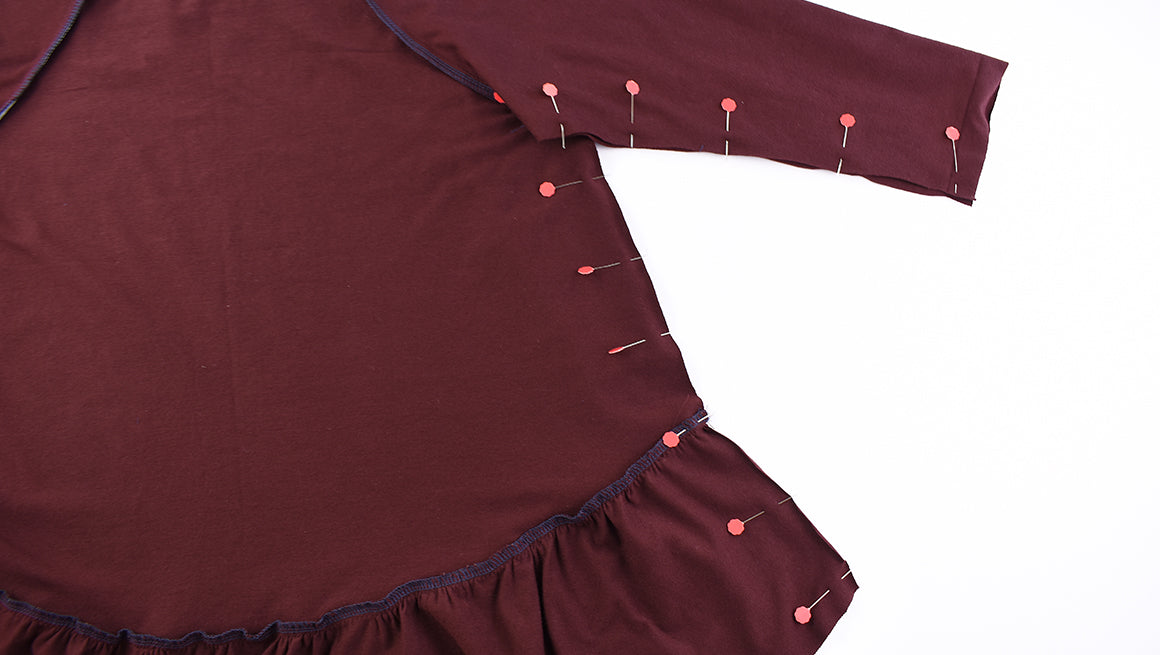
Waterfall Raglan Sew Along | Sew Sleeves & Side Seams
We are ready to attach the sleeves to our front and back bodices. Once we do this we'll sew the side seams and see our raglans take shape. SEW SLEEVES TO FRONT BODICE With the right sides together,...
Read more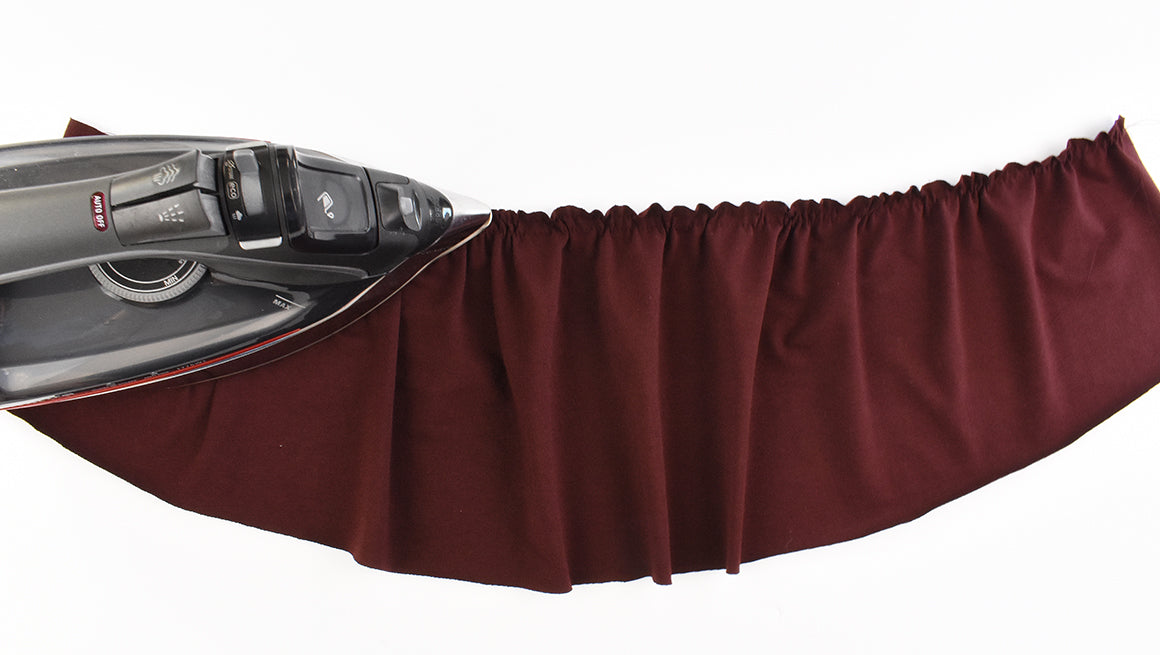
Waterfall Raglan Sew Along | Gathering & Attaching Ruffle
Before you begin to sew, we recommend that you read over all of the instructions and make sure you are familiar with the seam allowances and markings. Our first step is to assemble the fronts and b...
Read more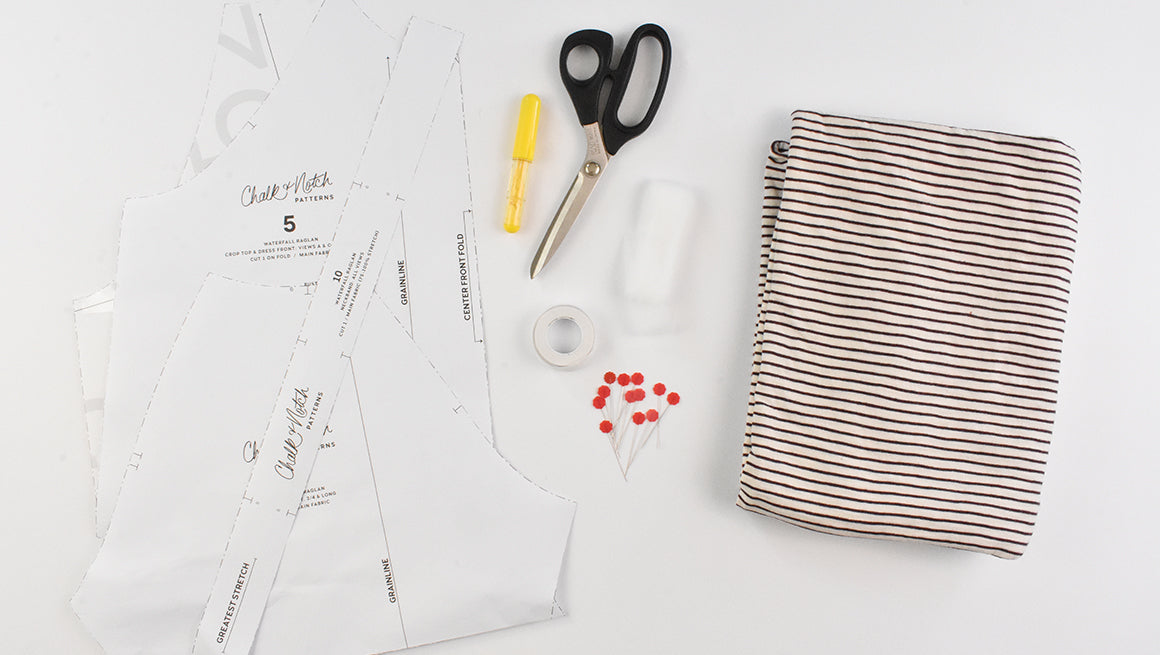
Waterfall Raglan Sew Along | Getting Started
We are excited to add the Waterfall Raglan Sew Along to our library. In this sew along we will be sewing View B, the women's ruffle top. The steps are the same for View C and for both of the mini W...
Read more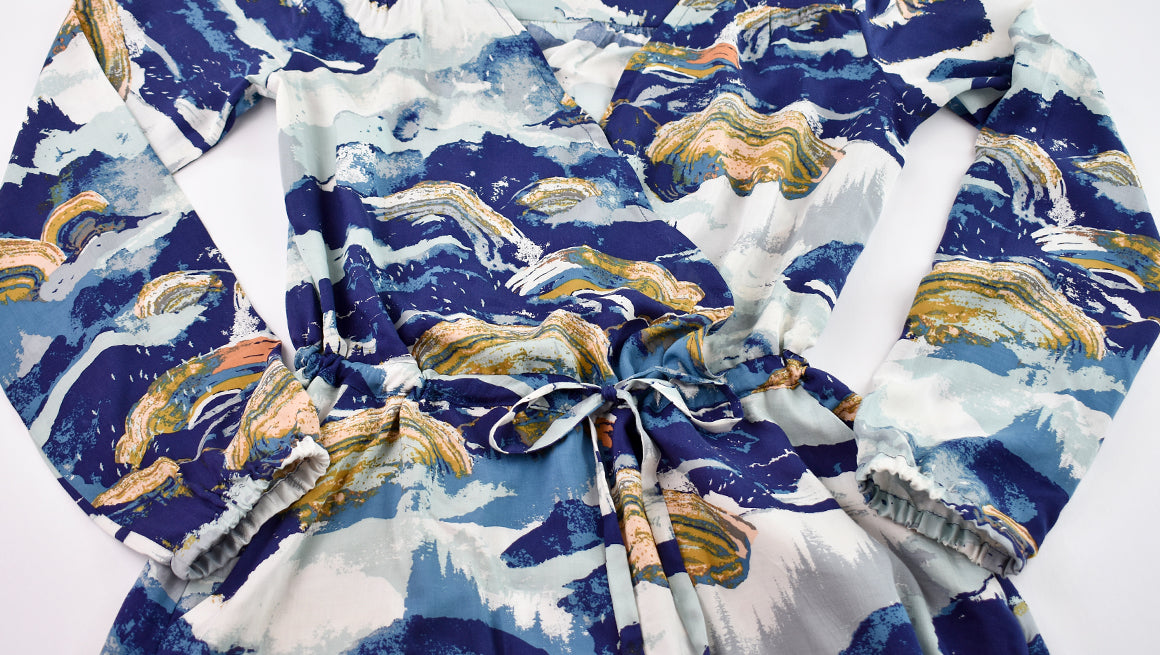
Orchid Sew Along | Sew Waistband Casing and Attach Bodice to Skirt
Your Orchid dress is so close to being finished! We'll wrap up our sewing by constructing the waistband casing and then attach the bodice to the skirt. PREP WAISTBAND CASING With the right sides to...
Read more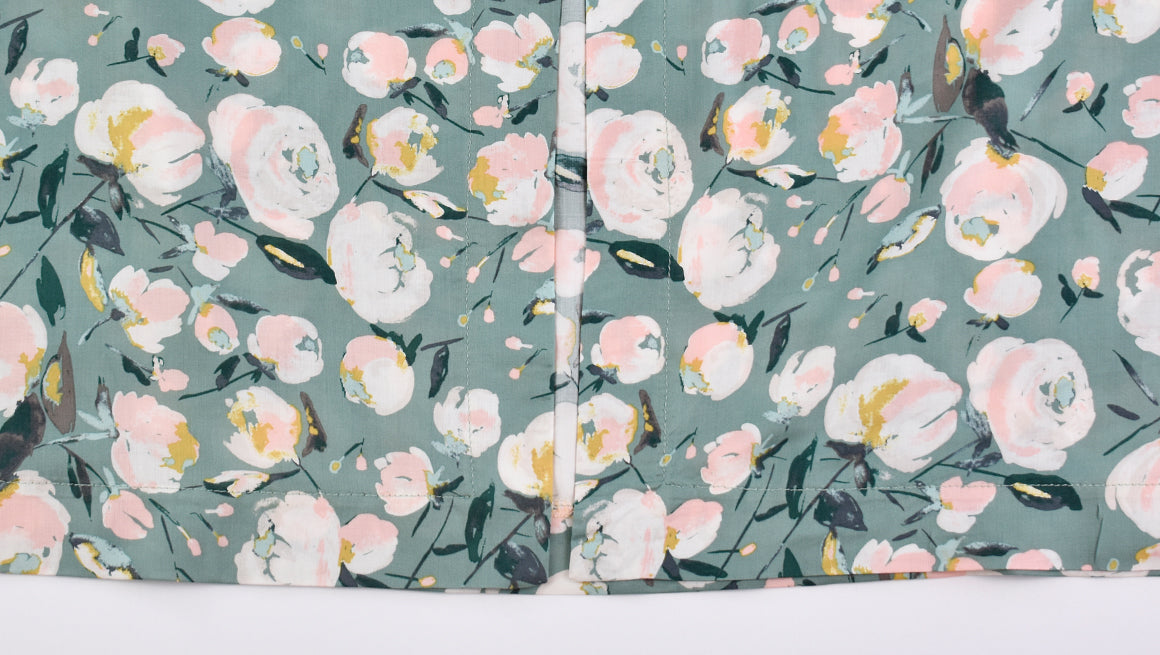
Orchid Sew Along | Sew Mitered Corners and Hem Skirt
It's time to sew the mitered corners and hem the skirt. We'll start by prepping the hem. PREP HEM Prep the hem by stitching a baste stitch 3/8” (1 cm) from the cut edge of the hem and slit extensio...
Read more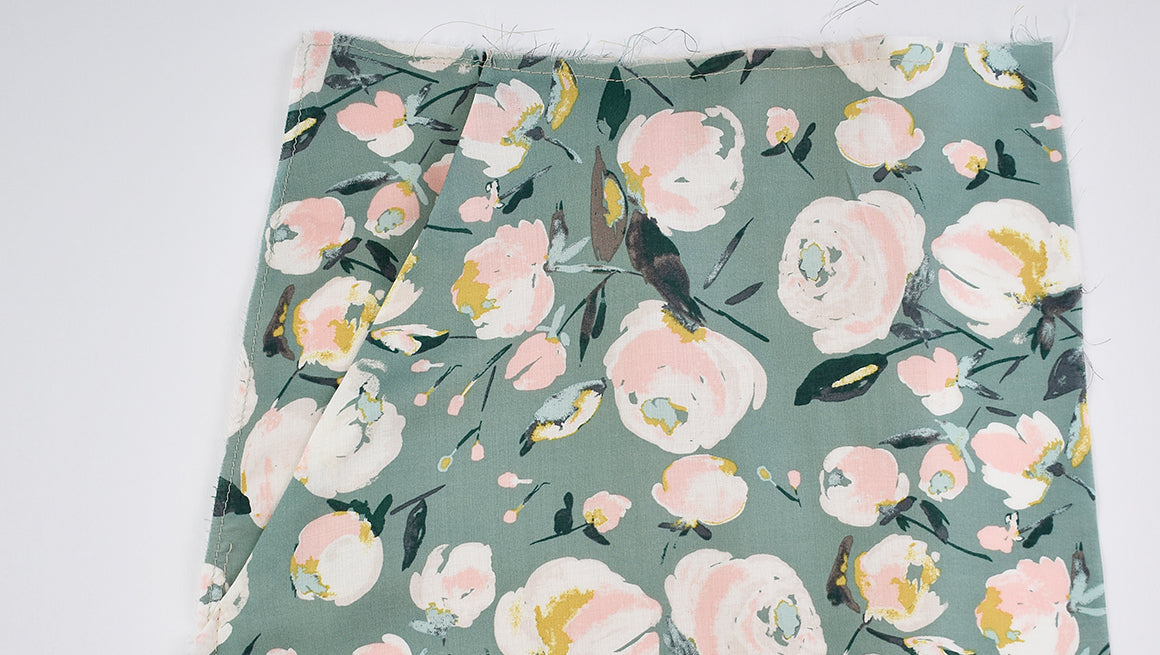
Orchid Sew Along | Sew Pockets and Side Seams
Now we will begin to assemble the skirts. We'll start by sewing the pockets and move to sew the skirt side seams. ATTACH THE POCKET FACING TO THE UNDER POCKET LINING Finish the angled edge of the p...
Read more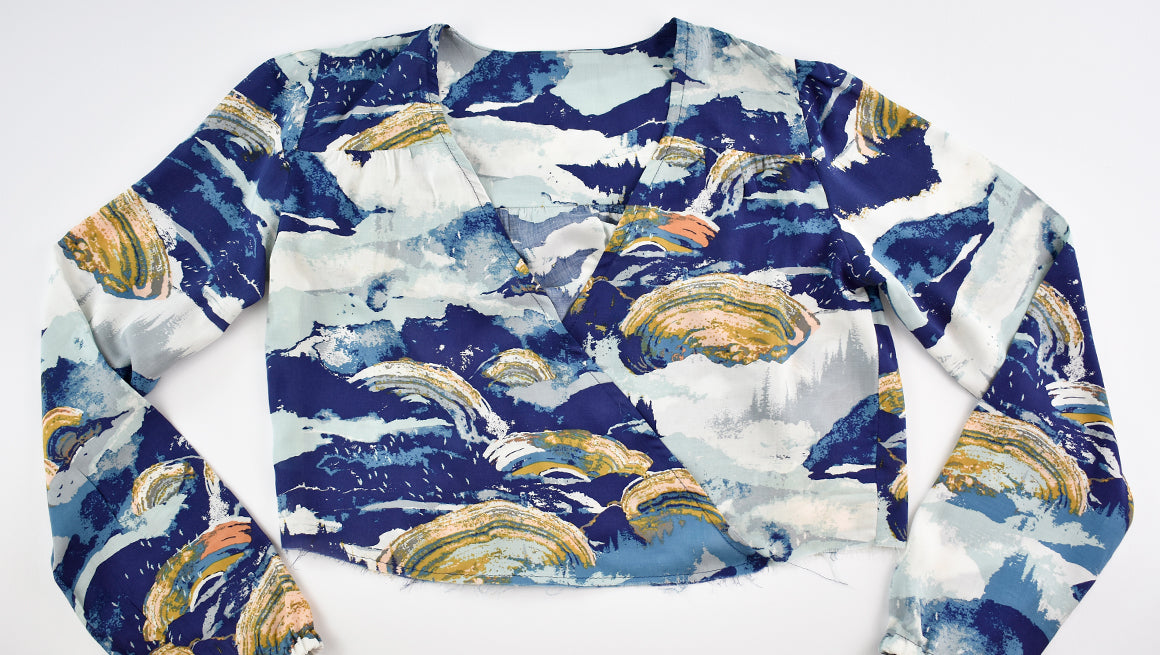
Orchid Sew Along | Sew Side Seams and Add Sleeves
We'll finish sewing our bodices by adding the sleeves and sewing the side seams. If sewing View B, skip all of the View A instructions below. SEWING SIDE SEAMS AND ATTACHING RUFFLE SLEEVES - VIEW A...
Read more
Orchid Sew Along | Sew Front and Back Bodices
We're going to continue sewing and assemble the front and back bodices of our Orchid dresses. We will attach the yokes, sew on bias binding, and learn how to clean finish the yokes and shoulder sea...
Read more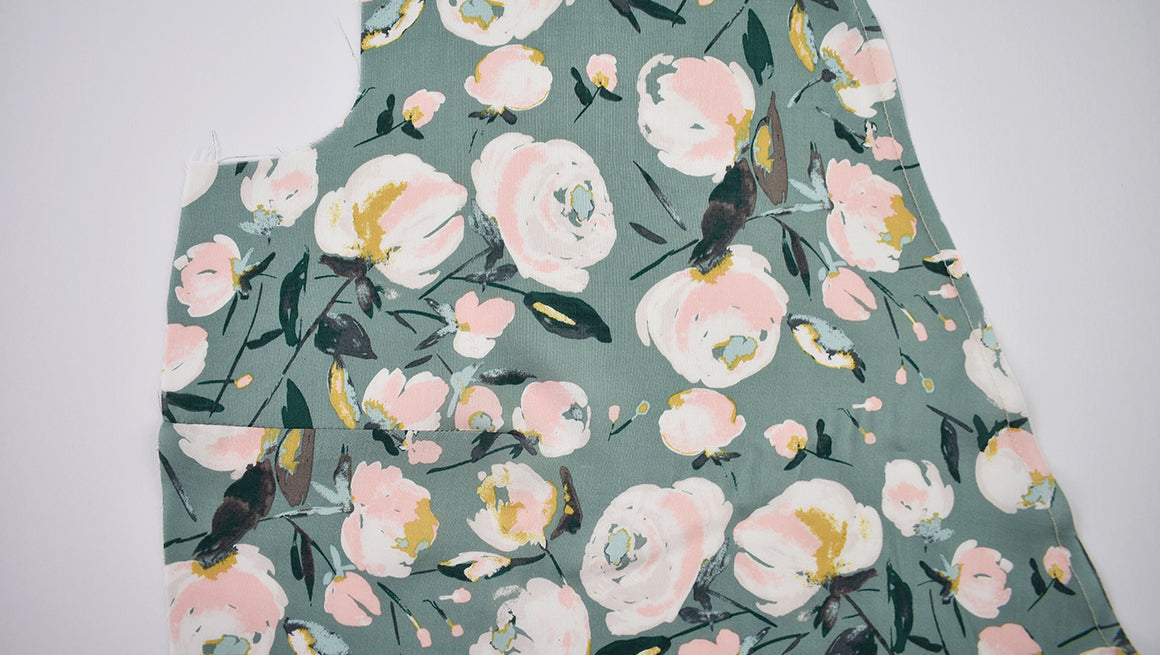
Orchid Sew Along | Prepare Bodice, Sew Darts and Ties
Now that pieces have been cut and interfaced, it's time to begin sewing. We'll start with staystitching, sewing the bodice darts on the C/D bodice, sewing the drawstring ties, and adding gathering ...
Read more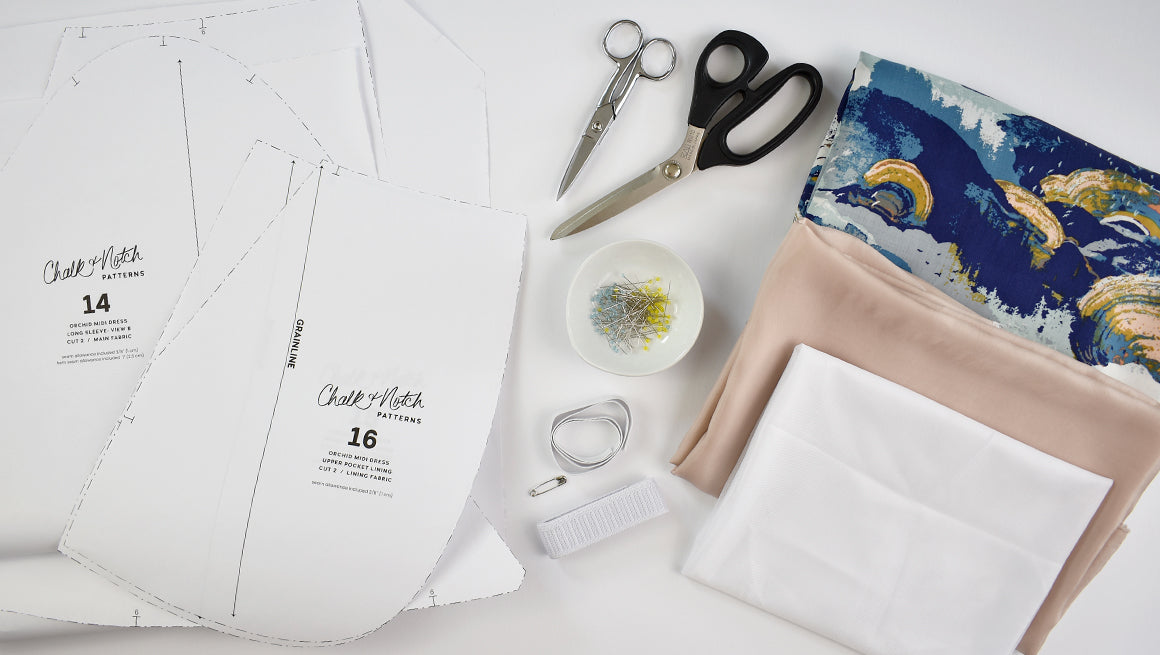
Orchid Sew Along | Getting Started
We are excited to add the Orchid Sew Along to our library. We will be sewing both views of this pattern in the sew-along. We hope you will find all the assistance you need to sew a beautiful Orchid...
Read more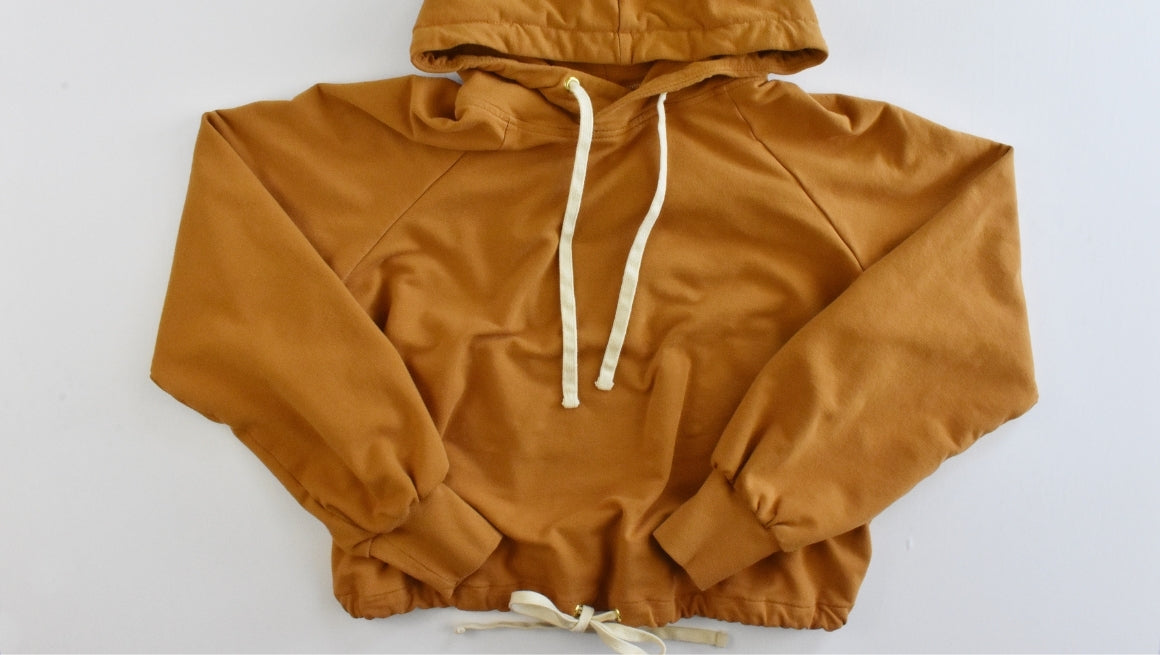
Page Hoodie Sew Along | Sew Hood & Finish
Now it's time to add the hood to your Page Hoodie! If you ever want to try a crew neckline for the Page, you can check out our tutorial on the blog and the free neckband pattern piece in the shop. ...
Read more
Page Hoodie Sew Along | Sew Hem Band or Casing
In this post we will be hemming the Page. View A has a hem band and View B includes a drawstring casing. SEW THE HEM BAND TO THE BODICE – VIEW A If sewing view A, place the bodice inside the hem t...
Read more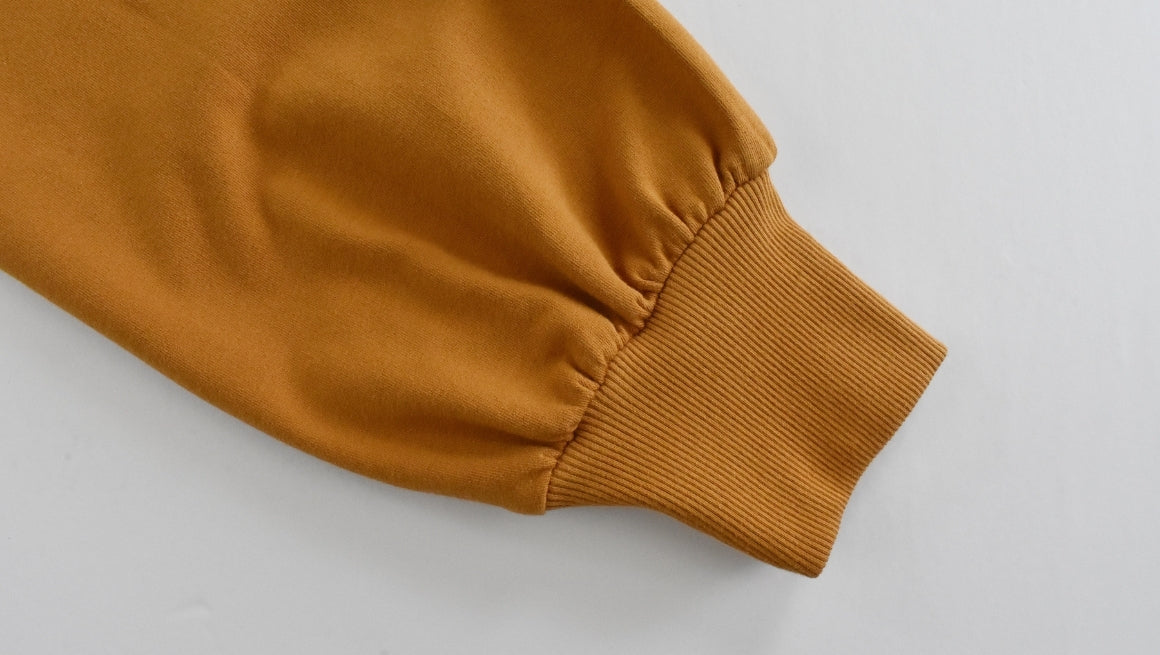
Page Hoodie Sew Along | Sew Bodice & Sleeves
Now you are ready to attach the sleeves to the bodice. In just a few seams you will have a bodice to try on! SEW SLEEVES TO FRONT BODICE With right sides together, pin the sleeves to the front bodi...
Read more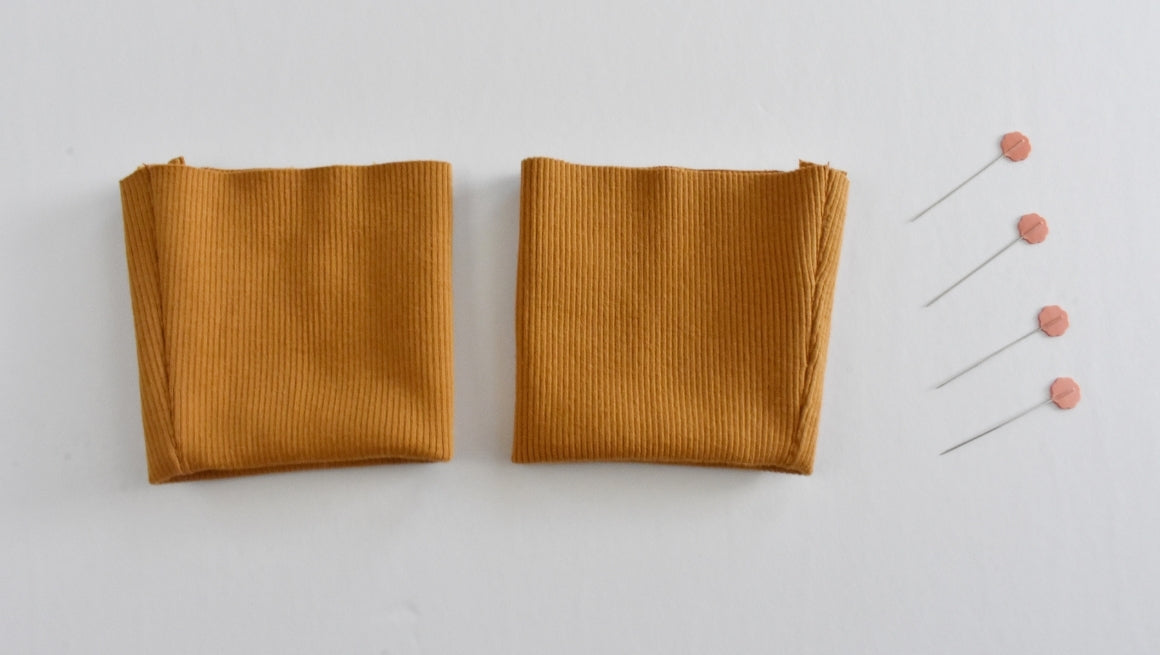
Page Hoodie Sew Along | Prepare Markings, Cuffs, & Hem Bands
You will always be happy that you took the time to prepare before you begin sewing. Read over all of the instructions and make sure you are familiar with the seam allowances and markings. First, we...
Read more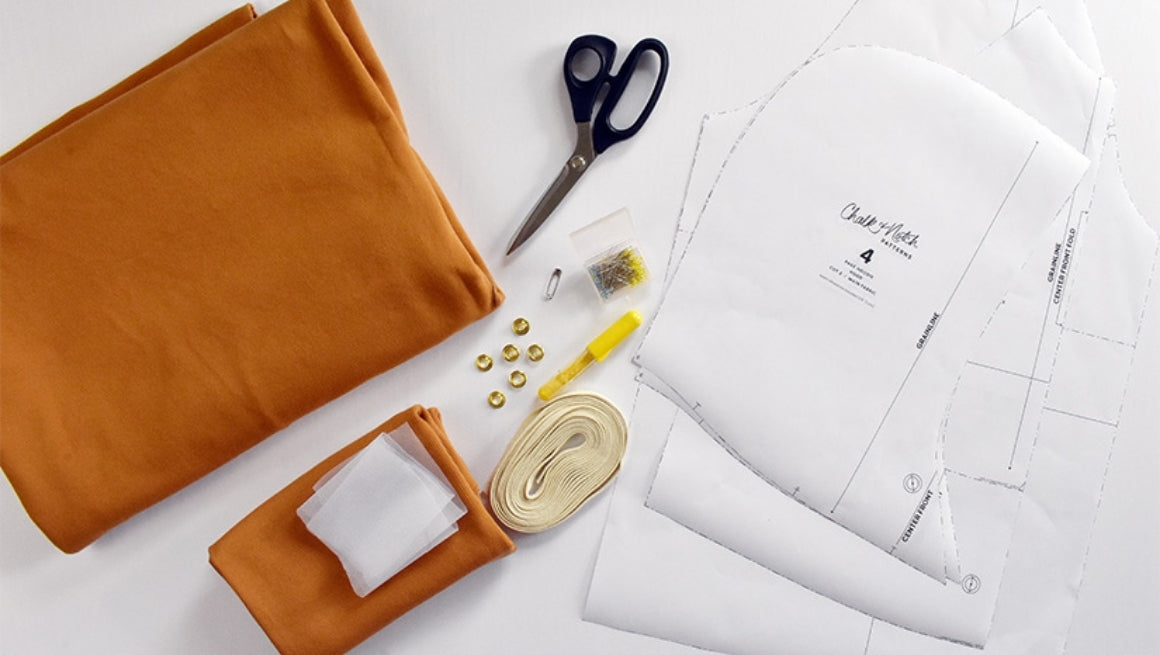
Page Hoodie Sew Along | Getting Started
We are excited to add the Page Sew Along to our library. Throughout this sew along we will be sewing both views. We hope you will find all the support you need, even if the Pagey is your first garm...
Read more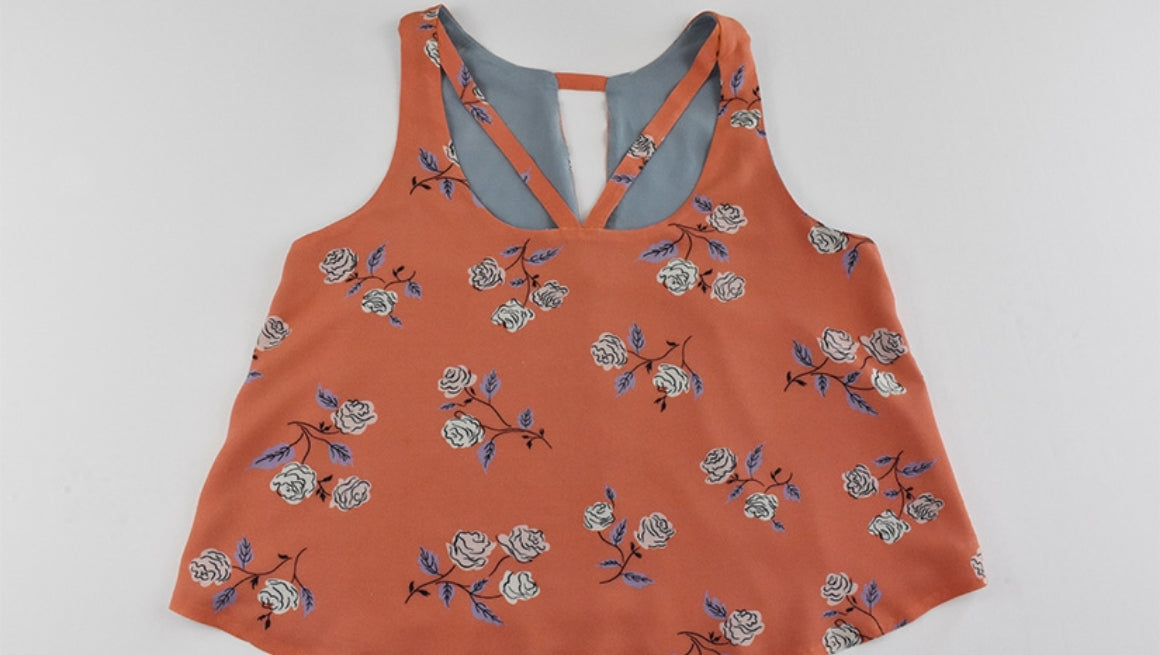
Victory Tank Sew Along | Sew the Hem
You have made it to the final steps of sewing your Victory Tank! Only your hem is left, and then you are ready to wear your Victory! STITCH MAIN HEM GUIDE & FOLD UP EDGE Prep the main tank hem ...
Read more
Victory Tank Sew Along | Sew Armholes & Side Seams
You can review the photos below or we also have a video clip of the clean fishing the armholes HERE. Roll the Bodice to Finish the Armhole To clean finish the armhole, take the bodice and roll one ...
Read more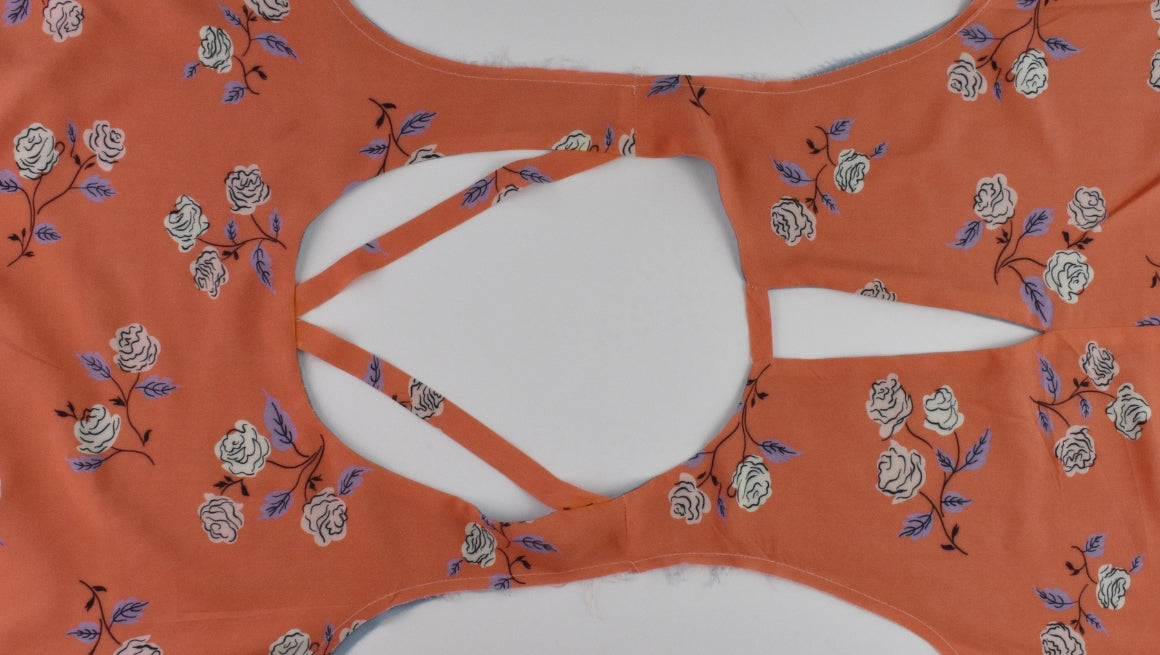
Victory Tank Sew Along | Sew Neckline View B
The View B neckline includes a few more steps to add the strap details but the sewing is pretty simple and you are in the right place for more support. Sew the Front & Back Straps There are sev...
Read more
Victory Tank Sew Along | Sew Neckline View A
Sew the Shoulder Seams on Main & Lining With the right sides together, sew the front and back bodice together at the shoulders. Press the seams open. Pinned Main Fabric Shoulder Seams Se...
Read more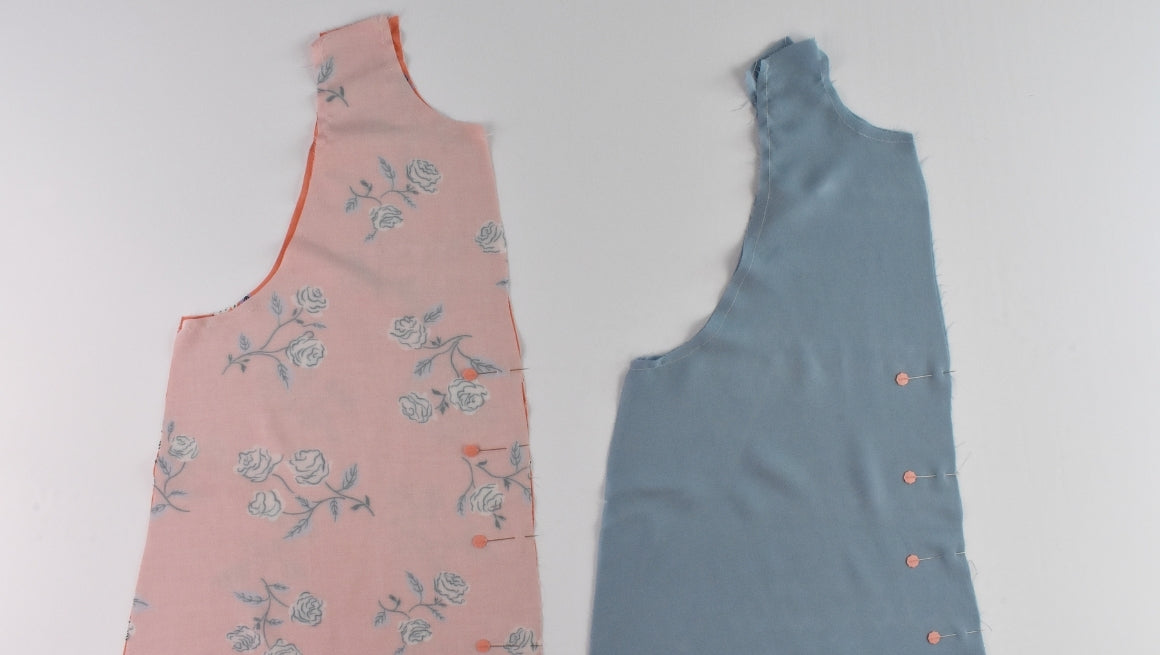
Victory Tank Sew Along | Sew Darts and Center Back
Just a reminder, unless noted, the seam allowance included is 3/8″ (1 cm) for joined seams. Clip or mark the notches indicate by ‘T’ marks and triangles. Now let’s get sewing! STAYSTICH THE NECKLIN...
Read more
Victory Tank Sew Along | Getting Started
We are excited to add the Victory Sew Along to our library. Throughout this sew along we will be sewing both views. We hope you will find all the support you need, even if the Victory is your first...
Read more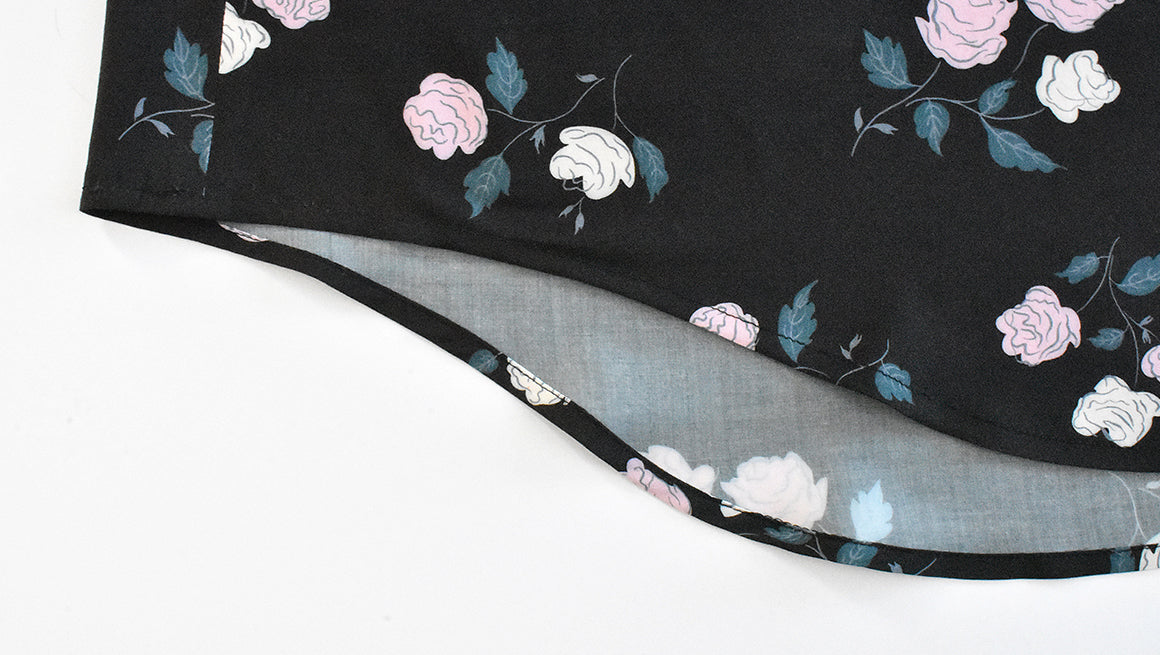
Fringe Sew Along | Hem and Attach Bodice to Skirt
Your Fringe is almost finished! Let's stitch up the hem and attach the bodice to your skirt. STITCH THE HEM FOLD GUIDE AND FOLD UP I prefer to hem the skirt before attaching the skirt to the bodice...
Read more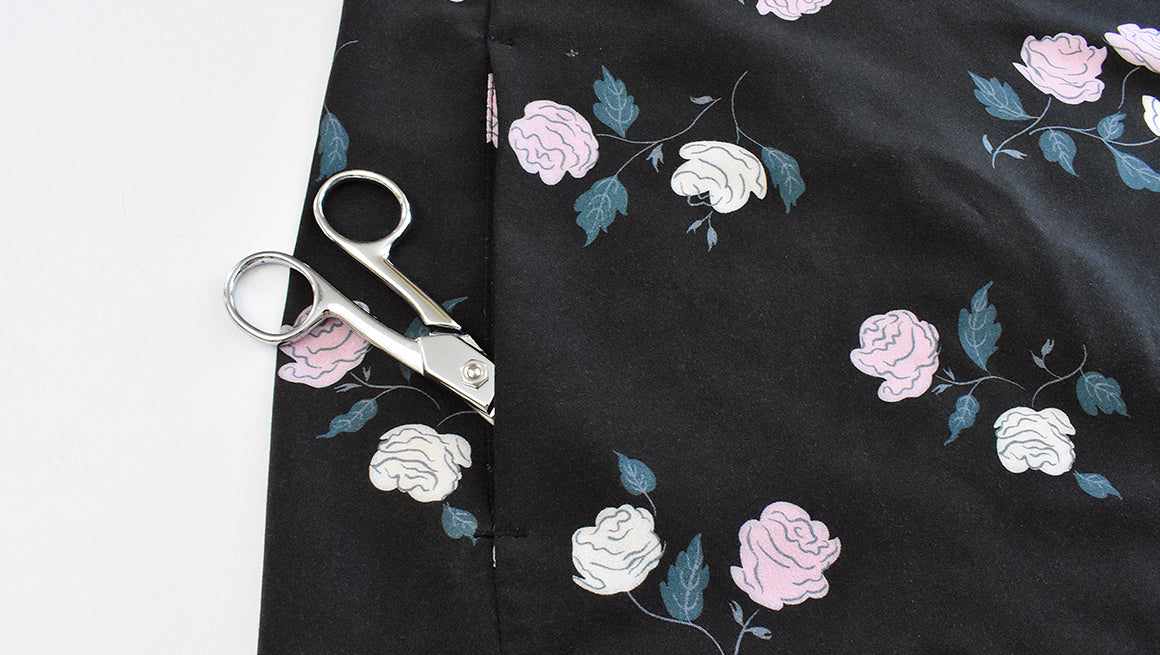
Fringe Sew Along | Sew Pockets and Skirt Side Seams
At this point, your bodice should be sewn and we're ready to stitch up the pockets (optional) and skirt of your Fringe blouse or dress. SEW THE SIDE SEAMS WITH NO POCKETS If omitting skirt pockets ...
Read more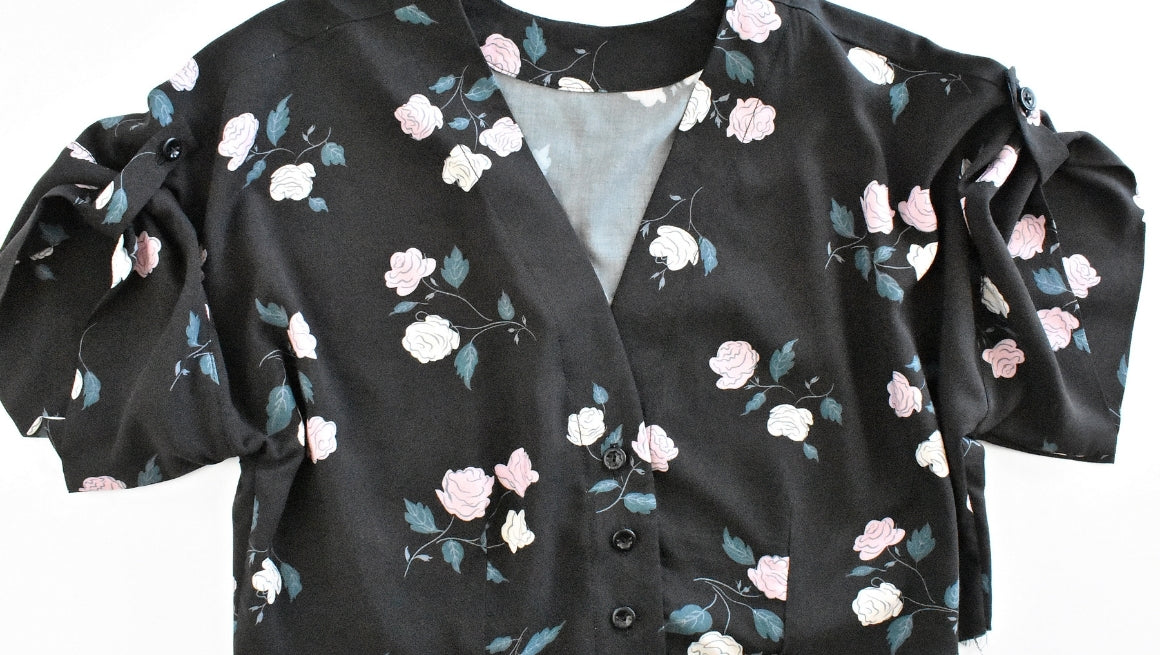
Fringe Sew Along | Attach the Sleeves/Cuffs and Sew the Side Seams
We're almost finished with the bodice portion of the Fringe. The sleeve and cuff options are interchangeable for both views. If sewing View B, skip all View A instructions below. SEW THE SLEEVE TAB...
Read more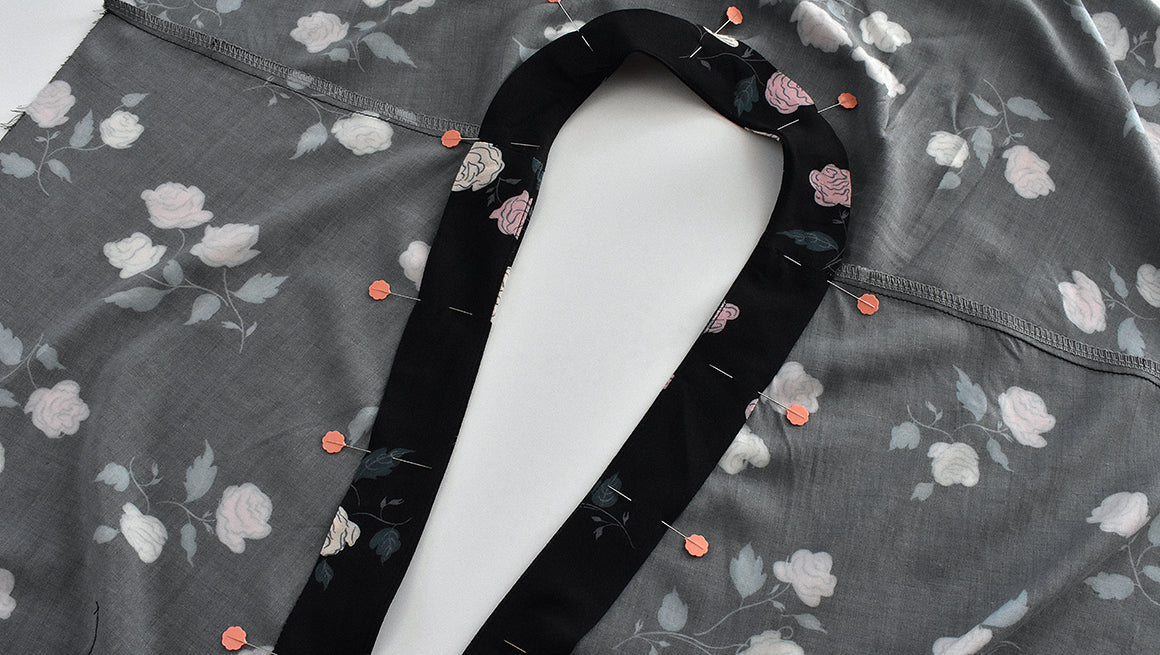
Fringe Sew Along | Sew Shoulder Seams and Attach Facings
Let's continue construction on your Fringe bodice with shoulder seams and facings for both Fringe views and the Mini Fringe (with a bodice lining). SEW THE SHOULDER SEAMS Before you attach your fac...
Read more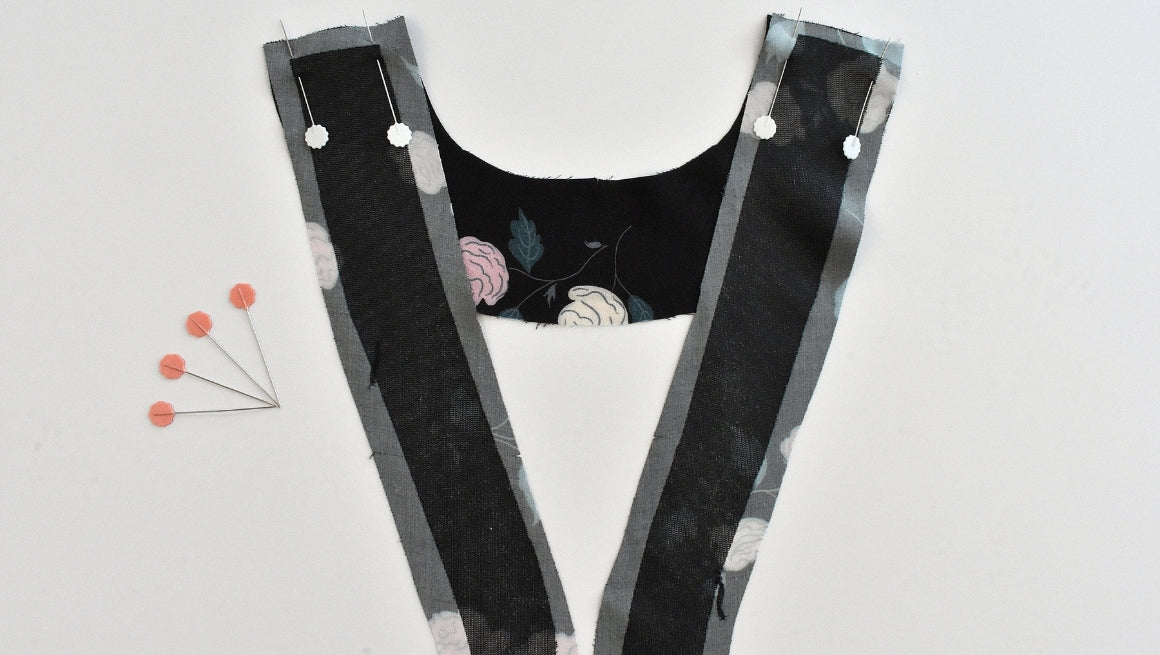
Fringe Sew Along | Prepare Facings and Sew Darts
Now that pieces have been prepared and cut, it's time to begin sewing. We'll start with the facings and bodice darts. SEW THE CENTER FRONT BODCE SEAM FOR VIEW B This step is for View B only. With r...
Read more
Fringe Sew Along | Getting Started
The Fringe is one of our most popular patterns, and we're thrilled to bring you more support in your creative endeavor with the Fringe Sew Along. Throughout this sew along, we will be sewing Fringe...
Read more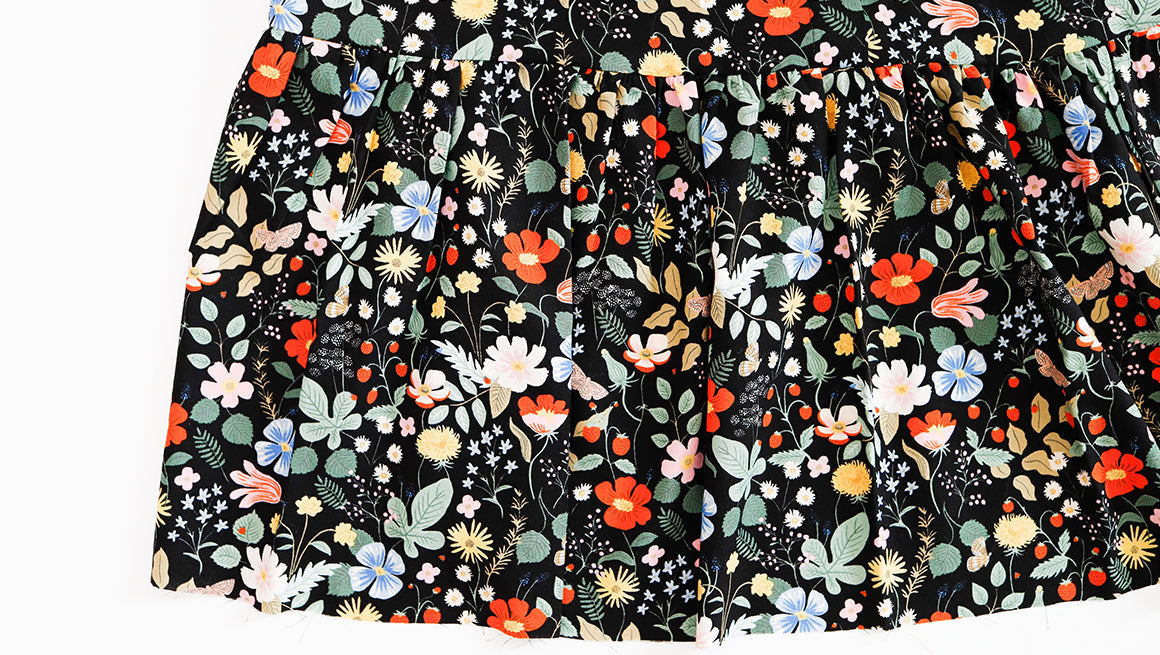
Wren Sew Along | Sew Dress Skirt & Hem
This is the last step before you can wear your Wren dress! Sew the Ruffle Side Seams With the right sides together, sew the ruffle side seams. Finish and press to the back. Gather the Ruf...
Read more
Wren Sew Along | Hem Blouse, Sew Buttonholes & Attach Buttons
In this post we have a few tips for sewing your buttonhole and your blouse hem. I prefer to sew the buttonholes and buttons of the dress before attaching the skirt but you can always add them at th...
Read more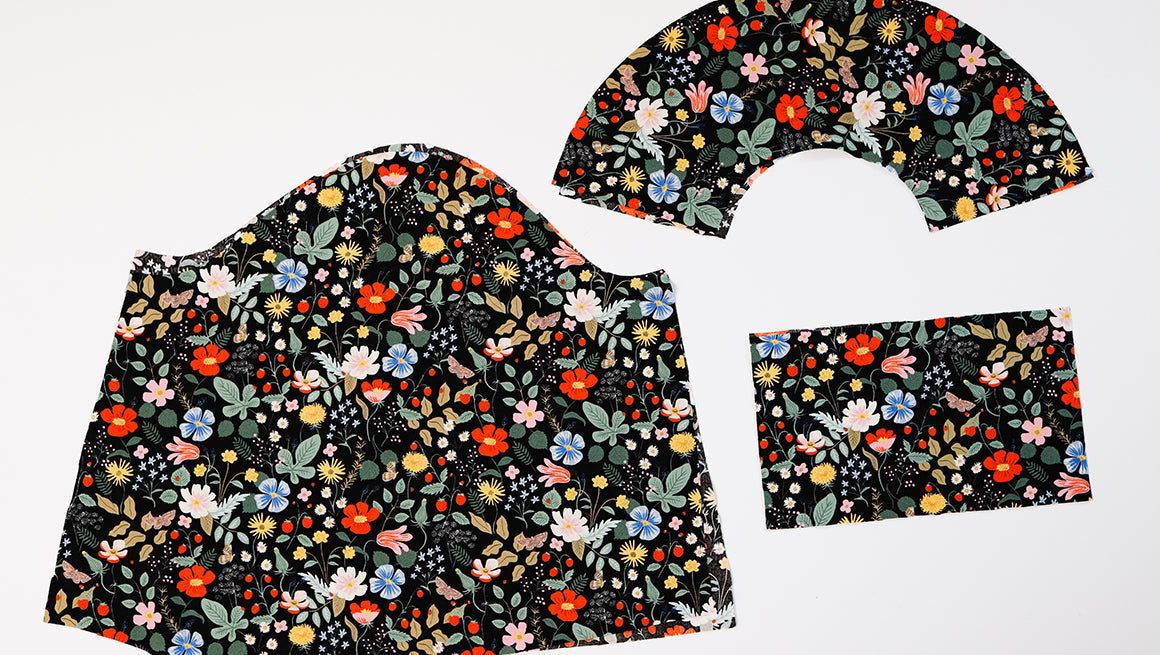
Wren Sew Along | Long Sleeves & Cuff
This post is for the longs sleeves and cuffs. If you are looking for the short sleeve instructions you can find the post here. The Mini Wren includes an elastic hem for the long sleeves so the shor...
Read more
Wren Sew Along | Short Puff Sleeves
We are ready to sew the short puff sleeves (View A). The construction is the same for the Wren & Mini Wren for the short sleeve option. If you are sewing the Mini Wren long sleeves (View B), yo...
Read more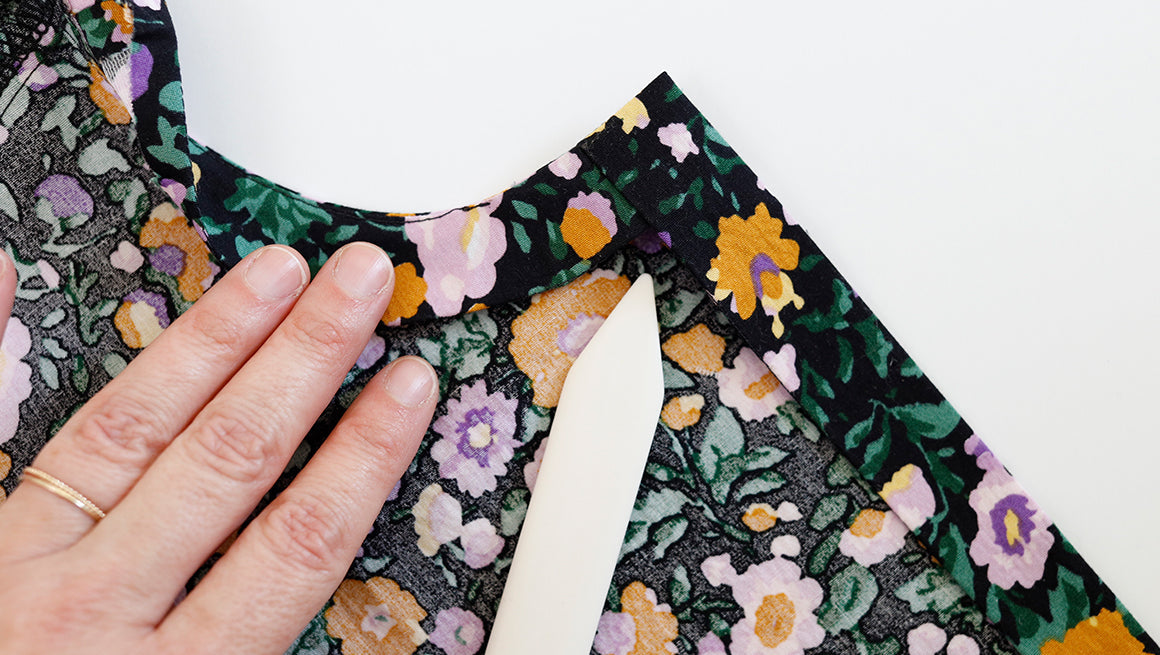
Wren Sew Along | Sew the Facing
Now we are ready to sew up the facing and create the fold-back placket. This might be a new construction method. Just follow along and trust that it will work out! We also filmed steps 8 through 11...
Read more
Wren Sew Along | Stay Stitching, Sewing Darts & Shoulder Seams
Now we are ready to start sewing! Stay stitching, sewing darts (the back darts are optional) and sewing the bodice shoulder seams are up first. STAY STITCHING NECKLINE Before handling your cut bod...
Read more
Wren Sew Along | Getting Started
We are excited to bring you a sew along for our latest release, the Wren Blouse & Dress. Throughout this sew along we will be sewing the Mini Wren for the Blouse (View A) and the Adult Wren for...
Read more
Marcel Sew Along | Hem
This is the final step before you can wear your Marcel. You can choose to hem with any method that you prefer. I like to use a stitch guide for pressing my double-turned hem. Watch our video or fol...
Read more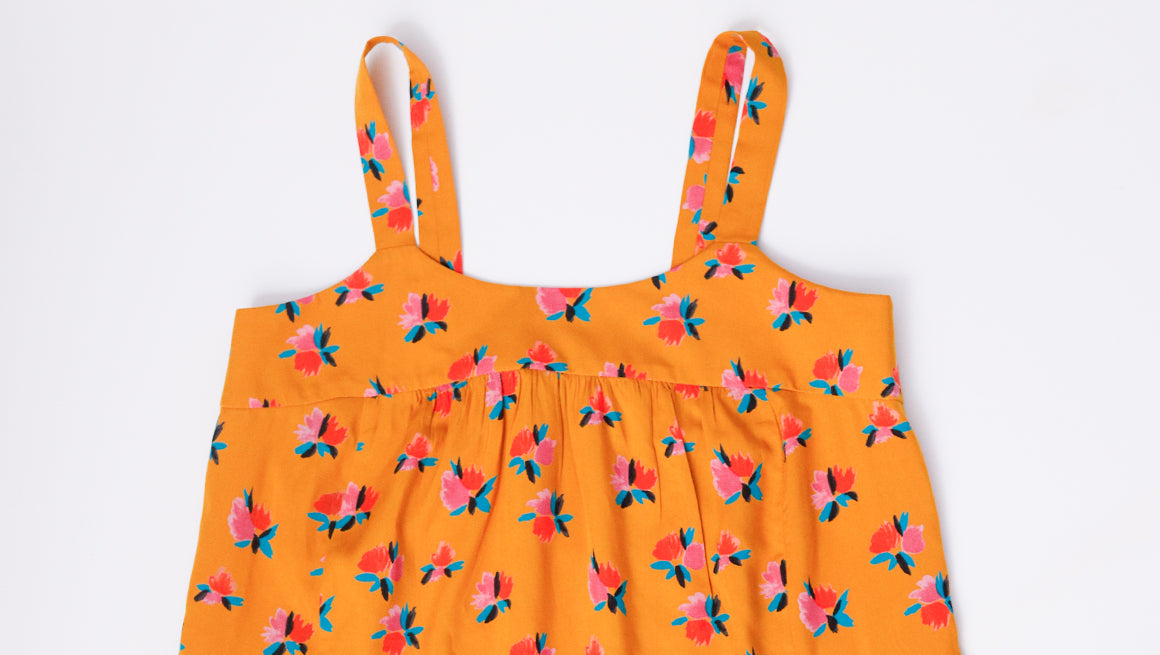
Marcel Sew Along | Sew the Bodice to the Dress or Tank
This is when your Marcel comes together! You are ready to sew and attach your bodice to your dress or tank top, the instructions are the same no matter what view you are sewing. Watch our video or ...
Read more