Tutorial | Victory Tank Button Front
Hi! I'm Cass (@CraftyProfessor) and I'm so excited to be part of the C&N Blogger Team so that I can share this tutorial with you. In this tutorial I'll be sharing a pretty simple hack to make the Victory Tank button down the front.

INSPIRATION
A few great things about this hack is that you can feature some fun buttons (like the super cute wooden ones I chose), you can make it nursing-friendly, you can wear it open over a camisole, or even tie the front pieces together for a sporty cropped look! Here is some RTW inspiration!

WHAT YOU'LL NEED
- Pattern - Chalk and Notch Victory Tank Pattern
- Paper, tape, and ruler
- Fabric: You'll need about the same amount of main and lining fabric per the Victory Tank Pattern.
- Interfacing - You'll need a 1 inch strip of interfacing 2 x the length of the tank. I like pre-cut 1 inch strips, but any interfacing will do.
- Buttons - You will need between 4-8 buttons depending on your tank length and placement preferences.

FABRIC
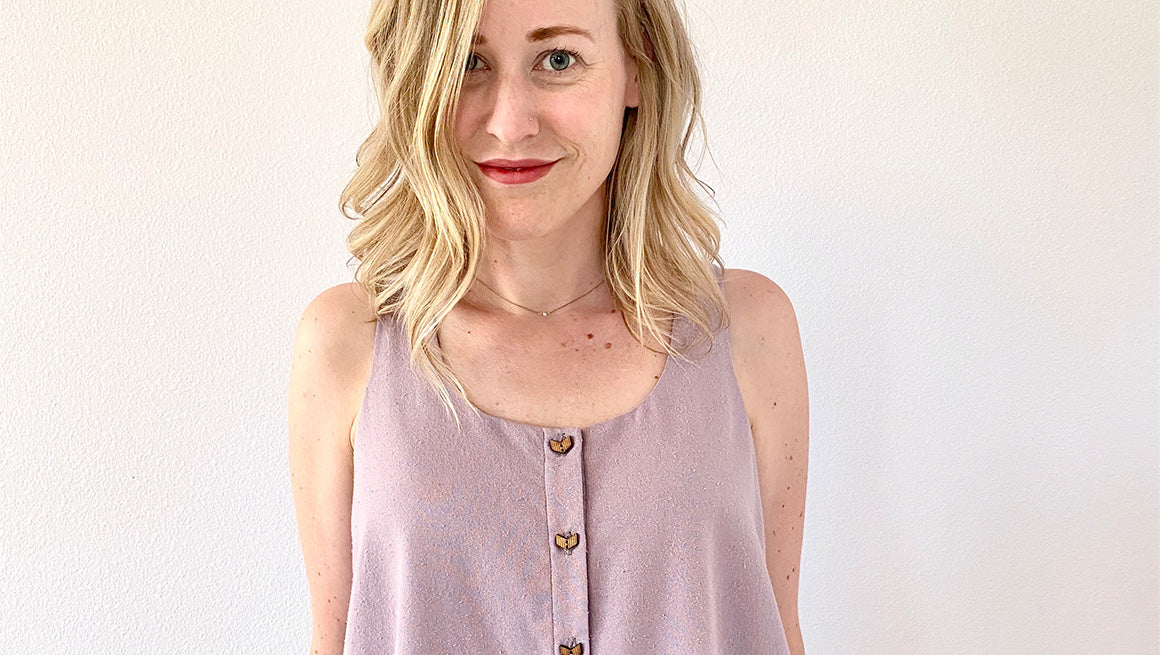
I got my fabric and buttons from Stonemountain and Daughter and chose silk noil in the color Nirvana for the main fabric. For the lining I chose rayon voile, which is currently out of stock (though I linked a similar print below) and then I went with some funky wooden arrow buttons. Because of the size I was making and the non-directional print, I was able to get away with just 1 yard each of the main and lining fabrics.


TUTORIAL
This tutorial will work for the cropped or longer views of the tank, as well as the option with or without the back strap. I do not recommend the option with the front straps. I chose the long version with the back strap and made size 4ab Cup.

PATTERN ADJUSTMENTS
There are just a couple of pretty easy pattern adjustments that you'll need to make, and lucky for you, I did all of the math for you, so all you need to do is draw some straight lines! There are no adjustments to the back pattern pieces or the lining pattern pieces.
For the front main pattern piece, you'll need to add a rectangle to the front center that is the length of the pattern piece by 1 7/8 inches (4.75 cm) wide. See the image below to see how this is broken out. While you will not need to adjust the lining, you will be cutting the front out as two mirrored pieces rather than on the fold. I also like to cut my lining about an inch shorter than the main (both front and back).

Construction Adjustments
Cut out fabric - Cut out the back pieces per the instructions. For the front pieces, rather than cutting them on the fold, you will now cut two mirrored pieces for each the main and lining using your adjusted pattern pieces.
Button Placket - After staystitching, sewing darts (if applicable) and sewing center back seams per the instructions, it is now time to prepare the placket.
*Repeat all steps below for both right and left front pieces of the main fabric.
- Iron on your 1 inch interfacing on the wrong side of fabric down the length of the front center of the main fabric 3/8 inch from the edge.
- Press the 3/8 inch seam allowance to the wrong side, partially covering your interfacing.
- At the center front neckline, fold the entire placket back, right sides together at the inner edge of the interfacing (1 7/8 from center edge). Keep the seam allowance folded over the interfacing and baste for about 1.5 inches at the neckline seam allowance.
- Hem the lining. It is important to do this earlier in the process so that it is hemmed when we sandwich it in the placket in the next steps.


Continue with the original pattern instructions to sew your shoulder seams and attach the main fabric to the lining. The only difference is that you will not have one continuous loop, but rather will be starting and stopping at the center front placket. The lining should come right to the edge of the interfacing, so since the main fabric is stitched/basted right sides together the main and lining should line up perfectly.


Topstitch the placket - Once you have understitched and pressed the lining and main right side out, it is now time to fold the placket over and topstitch it down. You will be folding the placket over to the wrong side 1 inch. I like to use the interfacing as a guide. Another little trick is that I use a fabric washaway glue stick to tack down the lining butting right up to the edge of the interfacing so that it gets sandwiched in the perfect place.

Then topstitch close to the edge of the fold to secure the placket in place. Make sure to your bobbin thread coordinates if you stitch from the wrong side.


You may now continue with the side seams and hemming the main fabric of the tank, per the original pattern instructions.
BUTTON HOLES AND BUTTONS
The rest of the tank can be completed per the original pattern instructions. The last thing left to do is add button holes and buttons or snaps. I chose to use 6 buttons, but this is all personal preference. Place your button holes according to your preference and sew on your buttons. And you're done!


One of my favorite things about this tank is how beautiful the insides are. So, go ahead and admire the beautiful insides of your garment!


FINAL LOOK

Thanks for reading this tutorial. Please tag me on instagram @craftyprofessor if you make a button up version, and feel free to send me a message if you have any questions!

Thank you to our sponsor Stonemountain & Daughter Fabrics for collaborating on this post. Use code: "chalkandnotch15" for a 15% discount (code is good through the end of the year and valid for a one time use per person).


%20and%20I'm%20so%20excited%20to%20be%20part%20of%20the%20C%26amp;N%20Blogger%20Team%20so%20that%20I%20can%20share%20this%20tutorial%20with%20you.%20In%20this%20tutorial%20I'll%20be%20sharing%20a%20pretty%20simple%20hack%20to%20make%20t...)