
Hello! Nicole (@nf_merritts) here. It’s less than a week until Halloween and, if you’re like me, you might be scrambling to put together a quick costume for yourself, your friends, or the kids in your life. Never fear, we’ve got you covered with some quick last minute DIY Halloween costume ideas that you can make in less than an hour. These looks feature the Waterfall and Page patterns but they can be made with any similar pieces already in your closet. If you plan to make any of the clothing patterns, you might need an extra hour or two, but you’ve got this!
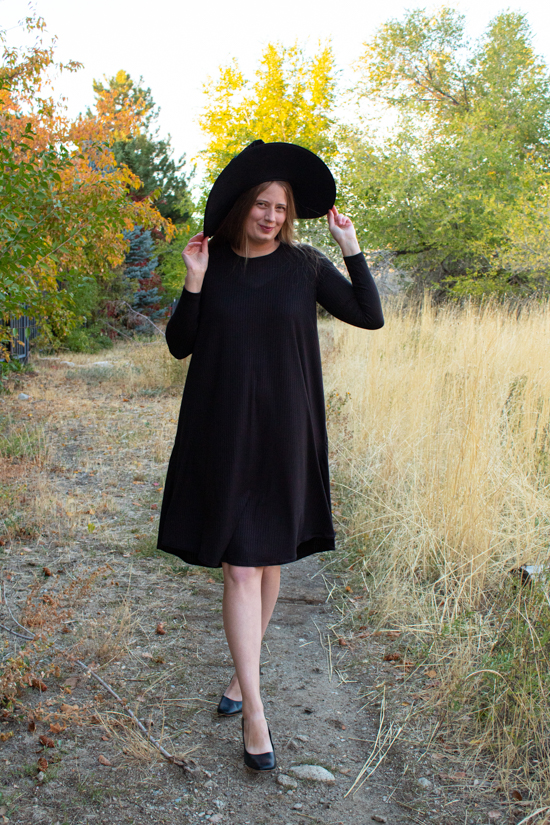
Witch Costume
This is a classic five minute “costume” to put together as all you’ll need is a black dress and witch hat. I used the Waterfall Raglan (with added length and ruffle omitted) sewn in a poly blend rib knit from Raspberry Creek Fabrics and a store bought witch hat. However, if you want to add a little more DIY element to this outfit, Delia Creates has a couple of great tutorials for a felt witch hat (here) and spiderweb collar (here).
Jack O’ Lantern Sweatshirt Costume
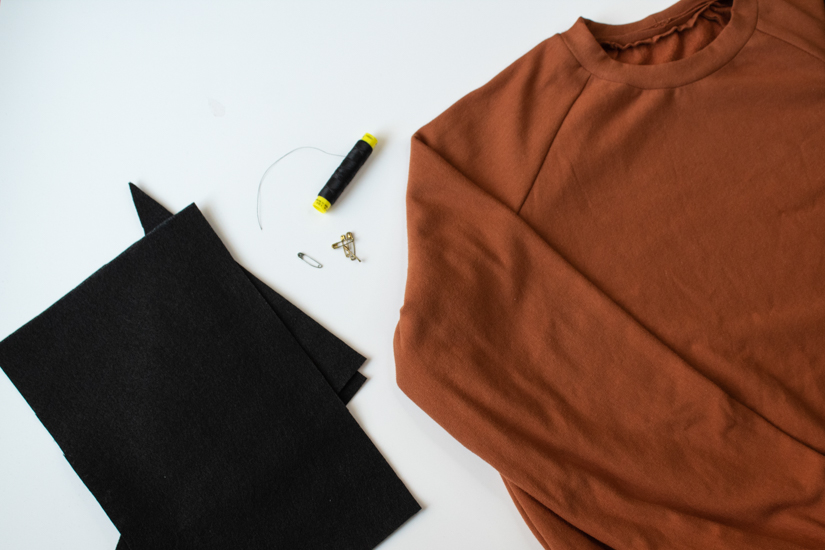
Probably my favorite of the three, this Jack O’ Lantern sweatshirt look will take anywhere from 5-20 minutes to put together depending on how permanent you want the added pieces. I started with a full sleeve Page Hoodie View B sewn in the softest bamboo/cotton/spandex fleece also purchased from Raspberry Creek Fabrics but, any orange sweatshirt will do. I also opted for the neckband add-on in place of the hoodie here. Let’s get started.

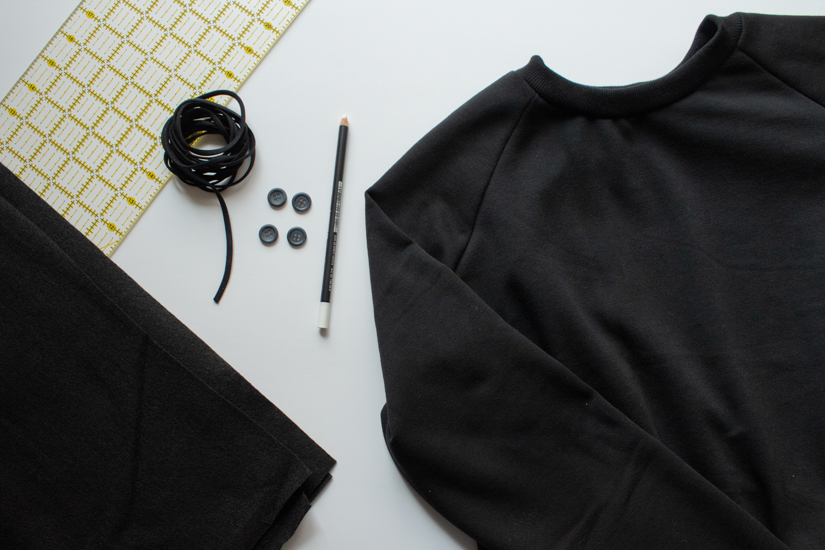
What You Need:
- The Page Hoodie pattern and Free Neckband add-on or another orange sweatshirt
- Scraps of black felt
- Scissors
- Safety pins OR matching thread and sewing machine depending on the method
- Pins
- Optional marking pencil or chalk
Tutorial
Using a marking pencil or chalk, draw your eye and mouth shapes on the felt. Cut them out. I went with a traditional triangle eye and toothy grin here but, you can get as creative as you’d like. Use pins to decide on placement.
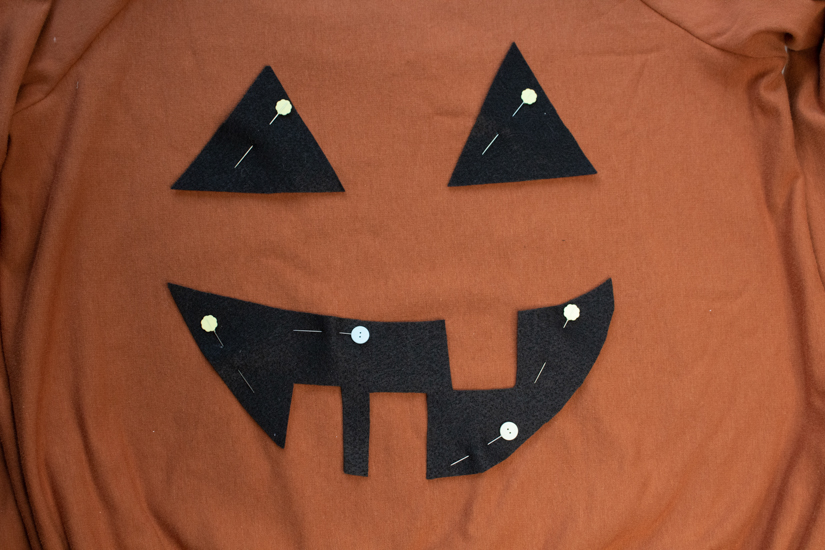
Once you’ve settled on placement, it’s time to decide how you’ll attach the face. If you’re in a hurry and don’t want things to be permanent, a few well placed safety pins can do the trick. For a permanent option, you can topstitch around the edges with matching thread. I opted for a third, semi-permanent option and simply added a few stitches to each of the corners. Once Halloween is over, I can easily remove the stitches and keep my orange sweatshirt without worrying about safety pins coming undone. This is the option I’d suggest if you want a temporary solution for a kid’s Jack o’ lantern sweatshirt.
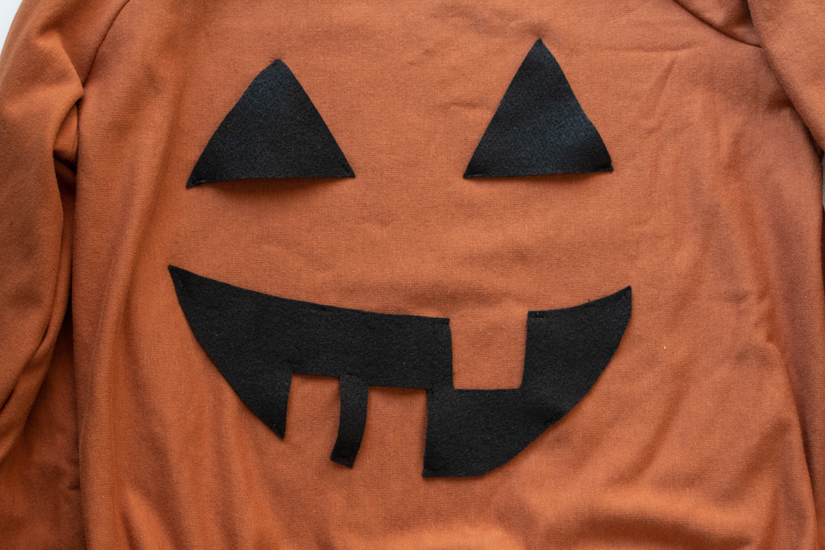
Now, pair your sweatshirt with a green or brown beanie, and your pumpkin look is complete!


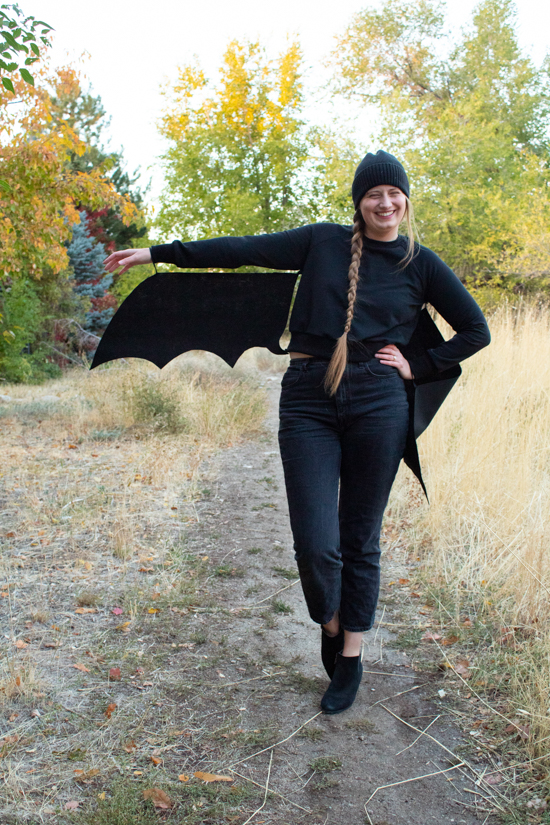
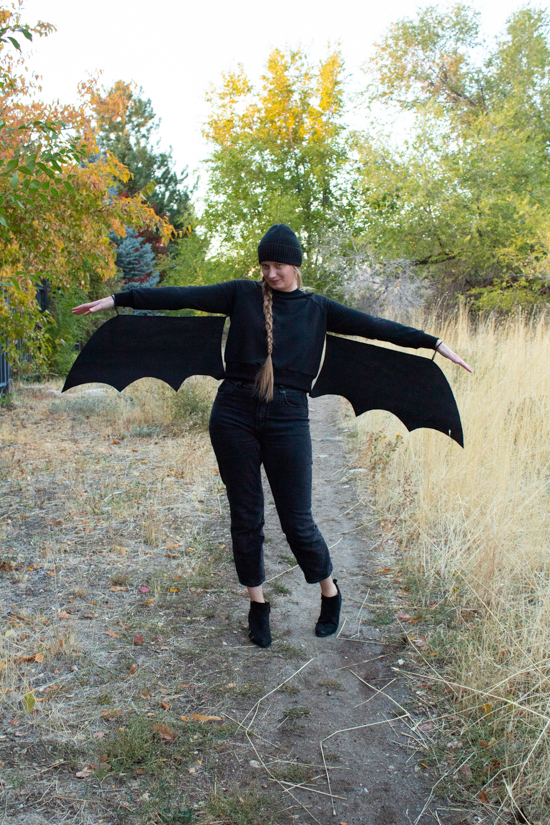
Easy Bat Wing Costume
While the Jack O’ Lantern sweatshirt might aesthetically be my favorite, this look is undoubtedly the most fun to wear. I couldn’t stop flapping my wings and spinning while taking these photos. Here I’ve used another Page Hoodie, this time in View A with slim sleeves and neckband add-on. The most detailed of the three looks, these batwings took about 45 minutes to put together. However, I probably could’ve done it faster if I’d started with a plan instead of just winging it. Hopefully, with these instructions, you can put it together in about half an hour.

What You Need:
- The Page Hoodie pattern and Free Neckband add-on or other black or dark gray sweatshirt
- About 1 yard of 36″ or wider black or dark gray felt
- Scissors
- 1 yard of 1/8″ or 1/4″ elastic.
- 4 buttons (I used 1/2″ buttons)
- Pins
- Marking pencil or chalk
Tutorial
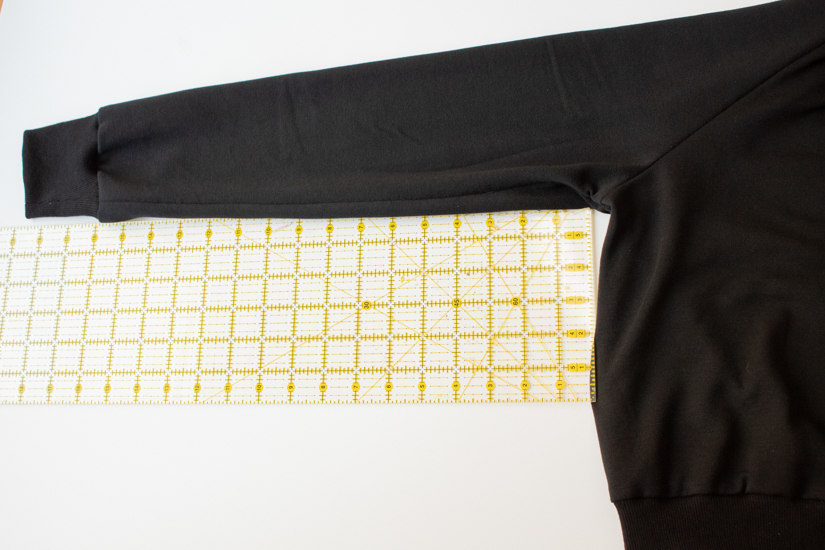
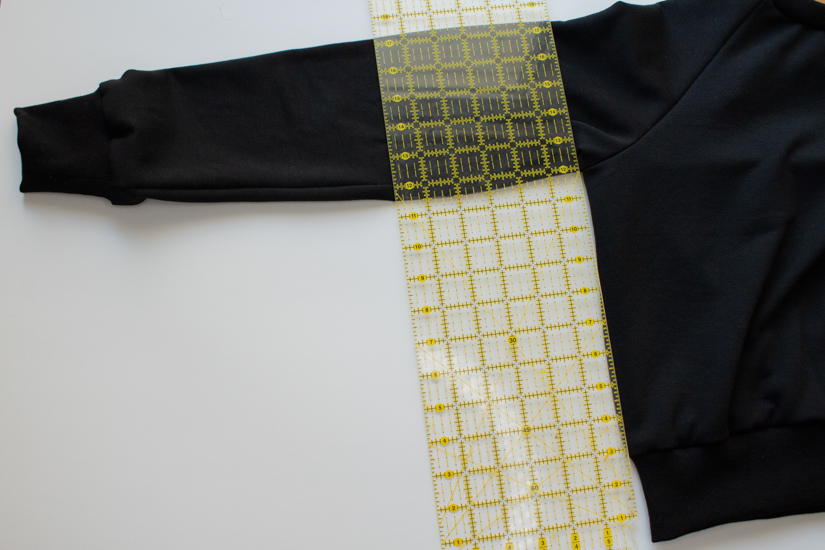
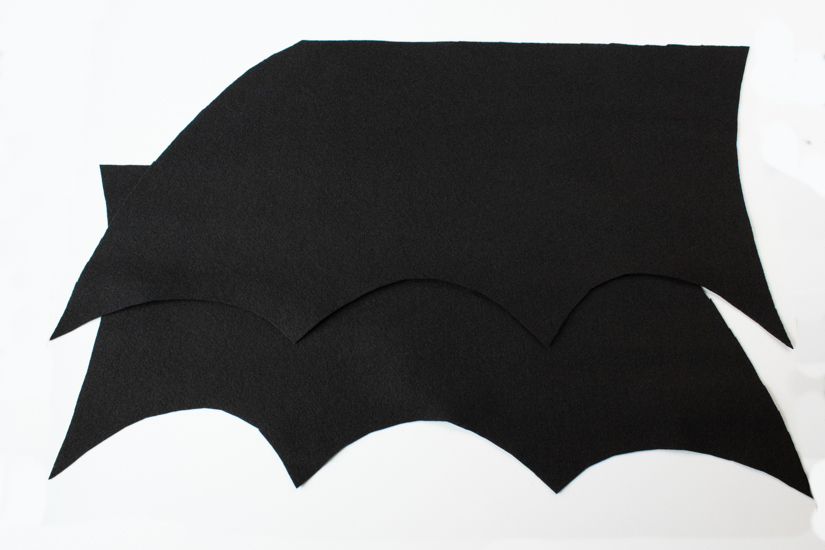
Start by measuring your sleeve length from armpit to the end of the cuff and bodice length from armpit to bottom of your hem band. For this my measurements were approximately 19″ sleeve length and 12″ bodice length. These will be used to determine your wing size.
Taking the measurements from the previous step, add 6-8″ to the sleeve length measurement. Then, cut a rectangle of felt. Your rectangle length will be the same as your bodice length and the width with be your sleeve length + 6-8″.
For example, using my 12″ bodice length and 19″ sleeve length, I cut. rectangle of felt measuring 12″ x 27″. Now, divide the width by three and this will be your length between wing points. I started by marking these points along the bottom of the felt and then drew in the curves between points. At the top, mark your original sleeve length. This will be the top of your wing. Draw a gentle curve from the top sleeve length point to the right bottom wing outside. On inside wing short end, draw a small curve in and out from top to bottom.
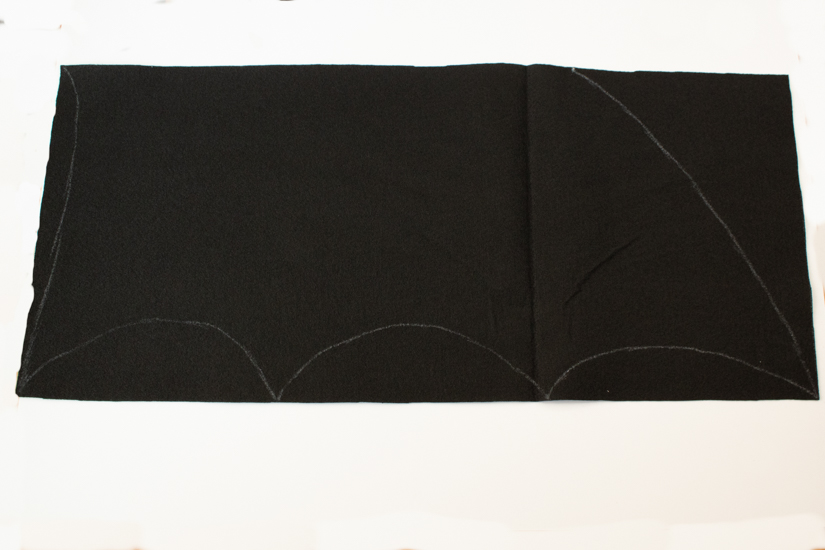
Cut out your wing piece and use it as a template to cut a second piece. Since there’s no right or wrong side to the felt, there’s no need to mirror when cutting.
Now grab your elastic and cut 4 – 2″ pieces and 2 pieces that are your wrist measurement + 2″.
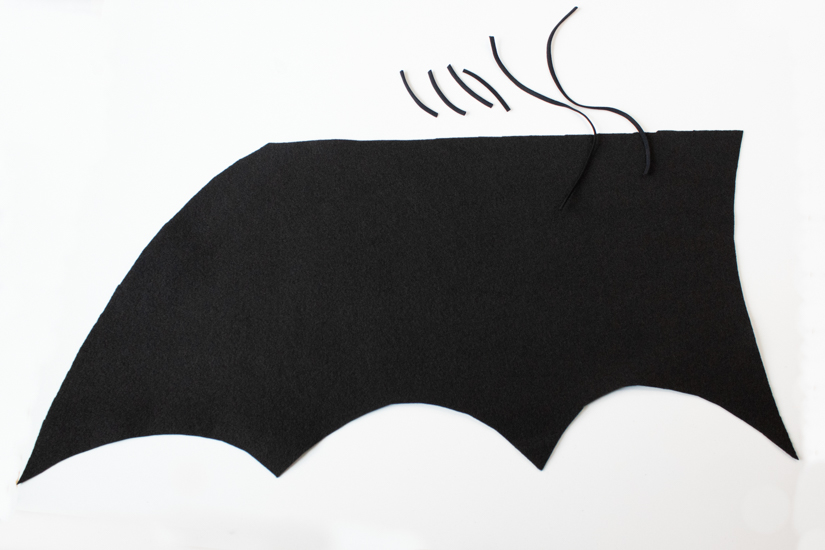
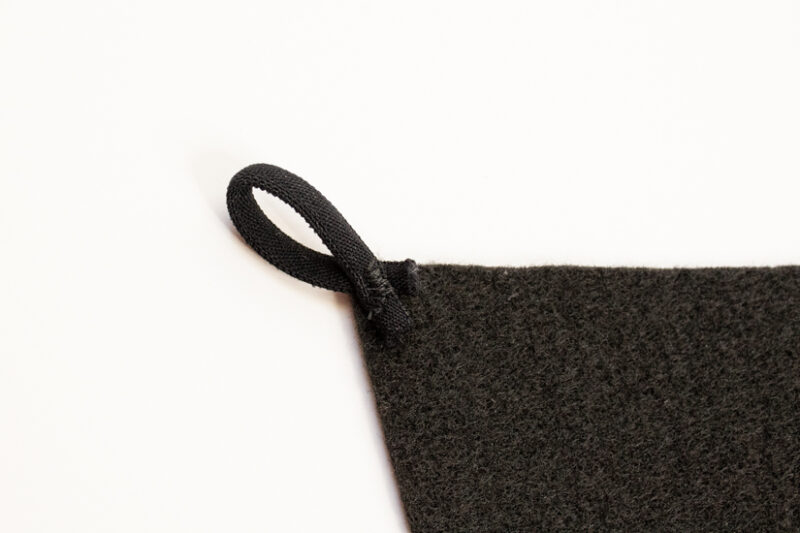
Create loops with your shorter elastic pieces and pin one to the corner of the inside wing top and inside wing bottom. Then, create a loop with your wrist strap elastic. Pin it to the top outside corner of your wing. Using a zig-zag stitch, sew your loops to the wing.

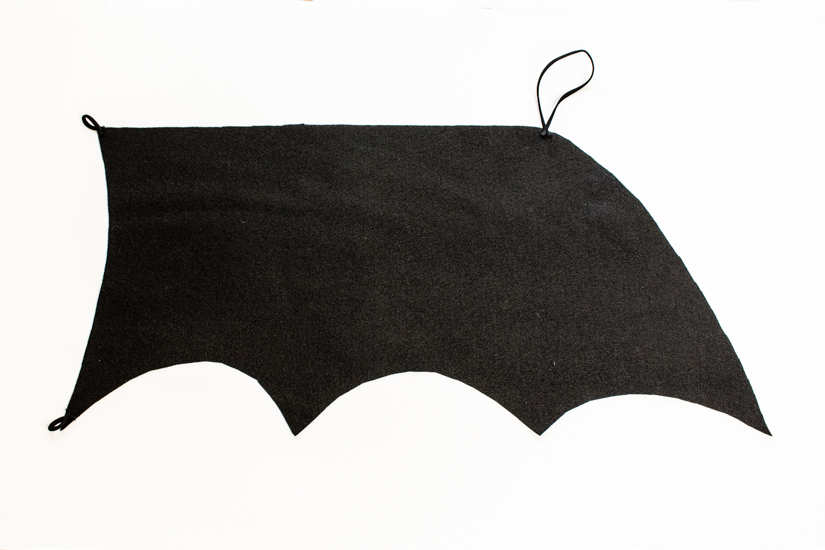
Now we’re going to add the buttons to your sweatshirt. Sew a button to the seam at the armpit on both sides and to the side seam at the bottom of the hem band.
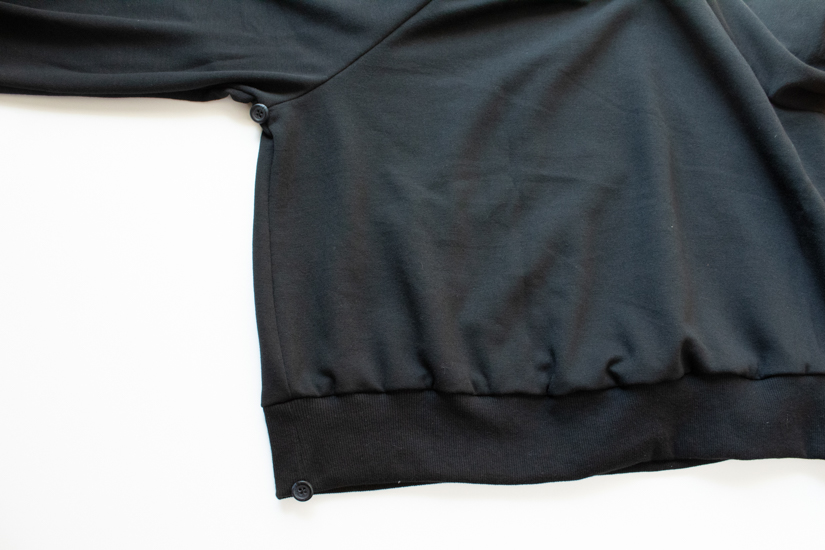
Put on your sweatshirt. Attach elastic loops to buttons and put your hand through the wrist strap. Now you’re ready to fly right over to the costume party!
Thanks for reading! If you use any of these looks, please make sure to tag us @chalkandnotch on Instagram so we can see your costumes.


