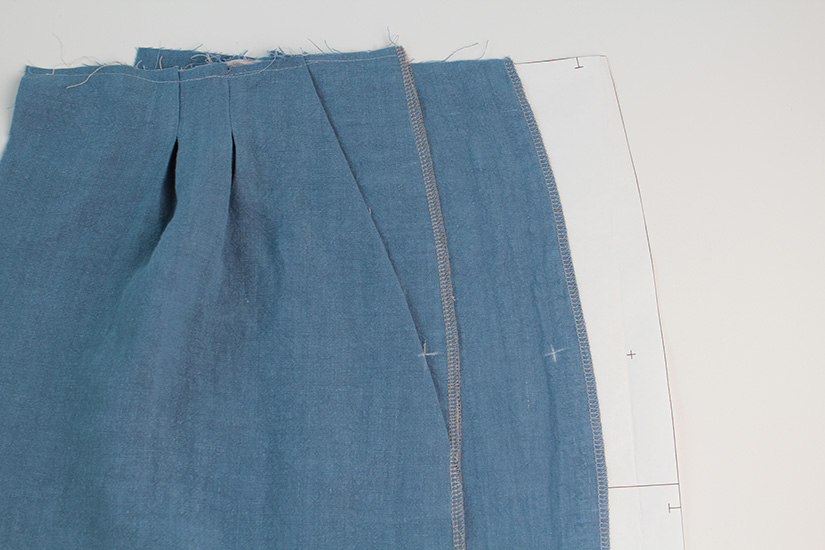
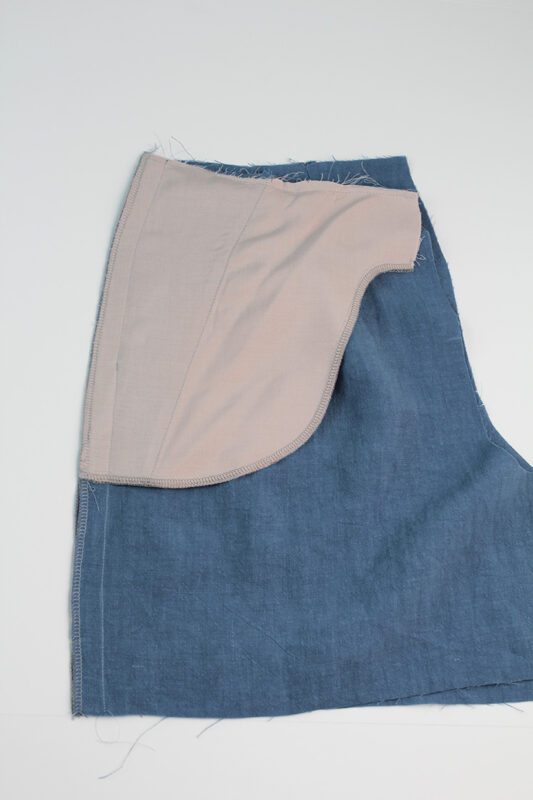
FINISH THE SIDE SEAMS
Finish the front and back side seams separately on all four pieces.
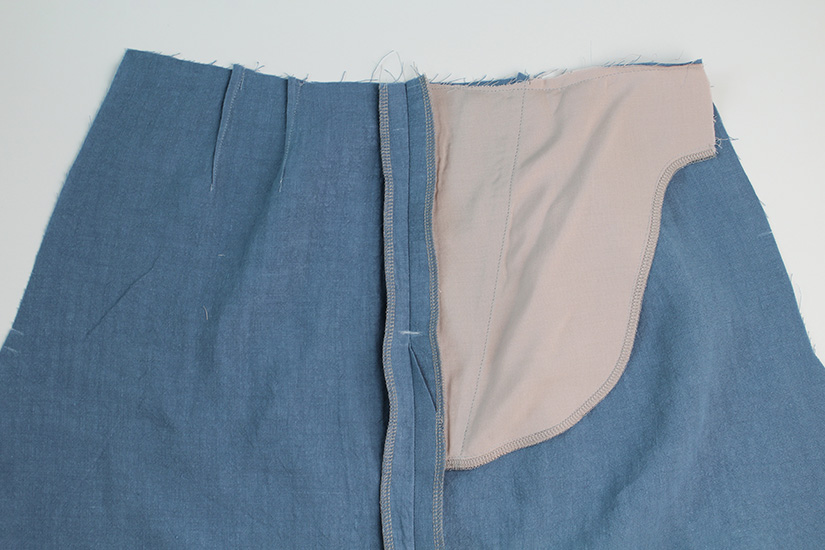
MARK THE STITCHING ON THE WEARER’S LEFT SIDE SEAM
Take the wearer’s left front and left back pieces. There is a “+” mark about 7″ (18 cm) down from the cut edge to indicate where the basting stitching stops and when you switch to a regular stitch. Flip to the right side and confirm the regular stitching starts where the pocket intersects in the front or slightly above it.
SEW THE WEARER’S LEFT SIDE SEAM
Once you have confirmed the point where you switch to a regular stitch, sew the wearer’s left side seam right sides together with a 3/4″ (2 cm) seam allowance. Starting with a basting stitch, sew from the top edge to the marked zipper point, and at the marked point switch to a regular stitch (back stitching a few stitches). and then sew down the side seam.
PRESS SEAM OPEN
Press the seam open. Lay the wearer’s left side pieces down with the wrong side facing up. Transfer the “+” mark so you know where the stitching switches.
SEW THE ZIPPER TO THE BACK SEAM ALLOWANCE
Move the back piece out of the way. Place the zipper face down. The zipper stop should be 1/4″ (0.6 cm) below the “+” mark, the zipper teeth should be to the left of the side seam, and the zipper head should be above the waist seam. Pin the zipper in place, making sure to pin just the zipper and the seam allowance.
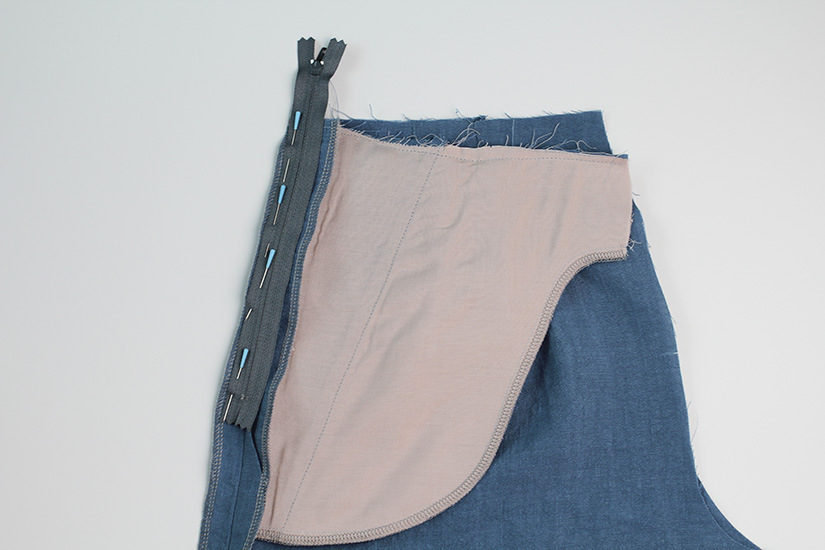
Using a zipper foot, sew the zipper to the seam allowance close to the zipper teeth.
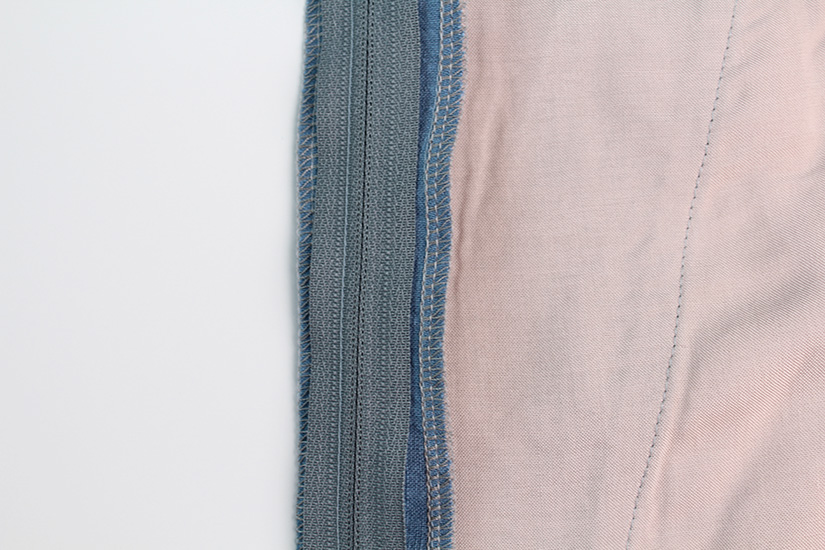
TOPSTITCH THE ZIPPER
Flip the zipper right side up. Topstitch to the right side of the zipper teeth, only through the seam allowance and avoiding the back short/trouser.
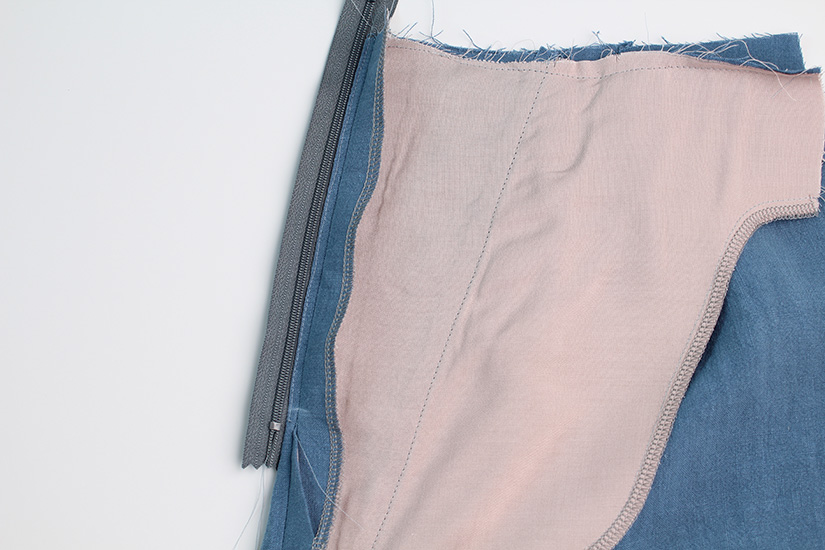
SEW THE ZIPPER TO THE FRONT SEAM ALLOWANCE
Flip the zipper back, face down. Move the front piece out of the way. Sew the other side of the zipper to the front seam allowance close to the zipper teeth.
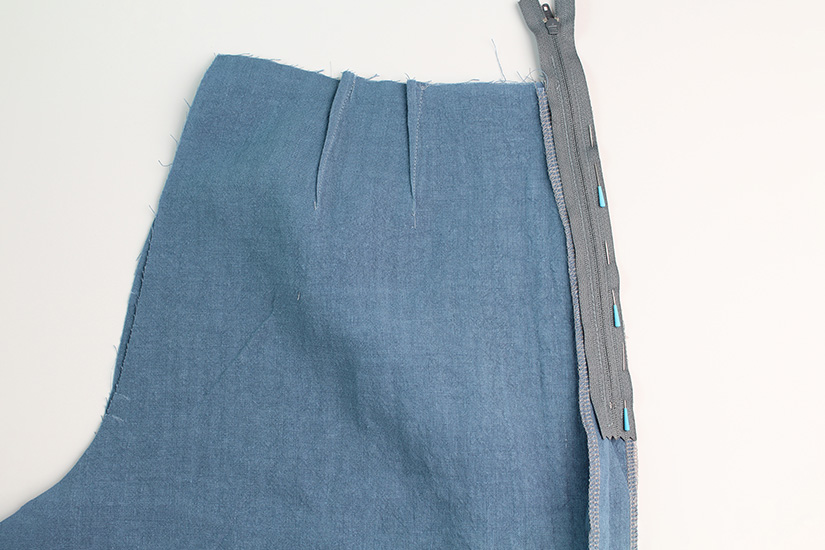
HAND BASTE OR MARK YOUR PLACKET GUIDE
With the right side up, lay your side seam as flat as possible. Hand baste or mark your placket stitching guide 1/2″ (1.2 cm) from the seam line the length of the zipper.
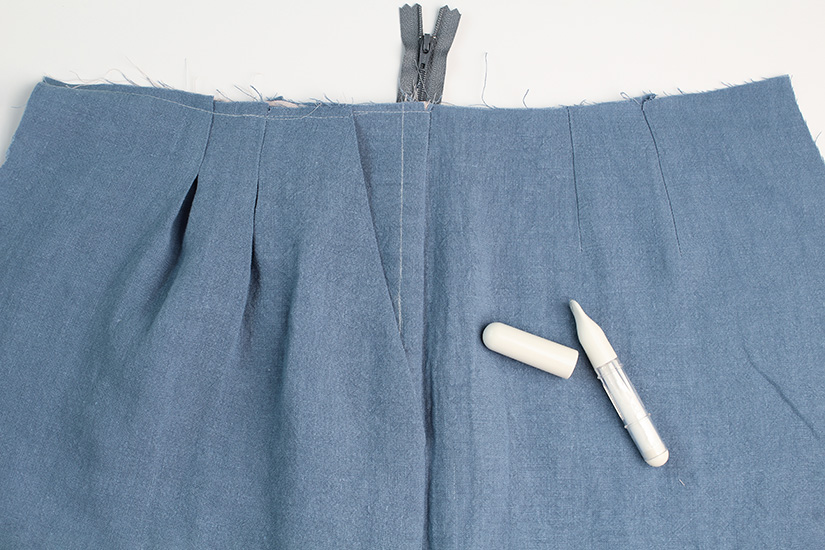
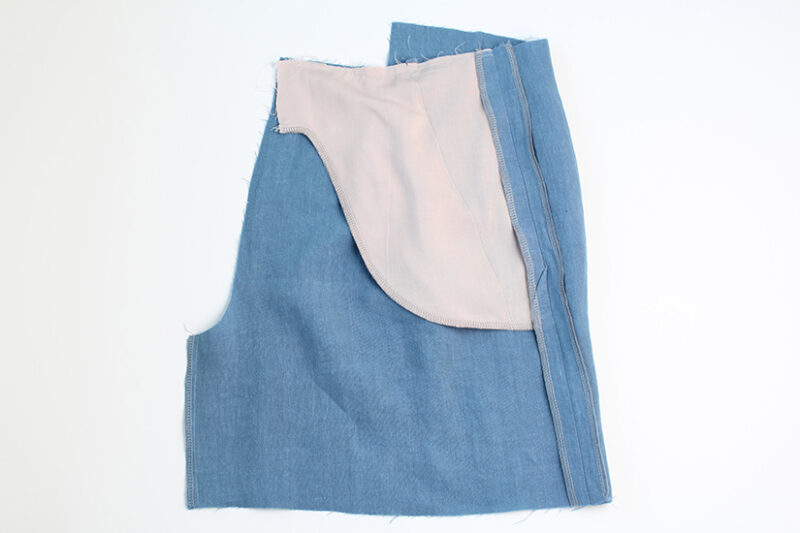
SEW PLACKET
Sew along your hand basting or marked placket placement starting at the waist and sewing the length of the zipper. You may have to go inside of the pocket when sewing the last inch.

If you are not adding the zipper shield, sew across the bottom of the zipper, 1/4″ (0.6 cm) below the zipper stop.
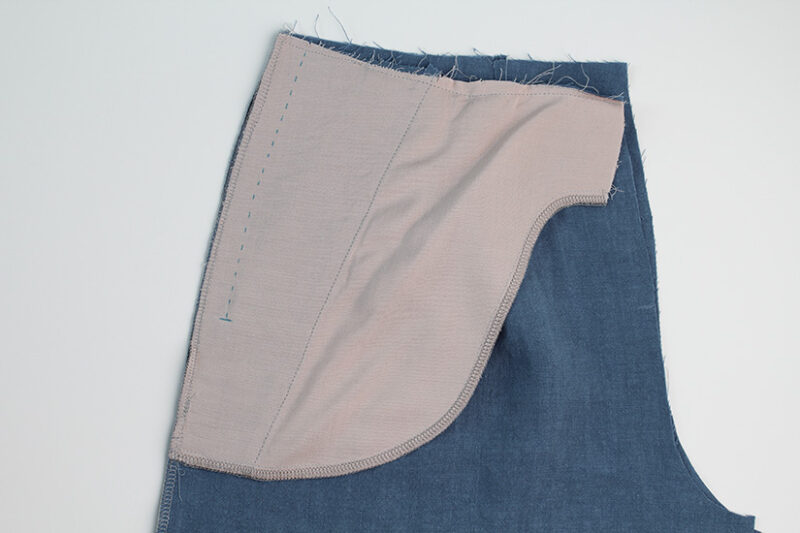
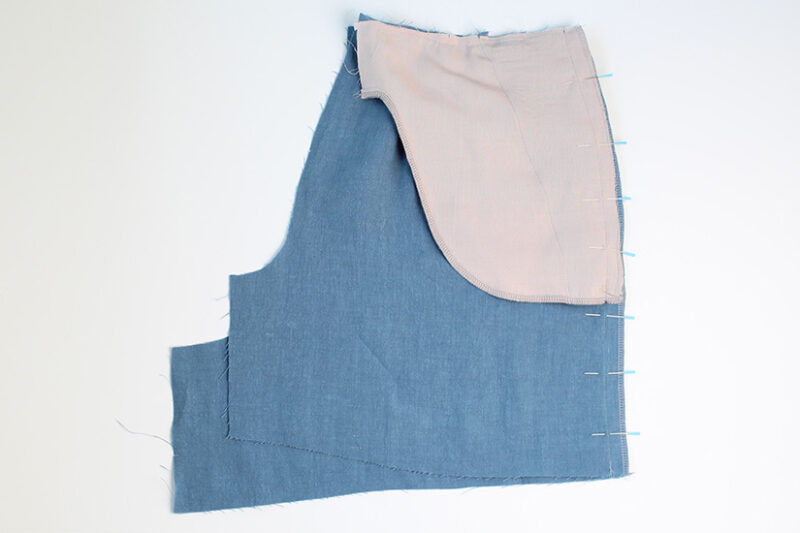
OPTIONAL ZIPPER SHIELD
Align the finished edge of the zipper shield to cover the finished back seam allowance and the bottom of zipper tape by 1/4″ (0.6 cm). Sew to the back seam allowance only, avoiding the back short/trouser.
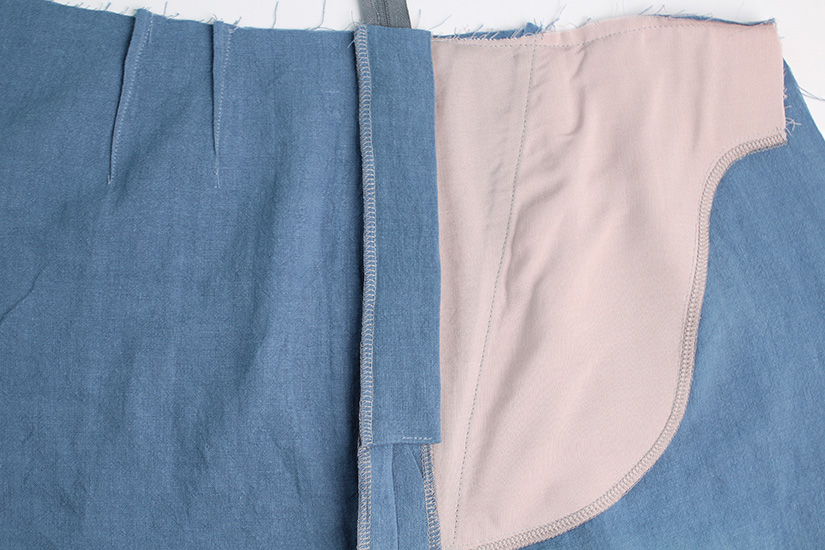
To secure the shield, stitch across the bottom of the placket (below the zipper stop) and through the zipper shield. If you prefer less bulk at the side seam you can omit the zipper shield.
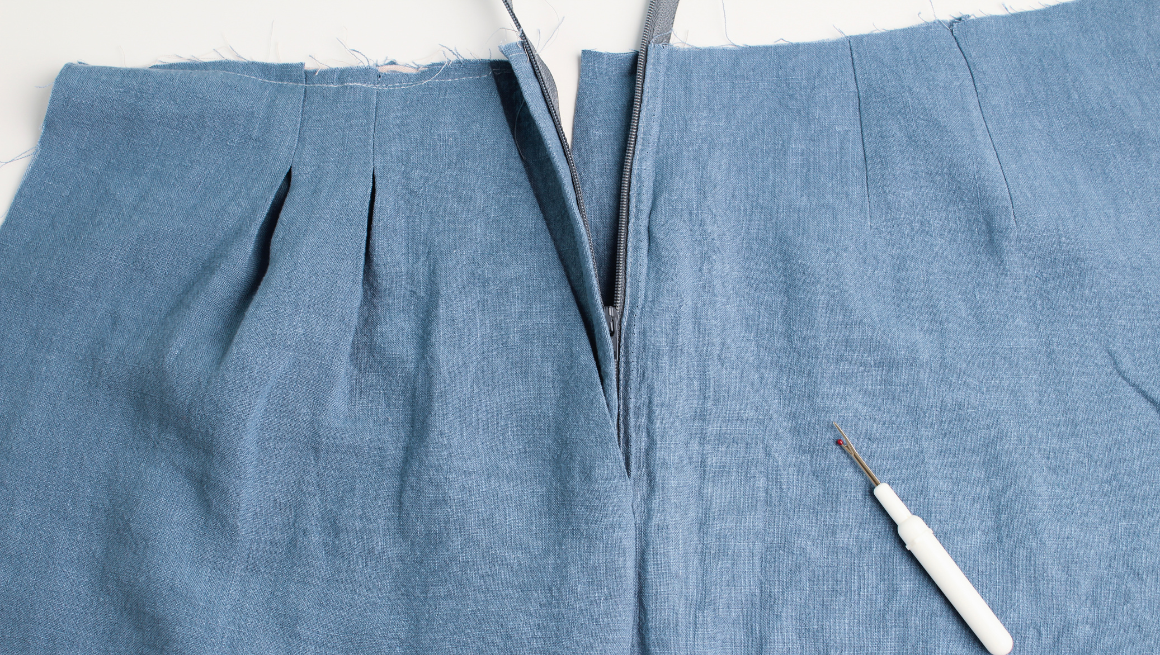
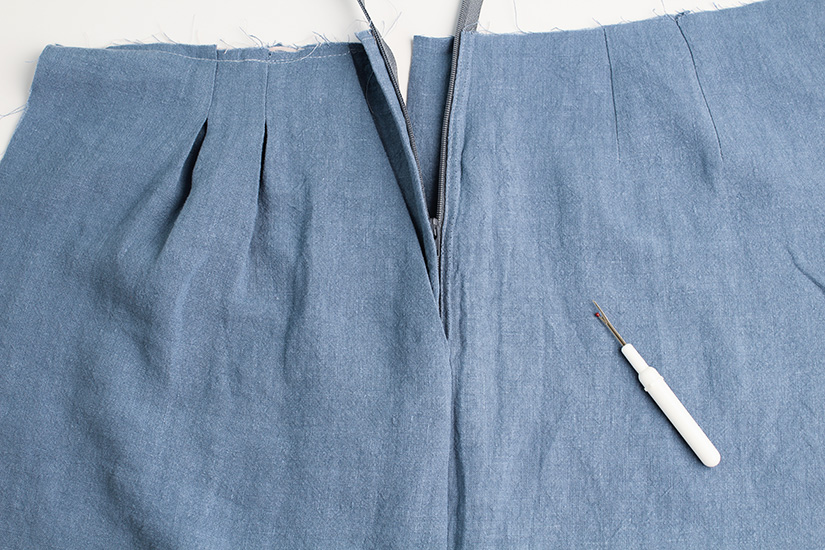
REMOVING BASTING
Remove your basting stitches for the stitch guide and the side seam basting stitches. Do not trim the top of the zipper tape until you attach the waistband.
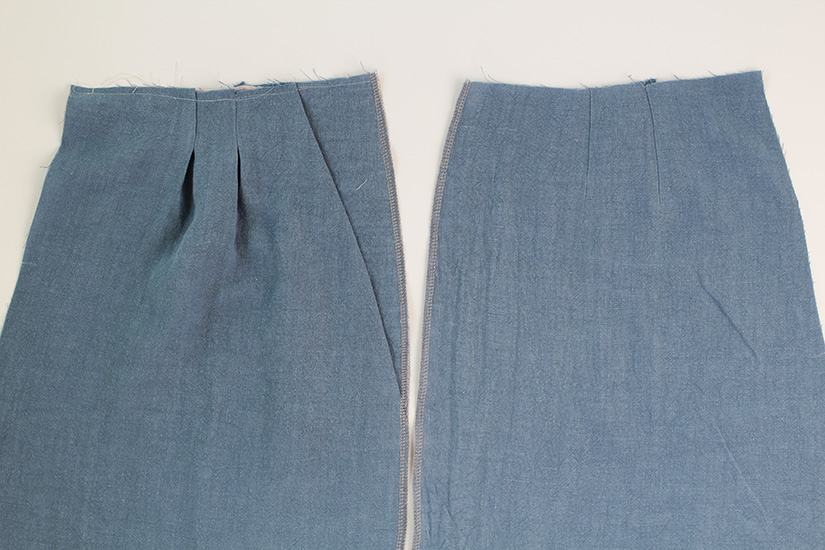
SEW THE WEARER’S RIGHT SIDE SEAM
With right sides together, sew the wearer’s right side seam with a 3/4″ (2 cm) seam allowance. Press the seam open.
Crew Sew Along Posts | Getting Started | Interfacing, Pleats, and Darts | Prepare Pockets | Sew Zipper and Side Seams | Sew Inseam and Rise | Waistband | Hem and Finishing
