If you are looking for any help fitting your Farrah, you’ve found the right post! We have put together this post covering the most common fitting adjustments for the Farrah. We have been working to have fitting posts for all of our patterns. Find our fitting and custom adjustments library here.

Please check out our Farrah Tester Inspiration post here if you’re interested in seeing the Farrah on a variety of body types. During testing, we work through the fit for each tester, which helps inform what fitting and custom adjustments we talk about in our fitting posts. These adjustments are included in the pattern tutorials, but if more fit questions come up, we will continue to add them to the blog posts.

Before we get started, I always like to add a note that the goal should be to create a comfortable garment that you will enjoy wearing. I don’t think it’s important to get rid of every single drag line and pull, so be kind to yourself as you are analyzing your fit. If you have specific questions about fitting the Farrah, you can always reach out in our Chalk and Notch Facebook Group or email us here.

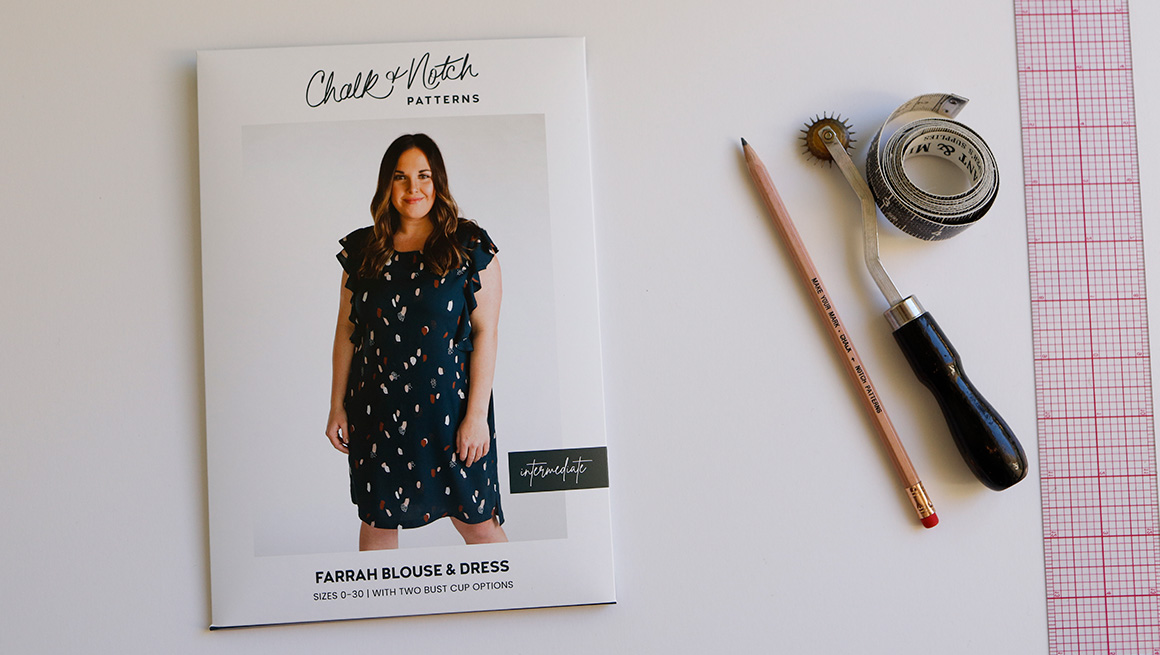
First things first, make sure you have a copy of the Farrah pattern!
HOW TO PICK A SIZE
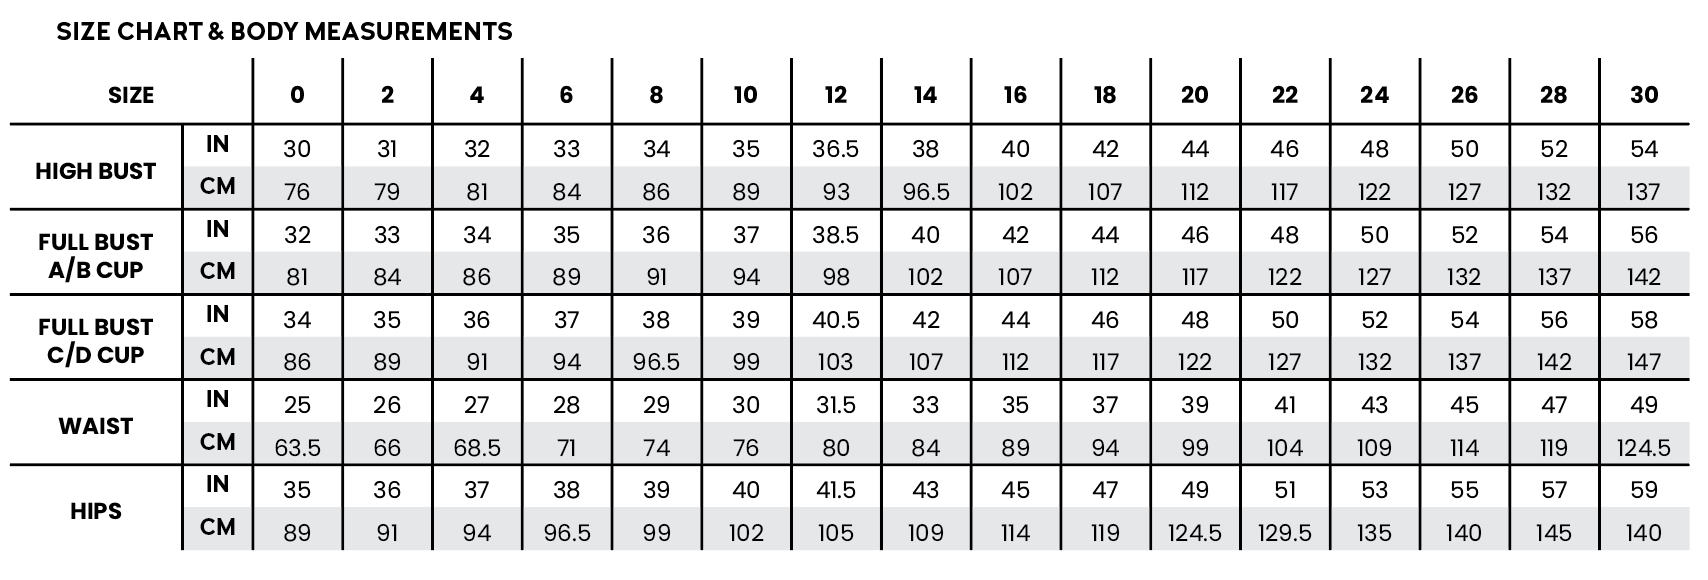
First, make sure you take new measurements before starting any project because our bodies change, and starting with accurate numbers is the first step to getting a good fit. When fitting the Farrah, you will want your high bust, full bust, and hips body measurements. For the most part, the waist is not going to inform your decision on which size to pick, but if you have any concerns, you can reference all the body measurements.

Cup Size
The cup size is determined by calculating the difference between the high bust and full bust. If the difference between the high bust and full bust is between 0” and 2” (5 cm), use the A/B cup. If the difference is between 2” (5 cm) and 4” (10 cm), use the C/D cup. If you have more than a 4” (10 cm) difference, you may need a Full Bust Adjustment. More details on the Full Bust Adjustment below.
Body Measurements
It is very common to fall across a few different sizes. After you determine what cup size to make, pick a size that works for your high bust, full bust, and hips. Make a note of your waist measurement if there’s a significant difference in size. You may need to blend between sizes. Start with the High Bust and Full Bust size and blend to the necessary waist and hip size. See more details on blending sizes below.
Finished Garment Measurements
This style is designed to have 4.5” (11.5 cm) of ease through the bust. There is 12” (30.5 cm) of ease through the waist and 5.5″ (14 cm) through the hips.
Review the finished garment measurements to determine if you would like to adjust the length. Find the finished length measurement by measuring from the center back neck to the center back hem. It might be helpful to have someone help you take this measurement.

MAKING A MUSLIN
I will always advise you to make a muslin or toile (test garment) before cutting into your final fashion fabric. Fabric will affect fit, and you won’t get a feel for the real fit unless you sew it in a comparable woven fabric. You don’t need to add the ruffles to your muslin. Sewing the yokes, bodice, and gusset will give you an idea of any needed adjustments.
CUSTOM ADJUSTMENTS
Chalk and Notch patterns are designed for a height of around 5’7″ (174 cm), but all of the Chalk and Notch patterns are tested on a range of heights. Length is a personal preference and can be adjusted to suit your preference. The Farrah looks great as a cropped blouse as well.

Loni @havinsewmuchfun removed 3″ (7.5 cm) from the lengthen/shorten line for this cropped Farrah.
ADJUSTING THE LENGTH THROUGH THE TORSO
The finished length of the tunic blouse ends at the low hip. The finished length of the dress ends at the knee. The front hem is 2” (5 cm) shorter than the back. Review the finished garment measurements to determine if you would like to adjust the length. For reference, I am 5′ 1,” and I usually remove about 1.5″ (4 cm) in length for the Farrah Blouse and 2″ (5 cm) in length for the Farrah Dress.
- Cut the front bodice and back bodice pattern pieces horizontally at the indicated line.
- If adding length, add paper and add the amount desired.
- If shortening, overlap at the cut line the amount desired.
- Re-draw the side seams.

ADJUSTING THE LENGTH THROUGH THE ARMHOLE
Depending on where you carry your length you may want to adjust the length through the bodice and/or through the armhole.
- Cut the front bodice, back bodice, and gusset pattern pieces above the armhole notch.
- If adding length, add paper and add the amount desired.
- If shortening, overlap at the cut line the amount desired.
- Re-draw the seam lines.
- There is no need to adjust the sleeve ruffles. Your notches will no longer match and will end either slightly higher or lower on the side seam, depending on how much length was adjusted.

BLENDING SIZES
If your measurements put you in different sizes, you can blend between sizes. This is a very common adjustment and will help achieve the intended fit if your body measurements fall across multiple sizes. If your hips are a smaller size than your bust, you can leave the extra ease through the hips. You won’t notice the extra ease as much when using a fabric with more drape, but you may prefer to blend sizes if you use a fabric with less drape.
- Print both sizes.
- Starting at the armhole, blend sizes to the desired hip width.
- Use the slit extension line that matches the hip measurement.

SHOULDER WIDTH ADJUSTMENT
The shoulder width should end close to your shoulder bone. If the width is too wide or too narrow you can adjust the yokes at the shoulder point.
- Redraw the shoulder point either in or out.
- Redraw the armhole curve of the yoke to match the new shoulder point.
- No need to adjust the ruffle sleeves when making this adjustment.

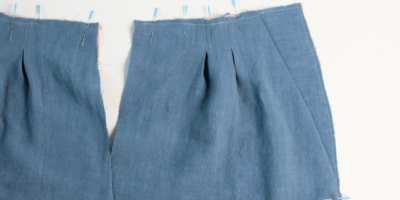
ADDING WIDTH THROUGH THE BACK
You may find extra fabric at your center back. Traditionally, I would advise a swayback adjustment. However, without a center back seam or a waist seam, it will be hard to remove the extra fabric and maintain the intended design. Instead, I suggest adding more width through the center back that will add more center back gathers and hip ease. This will allow the back to have enough ease and drape over the hips without catching.
- Add width to the center back bodice.
- No need to adjust the back yoke when making this adjustment. There will be more gather and ease through the back.

FULL BUST ADJUSTMENT
If you have over 4” (10 cm) between your high bust and full bust, you may need a Full Bust Adjustment to the C/D Cup Bodice.
- First decide how much more ease you need through your bust, and you will add half that amount to your pattern. If you need 1″ (2.5 cm), then you will add 1/2″ (1.25 cm) to the pattern.
- Cut from the center of the waist dart (#1) to the bust point (#2) and to the armhole (#3), not cutting all the way through the armhole. Lay this on top of a new piece of paper.
- Cut from the center of the bust dart (#4) to the bust point (#2) without cutting all the way through at the bust. Open the ease at the bust (#2), and make your pattern parallel by adding the same amount down to the hem (#1) – shown in PINK. When doing this you will open ease at the points (#1 & #4), creating larger darts. Tape this new shape down on the paper.
- Mark your new dart points 2″ (5 cm) back from the bust point (#2). Draw the dart lines from this new point to the dart notches.
- Trace your new bodice pattern piece. You have completed the FBA.

I hope this post helps explain how and when to do custom adjustments while fitting the Farrah pattern. It’s totally worth the time to make a muslin, make any adjustments, and update your printed pattern. Remember to write down some notes for yourself so that when you come back to the pattern, you know what adjustments you have made. If you have any other fit questions, please let me know and I can update the post as needed.
Happy Sewing!
XO, Gabriela
