
Today we’re lucky to be joined by Keira (@islandsewcialist on Instagram or check out her blog here) for our first Shay pattern hack tutorial. We’ll let her take it away below:
When I first laid eyes on the Shay pattern, the skirt is really what caught me! If you’ve been following my page, you’d know I immediately thought maxi skirt, right? Don’t get me wrong, a dress is very much in my future (I made my bodice mock up already, yay!), but I had a vision… I could legit picture the skirt blowing in the wind as I stroll across the beach, with the slit ever so slightly showing off my sun kissed legs with each step. Can you believe I was photobombed by sargassum seaweed on the actual day of my shoot? It went nothing like I envisioned… What a bummer! But at least the skirt lives on its glory regardless! Also, did you notice IT HAS POCKETS?

Tutorial
What You Need:
- The Shay Dress Pattern
- The Orchid Pattern Pocket Pieces or your favorite slash pocket pattern pieces
- Fabric, pins, and the notions needed to make the Shay Dress.
Pockets
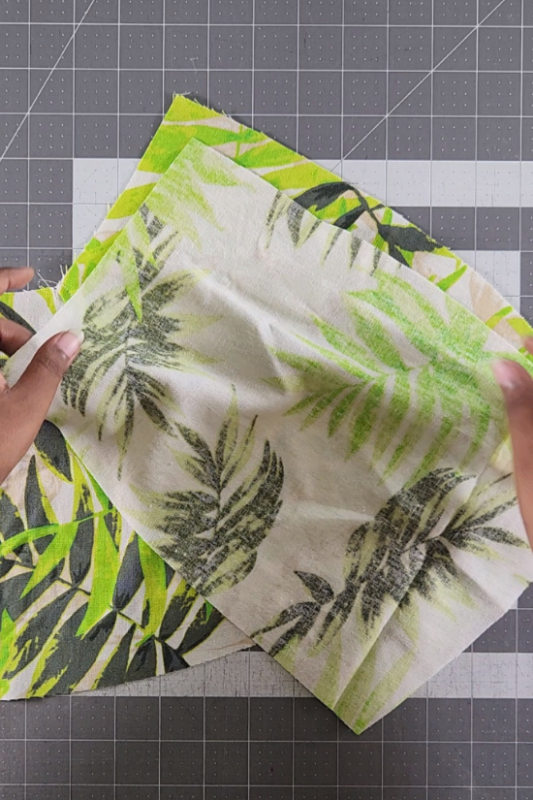
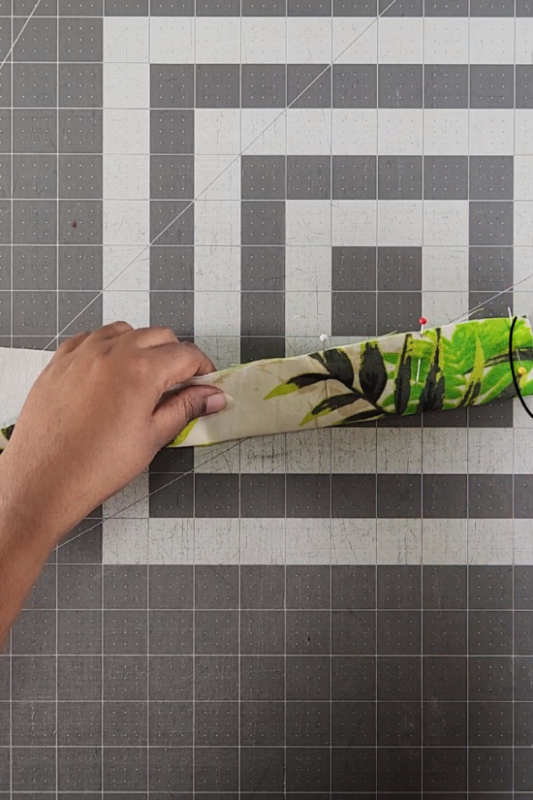
If you own the Orchid pattern, it’s an almost perfect match! I stole the slash pockets and the changes to match them up were minimal. Good call Keira! Here’s what the Orchid under pocket looks like against the Shay Skirt Tier One piece.
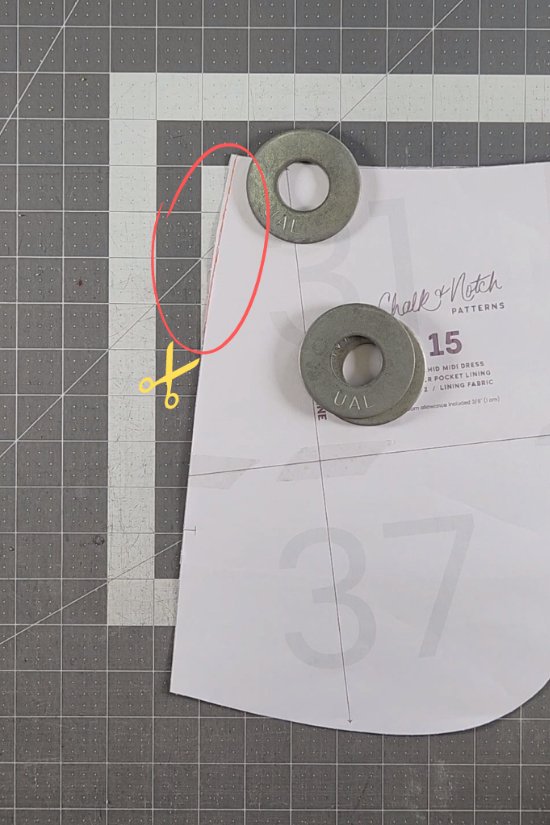
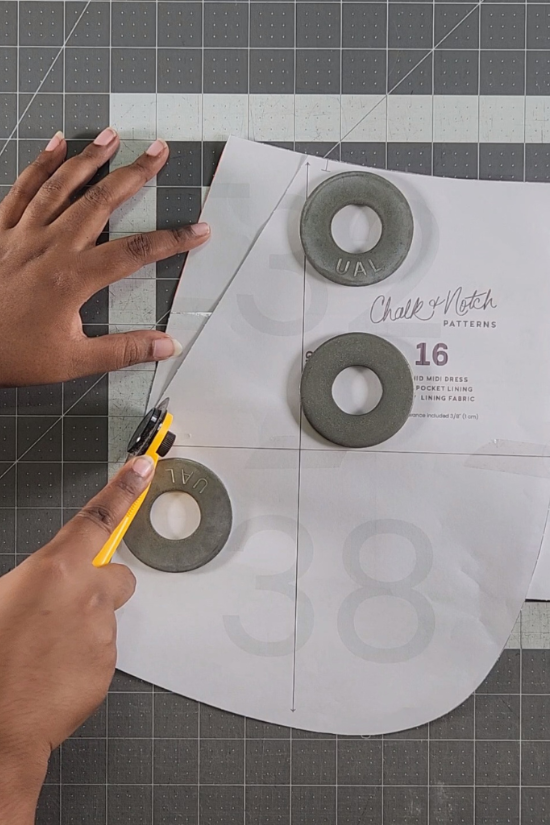
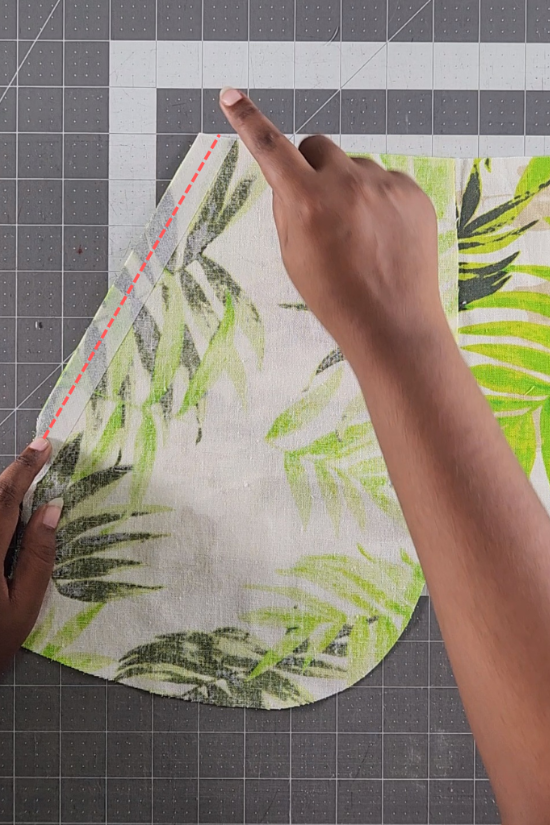
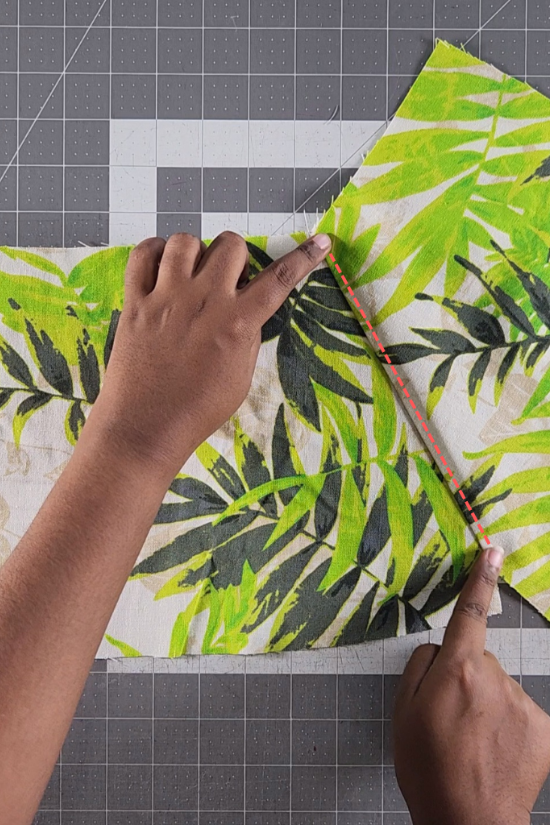
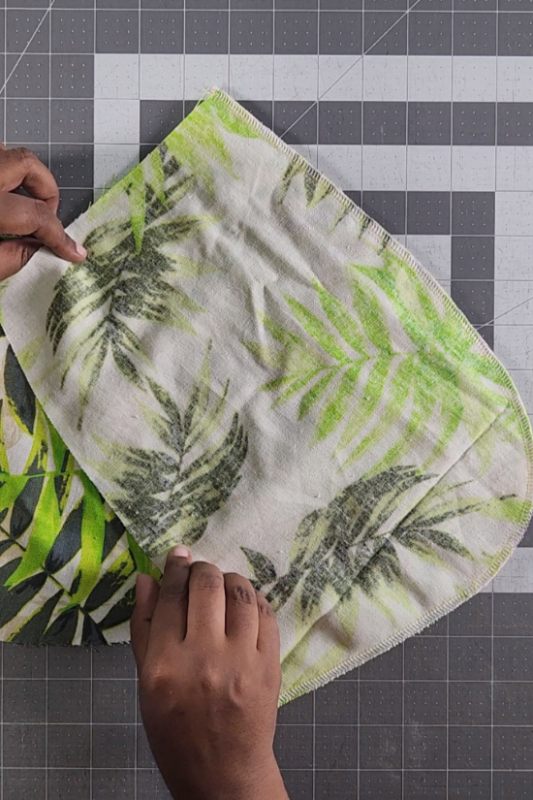
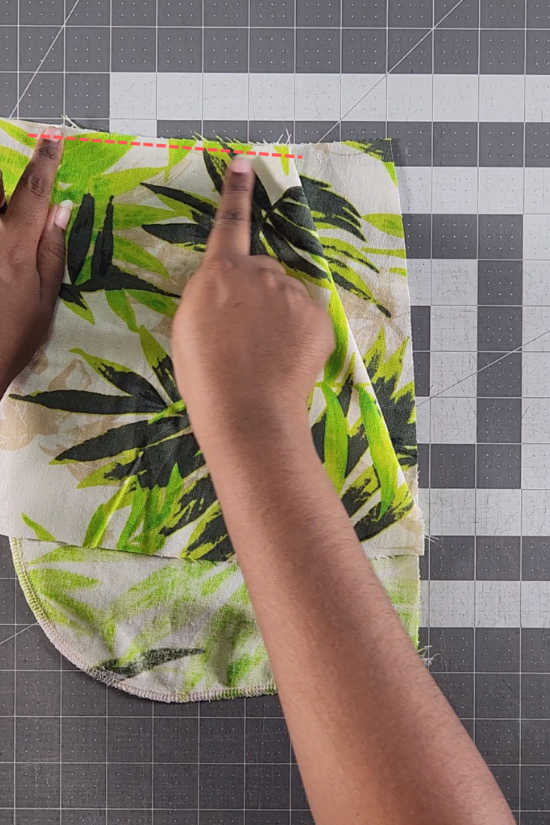
I only needed to trim off a little sliver, about 1/8″ (0.3 cm). If Shay was a fitted pattern, I’d add to the pocket lining instead but considering the amount of ease, I felt more than comfortable removing that tiny bit of excess. So once you cut off whatever you need to, you have your new back tier one pattern piece which you cut on the fold if doing the front button placket. For the front, I laid the upper pocket lining on top of my new tier one piece, and copied the slash. Don’t forget to transfer the pocket notches and cut two fronts if doing the button placket version.
Then I followed the Orchid’s instructions to attach my pockets. I interfaced the edges of my upper pocket linings and sewed along the slash 3/8″ (1 cm), matching them right sides together with my front tier one pieces. Then I followed the Orchid’s instructions to attach my pockets. I interfaced the edges of my upper pocket linings and sewed along the slash 3/8″ (1 cm), matching them right sides together with my front tier one pieces.
Next, I pressed the pocket linings away from the skirt and understitched the seam allowances to the pocket linings.
Then I matched my under pocket linings to my upper pocket linings, right sides together, sewed and serged them together around the outer edges with 3/8″ (1 cm) seam allowance.
Next, I turned the under pocket linings to the inside and basted the top edges to keep them in place.
Tip: Don’t baste the lower pocket edges at the side seams. You need to leave them open so you can move the pocket out of the way to attach tier 2.
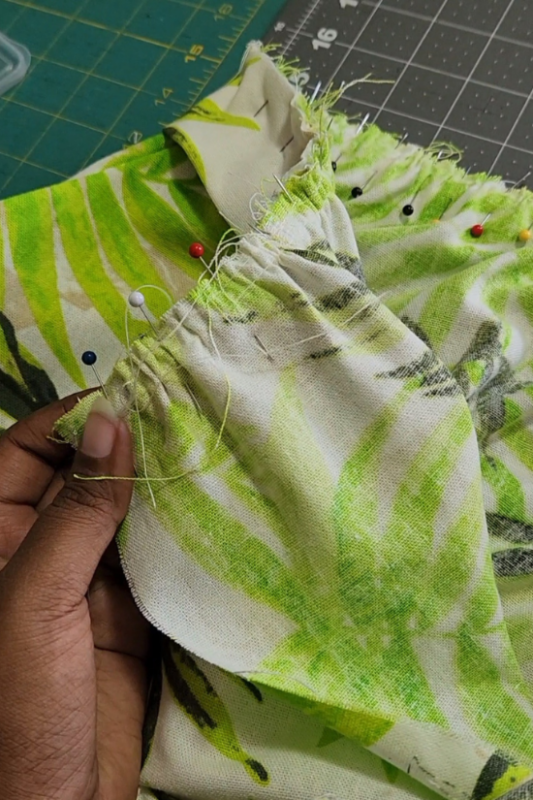
Because the pockets extend past tier 1, it is important to gather and attach each tier 2 front piece separately and then sew the side seams. So gather and attach the left tier 2 piece to the left tier 1 piece. Repeat for the right side. And then do the back separately as well. This is the only way you can move the pockets out of the way. Once your tier 1 pieces are joined to your tier 2 pieces, pin the front pieces to the back piece at the side seams and stitch all the way down from the top edge of tier 1, sandwiching the pocket edges down to the bottom edge of tier 2. You can then attach tier 3 according to the instructions.
Waistband
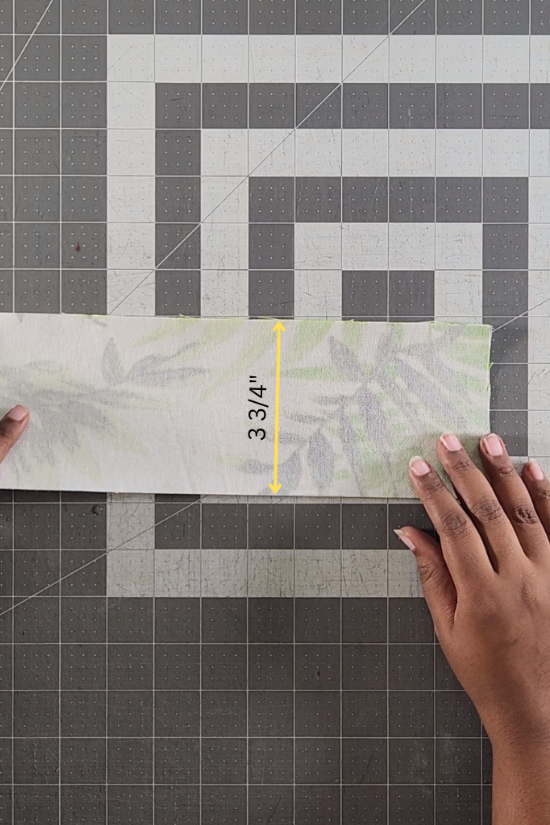
I cut my waistband 3 3/4″ (9.5 cm) wide to have a finished waistband width of 1 1/2″ (3.8 cm). For the length, I used the finished waist measurement according to the chart included in the pattern’s tutorial. For size 14, that was 35” (89 cm). I added back the seam allowances 3/8″ (1 cm) on either side, giving a total of 3/4″ (2 cm). And then I took into consideration that the finished placket width would also contribute to the finished waist measurement. So I removed that 3/4″ (2 cm), bringing me right back to 35” (89 cm). Since the total seam allowances and placket width are equal, they cancel each other out in this instance, and I just needed to use the finished waist measurement as stated in the chart.
For instance, my placket was actually a 1” (2.5 cm) placket.
This would be the calculation: 35” (89 cm) + 3/8″ (1 cm) + 3/8″ (1 cm) – 1” (2.5 cm) = 34 3/4″ (88 cm).
To attach my waistband, I definitely went the lazy way. I folded and pressed my waistband in half along the long edge, wrong sides together. I gathered my tier 1 skirt to fit the waistband and stitched them together with a 3/8″ (1 cm) seam allowance, right sides together. I then finished my seam with a serger. For a nice clean finish, use the same method as the placket so your seams will be encased in the waistband.

Tip: Because of the weight of the skirt (Especially if using linen like me), consider sizing down when sewing just a skirt. Without the security of the bodice keeping the skirt waist in place, The ease in the waist was definitely too much to keep it sitting at my natural waist. If you’ve worked with linen and linen blends, you’d know it tends to grow as well. Here’s a little laugh: by the end of my shoot, I was holding up my skirt waist at the back with a clothespin. I don’t consider myself an influencer by any stretch of the imagination, but for some reason, all I could do at the moment was giggle and shout, “Influencers in the wild!”. I apologize sincerely to anyone on the beach who had sore eyes watching me pose with a clothespin! Haha!
Placket
It goes without saying you won’t need the full length of the placket if making just a skirt. So adjust accordingly, remembering to consider any shortening or lengthening you have done to your tier pattern pieces and accounting for the added 1.5” (3.8 cm) waistband.
The Final Look
We’ve come to the end of my Shay skirt chronicles, and I hope you’ve thoroughly enjoyed reading this and feel inspired to make separates as well. The skirt is perfectly billowy for summer days, and the slit adds some extra sass! I suggest sizing down or using a lighter weight fabric like rayon to achieve the perfect fit. If you do give this one a try, I command you to stick those legs out and strut on in the sunshine!


Until next time,
Toodle-loo
Keira


