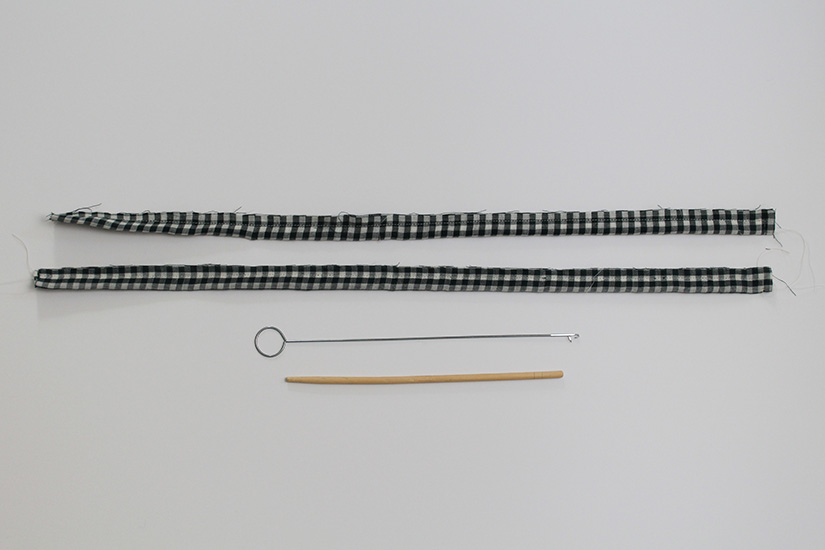
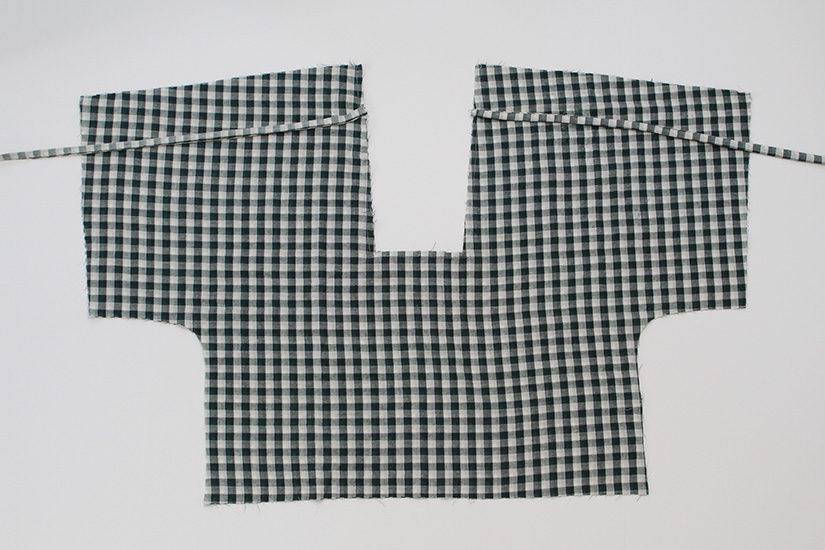
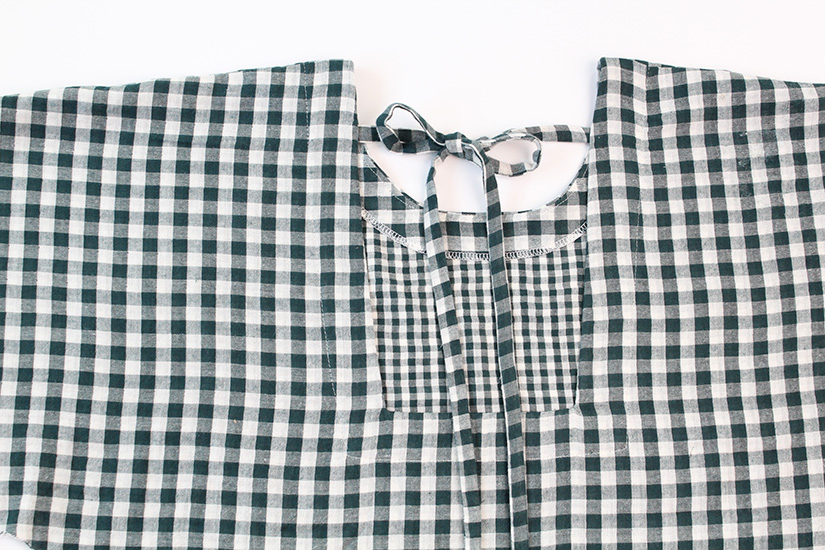
LOW BACK | SEW THE TIES
If sewing the high back view with facings, skip to Sewing the Facing Shoulder Seams instructions below.
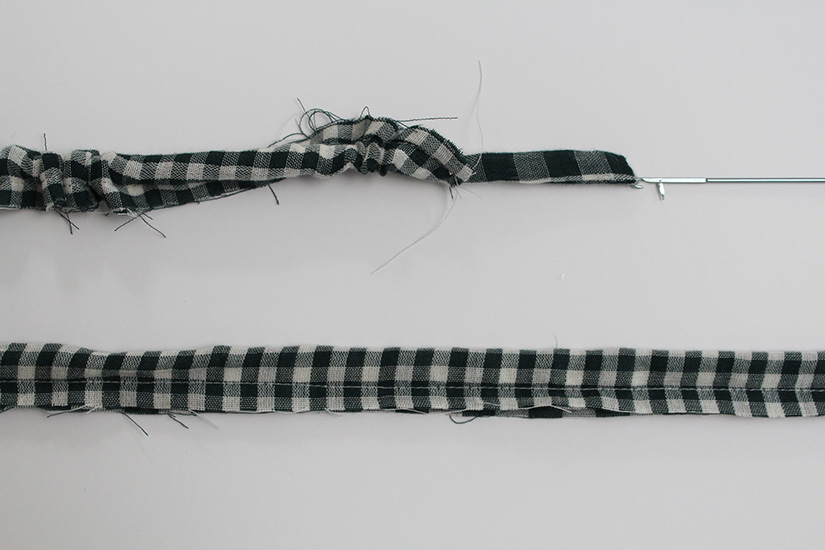
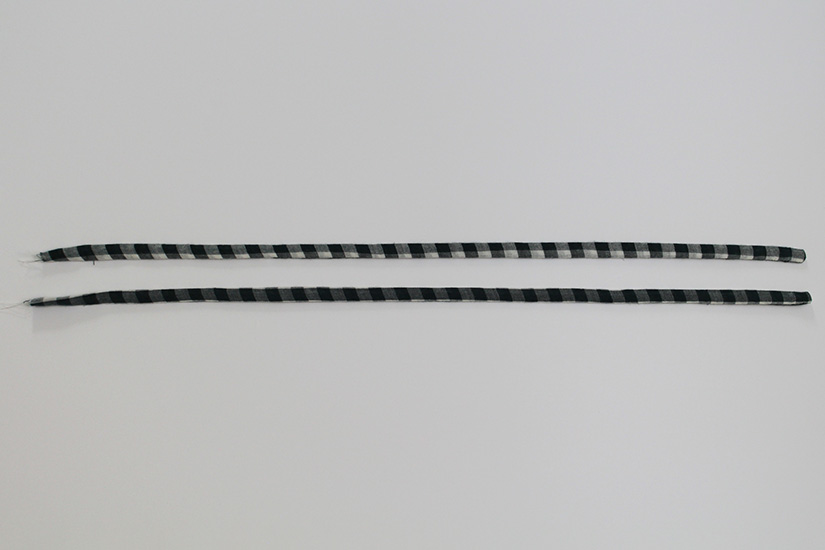
With the right sides together, fold the ties in half lengthwise. Reduce the stitch length to get a sharp corner. Stitch at 1/4″ (0.6 cm) around 2 sides (leaving one short end open), pivoting at the corner. Trim the seam allowance. Turn right side out and press. Repeat for the other tie. Using a turning tool can be helpful. Alternatively, ribbons can be used for ties.
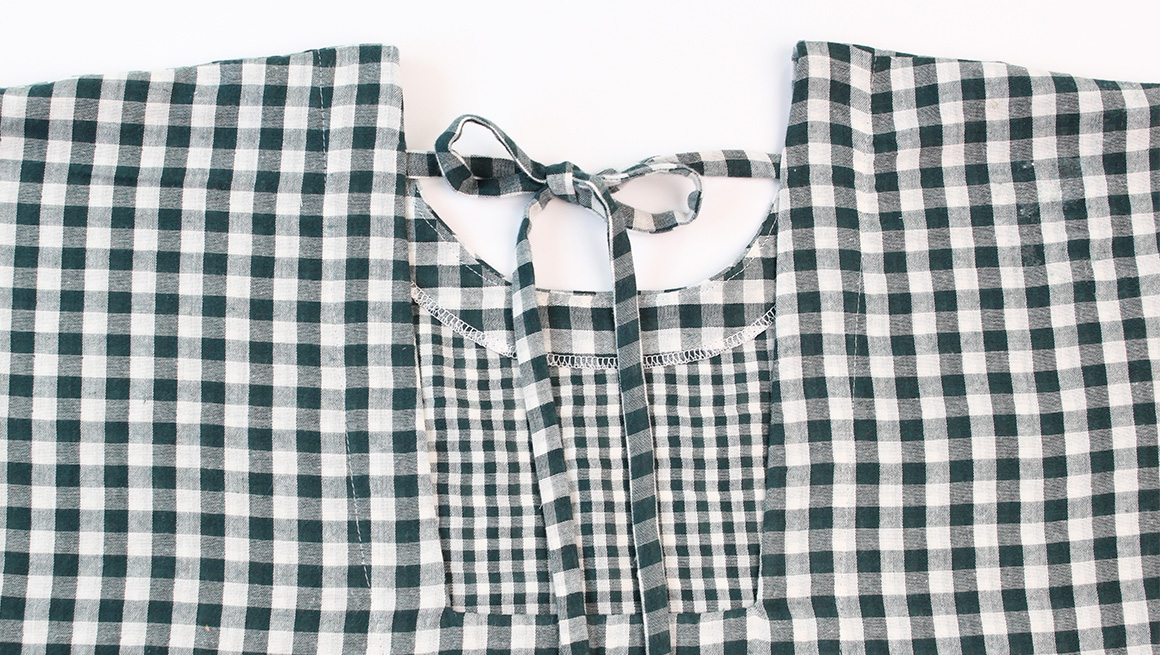
LOW BACK | ATTACH THE TIES TO THE BACK BODICE
Pin the cut edge of the ties to the low back bodice between the double notches. Sew a basting stitch at 1/4″ (0.6 cm) to secure them in place. Set the bodice aside.
FACING NECKLINE | SEW THE FACING SHOULDER SEAMS
With the right sides together, sew the facing shoulder seams. Press the seams open.
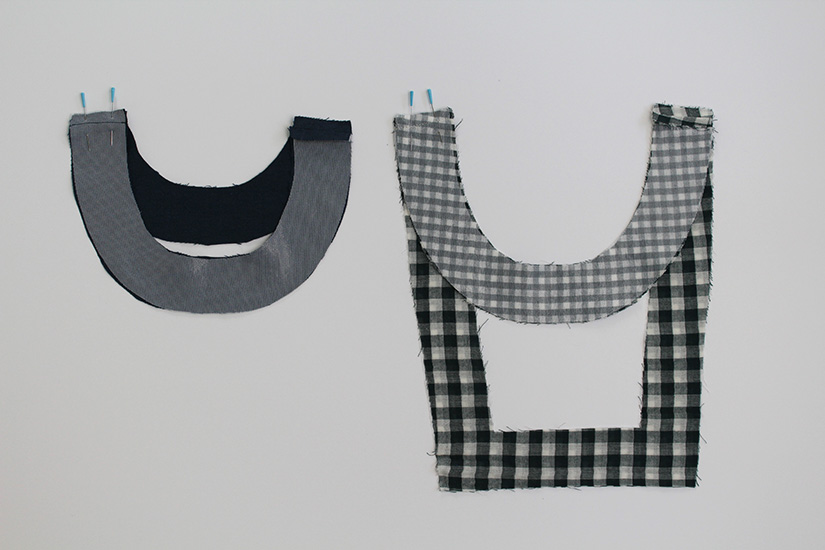
FACING NECKLINE | SEW A FOLD GUIDE
Sew a fold guide on the outer edge of the neck facing at just under 3/8″ (1 cm). Press the outer edge in 3/8″ (1 cm), wrong sides together. Alternatively, you can finish the outside edges with an overlock.
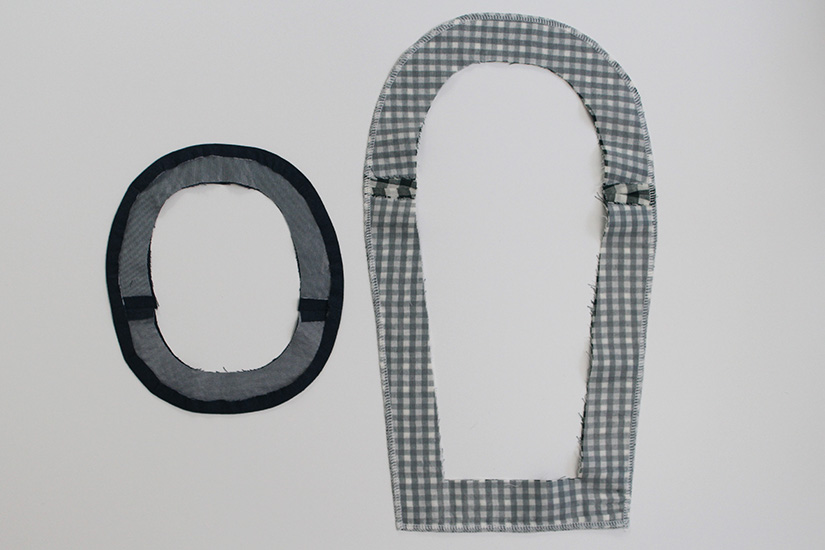
FACING NECKLINE | SEW THE FACING TO THE NECKLINE
With the right sides together, pin the facing to the bodice neckline, matching the center front, center back and shoulder seams. Sew the neckline.
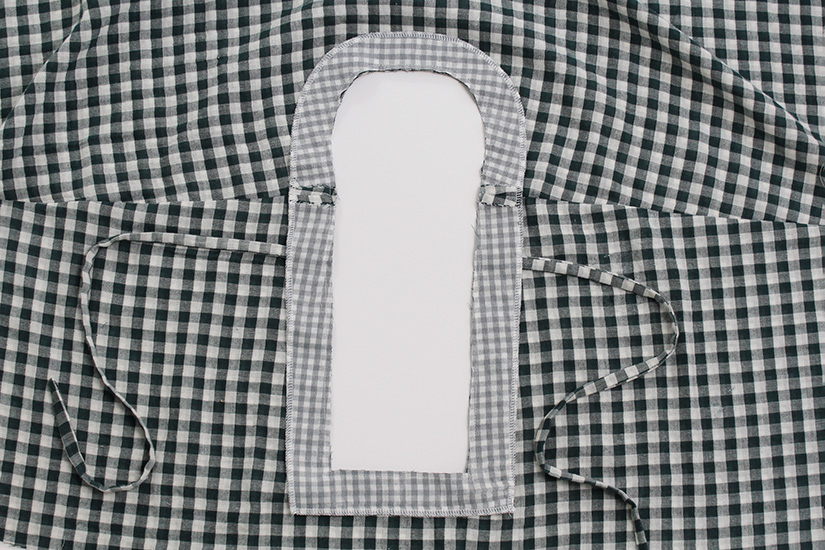
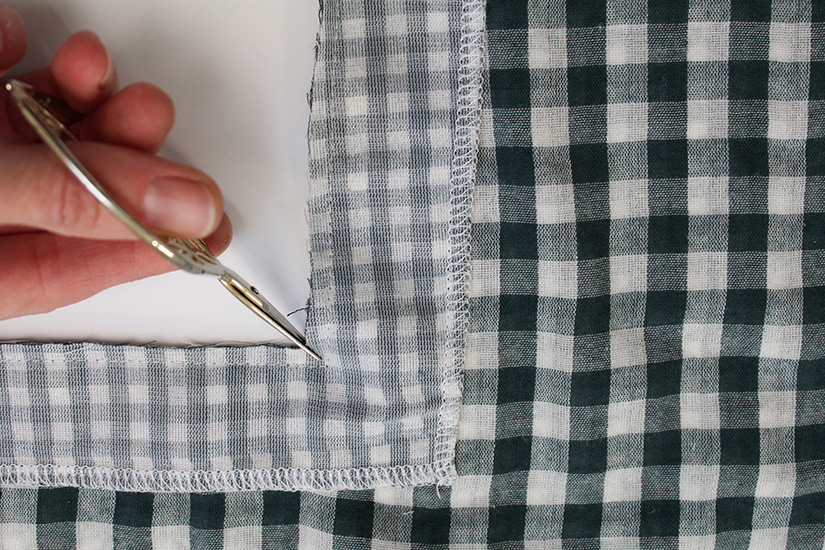
Trim the seam allowance by half and clip the curves. Clip the corners if sewing the low back view, and be careful not to cut your stitch line.
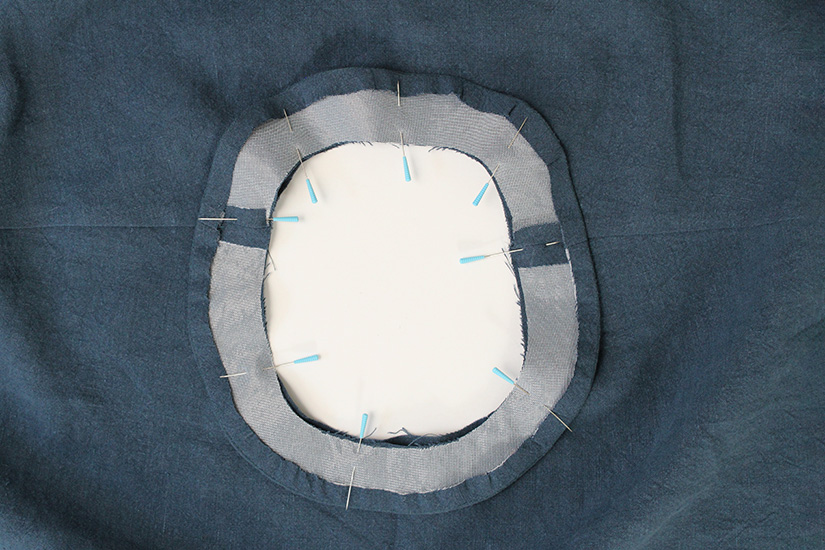
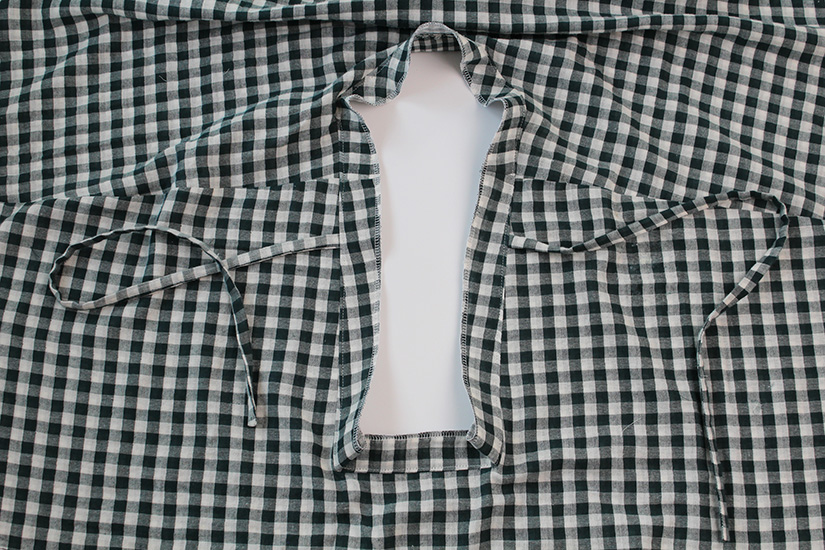
FACING NECKLINE | UNDERSTITCH THE NECK FACING FOR THE HIGH BACK OR LOW BACK VIEW
We will finish the photos photographing the low back view, but the steps are the same for the high back view.
Open the neck facing and press the seam allowance towards the facing by stitching a line 1/16″ (0.15 cm) away from the seam on the neck facing. Make sure to catch the seam allowance towards the facing when stitching. You won’t be able to get all the way to the back corners if sewing the low back view.

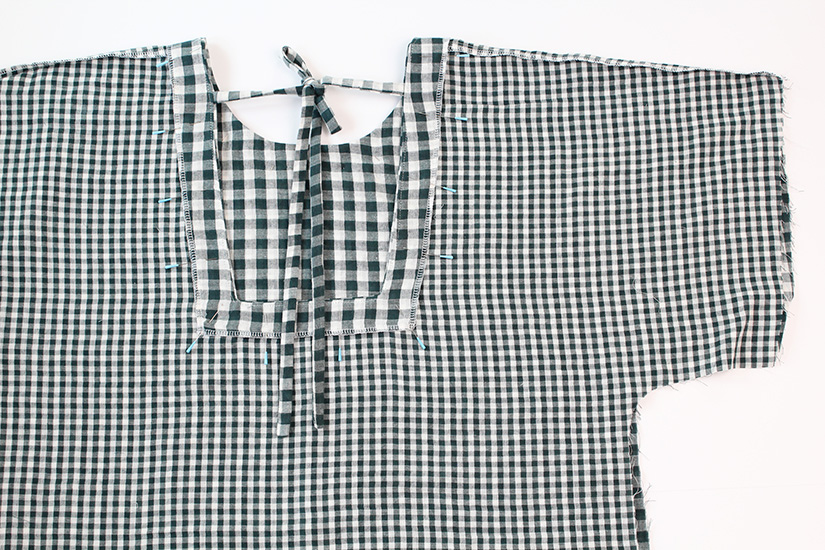
FACING NECKLINE | EDGESTITCH THE FACING
Press the facing towards the inside of the garment and with the edges folded under, pin in place. Make sure the back ties are out of the way for the low back view. Sew from the wrong side during this step, edgestitching at 1/16″ (0.15 cm). When stitching from the wrong side, make sure your bobbin thread matches the right side of your garment.
Aria Top Sew Along Posts | Getting Started | Prepare Neckline and Sew Shoulder Seams | Sew Bias Neckline | Sew Facing Neckline | Sew Side Seams and Hem | Mini Aria: View A
