Joy Sew Along | Bag Lining & Finishing Details
This probably seems like the most intimidating step, but it comes together pretty quickly and it's really cool. Pulling the jacket right side out feels like magic! By the end of this post, you will have made your very own Joy Jacket!
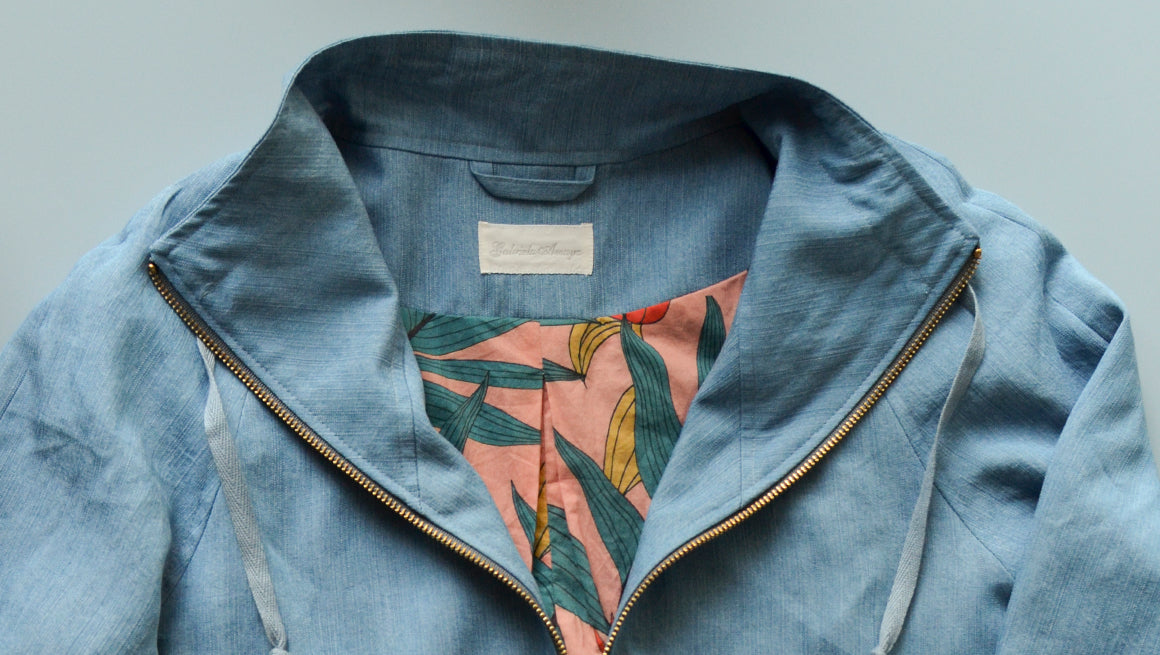
SEW THE MAIN FABRIC TO THE LINING/FACING

Lay the lining/facing right side up.

Lay the main fabric right side down on top of it. With right sides together, pin all the way around the outer edge of the jacket. The process is the same for View B; you just sew around the hood instead of the collar. Using a zipper foot, sew the main to the facing/lining to bag the lining. When you are sewing at the center front, sew right on top of the zipper stitch line. Watch for the zipper pull and zipper stops as you are sewing around.

Clip the corners and curves to remove bulk.
SEW MAIN SLEEVE & LINING SLEEVE TOGETHER

To finish bagging the jacket, take the main sleeves and lining sleeves and bring them together.

With the jacket still wrong side out, pin the right sides of the sleeves together.

Sew sleeve hems right sides together at 3/8" (1 cm). Make sure the sleeves are not twisted by matching the upper and underarm seams. Turn right side out through the sleeve opening.
This last part - attaching the main and lining sleeves - is pretty hard to illustrate, so for additional guidance, there is a video for reference HERE.
PRESS & TOPSTITCH

After turning your jacket right side out, use a point turner to square out all the corners. Press around all the edges and press the facings to the inside of the main fabric. Use pins around the edges so your fabric doesn't shift while topstitching. Topstitch the entire edge at 1/4" (0.6 cm), including the center front zipper. I suggest you start and stop in the back so your backstitching is not visible. It can be useful to use a zipper foot while sewing around the grommets. Press again.
CLOSE SLEEVE OPENING & TACK SLEEVE HEM

Turn your jacket lining side out and find the opening in the sleeve. Sew it closed by hand or by machine.
TACK SLEEVE HEMS & COLLAR HANGER LOOP

Press cuff using the press guide. To secure the cuffs, sew a few hand tacks, stitching in the seam ditch. This will help to keep cuffs in place.

If you are using a hanger loop, hand tack the neck facing through the main neckline, stitching in the seam ditch. This will secure the jacket when hanging it from the hanger loop.
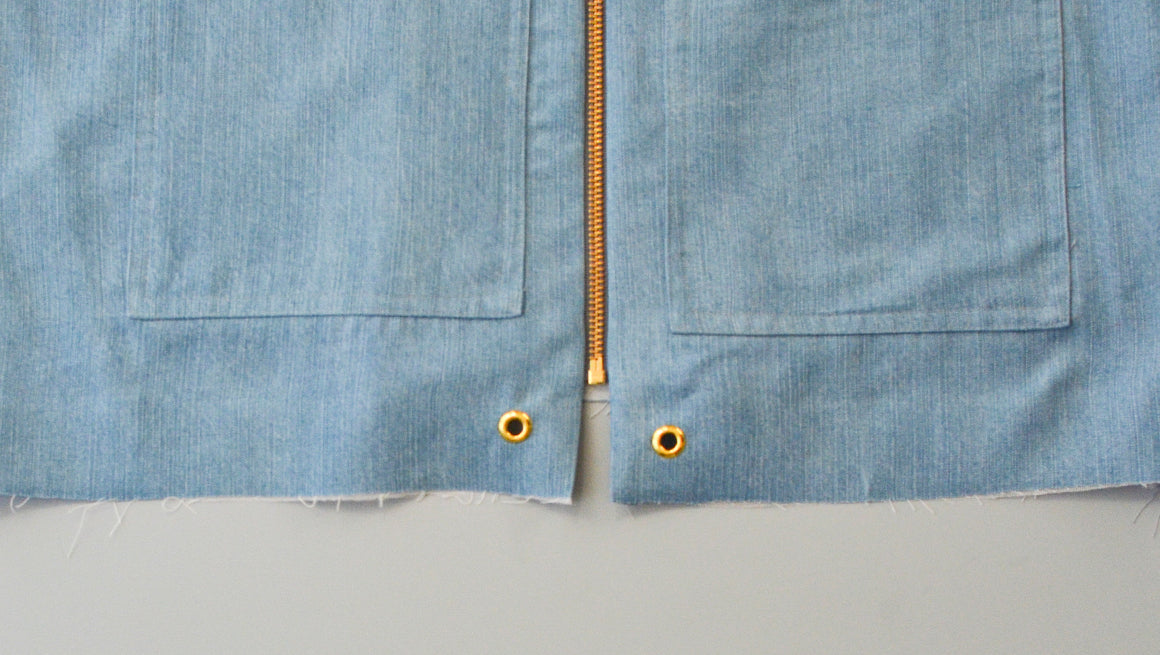
OPTIONAL: SEW DRAWSTRING CHANNELS & THREAD DRAWSTRING

If you are adding drawstring channels, use pins to make sure the channels lay flat while topstitching. A zipper foot can be helpful when you are sewing around the grommets. Make sure not to catch your hem lining while you sew.

Use a safety pin to thread your drawstrings.

Trim any excess length.

Hem your drawstrings.

Tie a knot to prevent them from pulling through the buttonholes or grommets.

And there you have it, you've finished your Joy Jacket! I hope you love yours and wear it with pride. If you share it on social media, please make sure to tag @chalkandnotch and use the hashtags #chalkandnotchpatterns #joyjacketpattern so I can see it!

Joy Jacket Sew Along
1 Sewing Supplies || 2 Pattern Adjustments || 3 Cutting and Applying Fusible || 4 Prepping Drawstrings & Pockets || 5 Assemble Outer Main Fabric || 6 Assemble Lining || 7 Assemble Facing & Attach to Lining || 8 Set Zipper & Add Grommets or Buttonholes || 9 Bagging Lining & Finishing Details
Gabriela
